
- Prerequisites
- Building an Integration
- Setting Up Authentication
- Setting Up Triggers & Actions
- Publishing Integration
- How To Authenticate Your Application Using The API Key Method
- How to Set-Up the Integration Based on Auth Type Bearer Token
- How To Authenticate Your Application Using OAuth 2.0
- How To Authenticate Your Application Using Basic Auth
- How To Authenticate Your Application Using The JWT Bearer Method
Using the Filter App
One of the core features of SureTriggers is the Filter app, which allows you to stop the next steps in your workflow if certain conditions are not met.
It’s very useful and it can help you build advanced workflows to accomplish different tasks.
In this article, we’ll explore what the Filter app is, some use cases for it, and how to set it up step-by-step with an example.
What is the Filter App & Uses of Filter App?
The Filter app is an action app that is designed to help you add conditional logic to your workflows.
With the Filter app, you can set up a series of conditions that must be met before the workflow can proceed to the next step. This is useful for ensuring that only the necessary steps are taken and that nothing is missed.
Let’s understand the filter app with an example.
Suppose, you’ve created a workflow to add leads to your email marketing tool that are collected from a form application. However, to maintain lead quality, you wish to exclude leads with Gmail email addresses.
In this scenario, you could use the filter app to specify a criterion to prevent the execution of the action step in your workflow if the lead email contains “gmail.com”.
Similarly, if you come across a situation where you do not want to execute the action steps based on certain conditions, then the Filter app is your savior.
How to Set Up the Filter App?
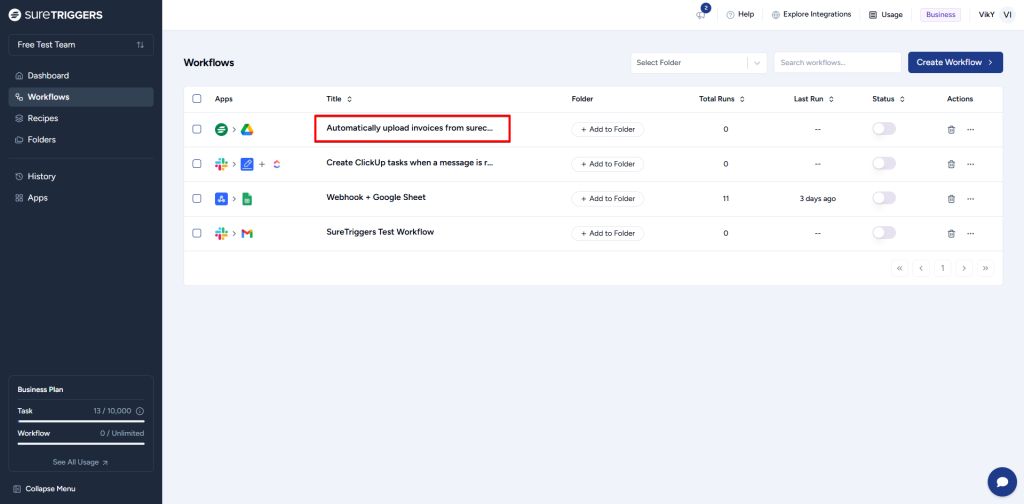
Imagine that you have a workflow in a place where you’re uploading invoices created by your e-commerce platform (in this example, it’s SureCart.) to a Google Drive account.
But you only want to upload invoices for orders worth more than $100. To accomplish this, we will use the Filter app in our workflow to prevent uploading invoices that have an order value below $100.
To add the filter to this workflow, simply follow these steps:
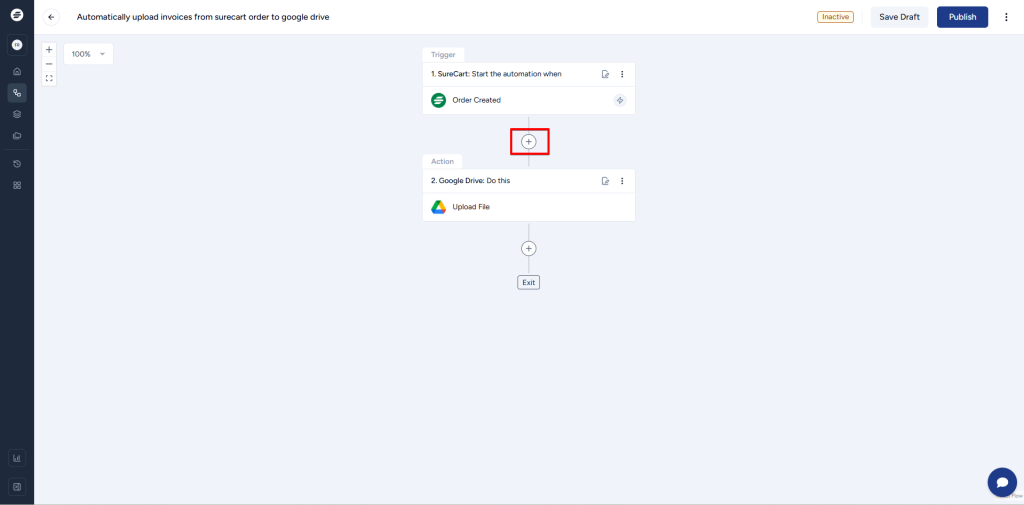
- Open the workflow where you want to add the Filter.
- Click on the plus icon between the trigger and the next steps.
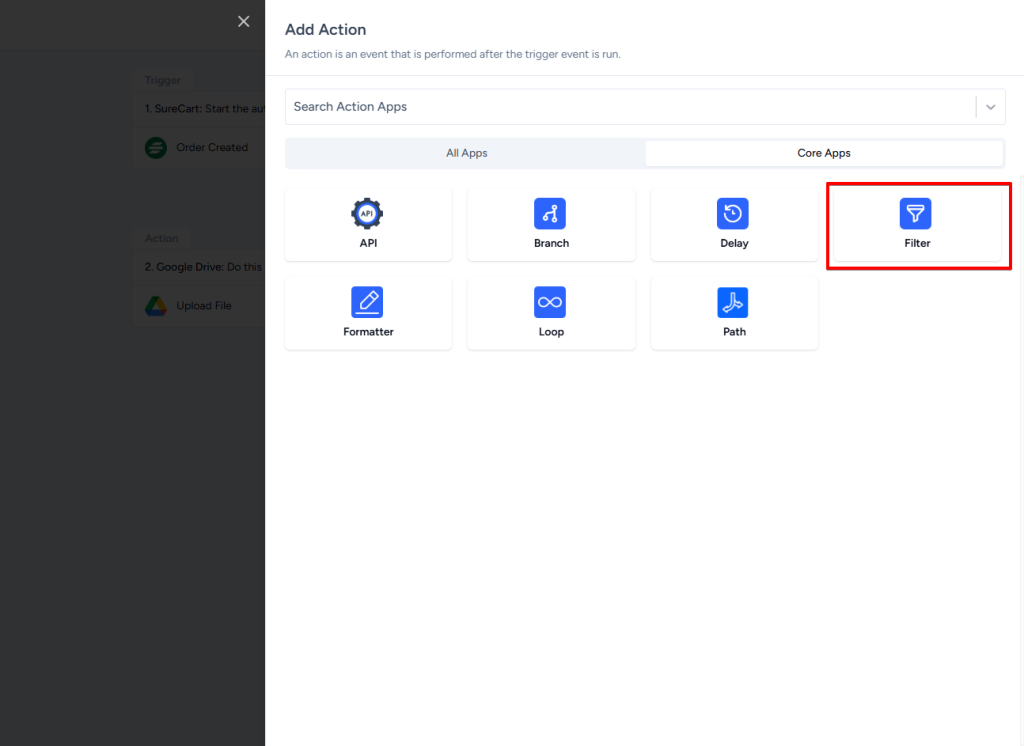
- Search and Select the Filter app.
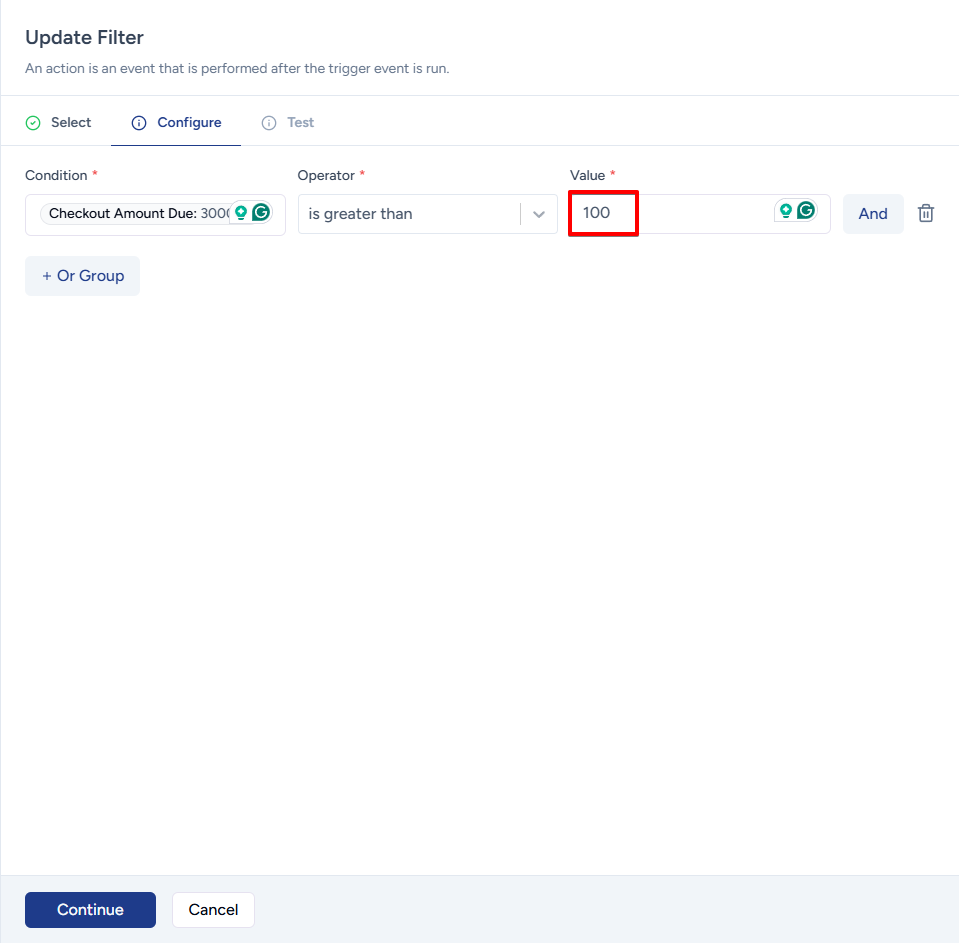
- Provide the criteria key as per the requirement. In this case, it’s the checkout amount.
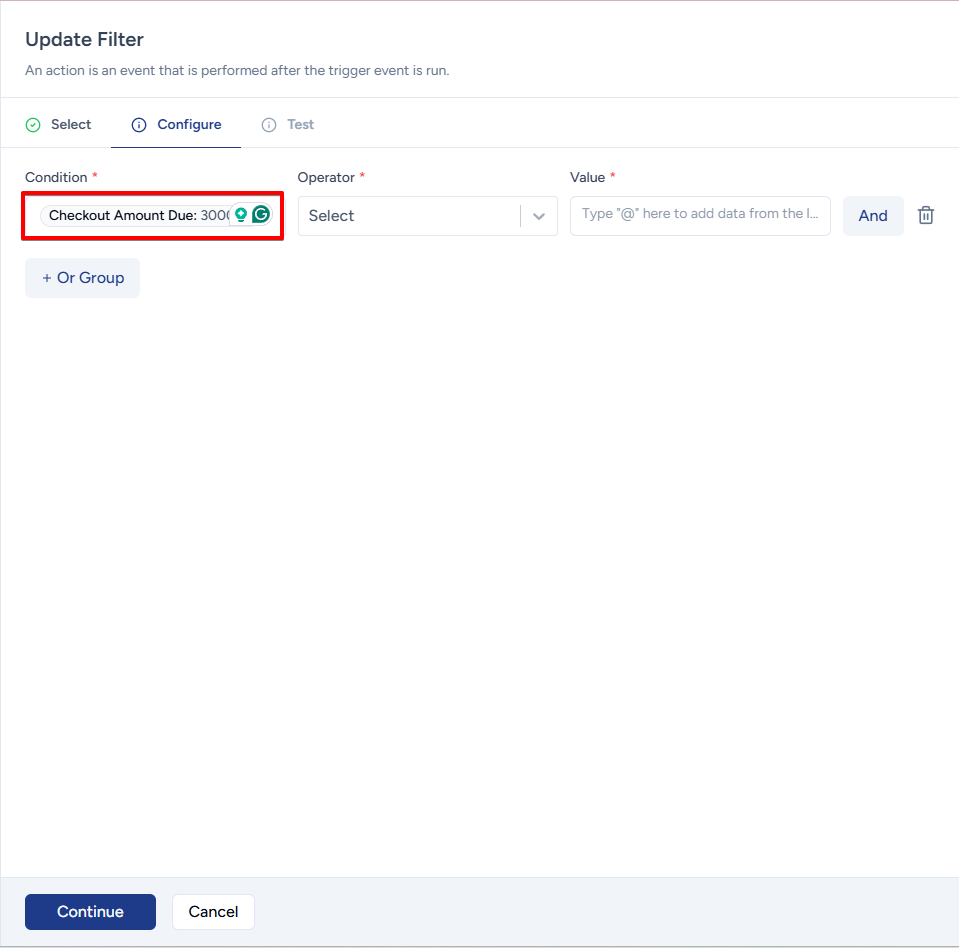
- Select the operator from the list of available operators.
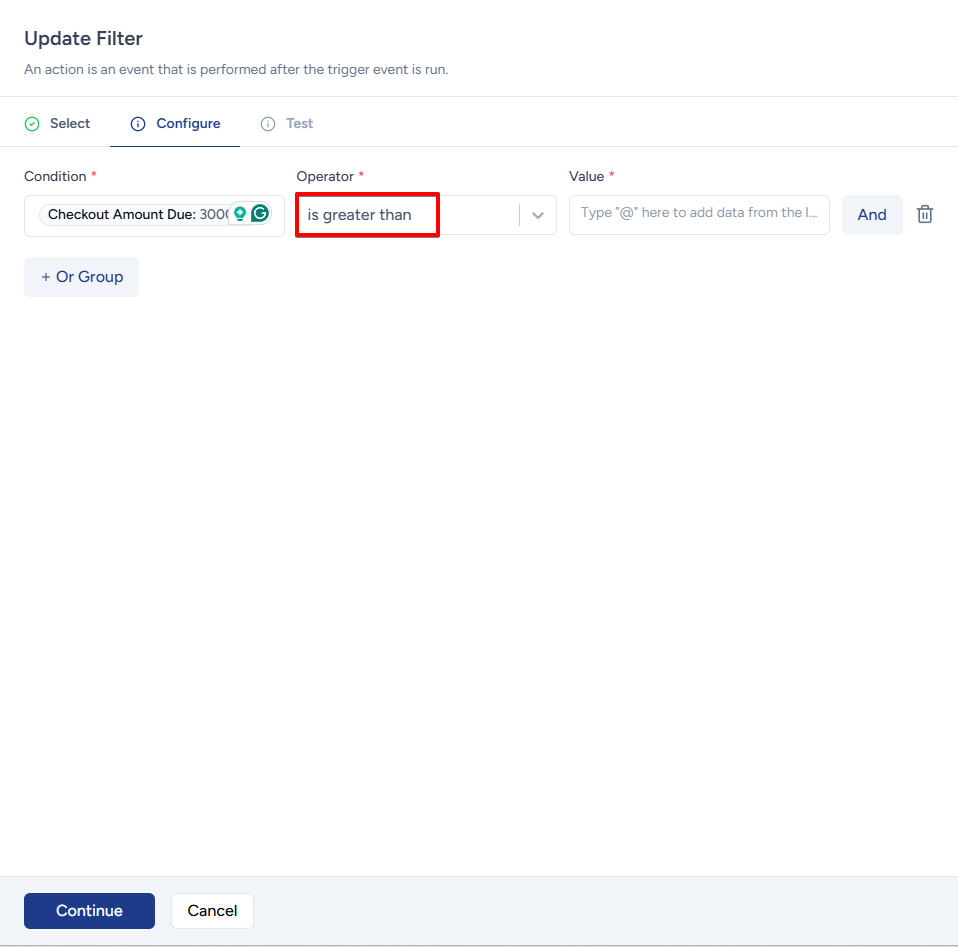
- Enter the value manually in the value field.
- Test the condition. You may get the result as True or False based on the current data you have from the trigger while creating the workflow.

- Save the step.

- Update the workflow.
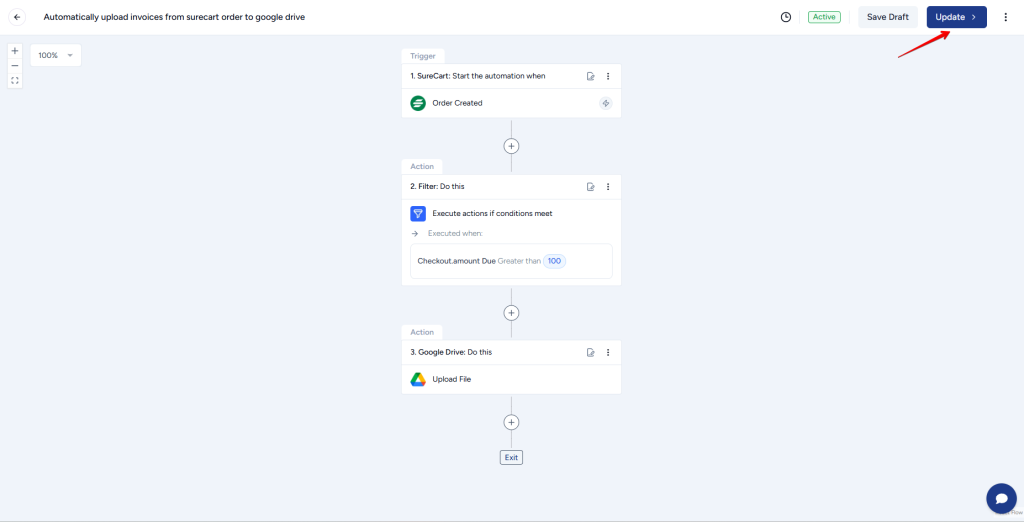
That’s it! Now, only the invoices of orders with an order value of more than $100 would be uploaded to Google Drive.
Note: In this example, we added Filter to an existing workflow. You can follow the same steps and add filters while creating new workflows as well.
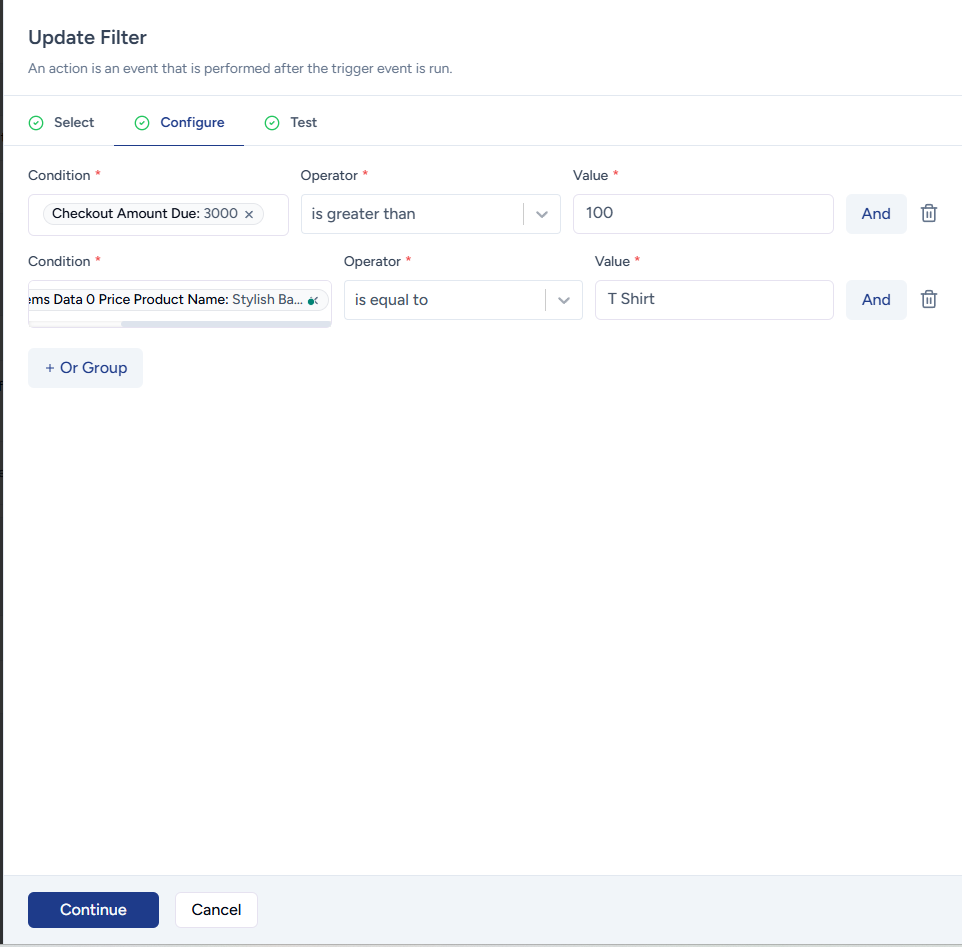
Setting Up Multiple Criteria
With the filter app, you have the option to set filters using multiple criteria.
For instance, if you want to specify both the amount and product for which the invoice should be uploaded, you can easily do so using this app.
By following the steps outlined in this article, you can set up the Filter app and start using it to optimize your workflows today.
And if you need any help setting up the Filters, feel free to reach out to our support team. We’ll be more than happy to assist!
We don't respond to the article feedback, we use it to improve our support content.