This document will help you understand how to create workflows in SureTriggers. To create a workflow, you need to sign in to your SureTriggers account and follow the steps as mentioned below:-
Step 1: Create a new workflow
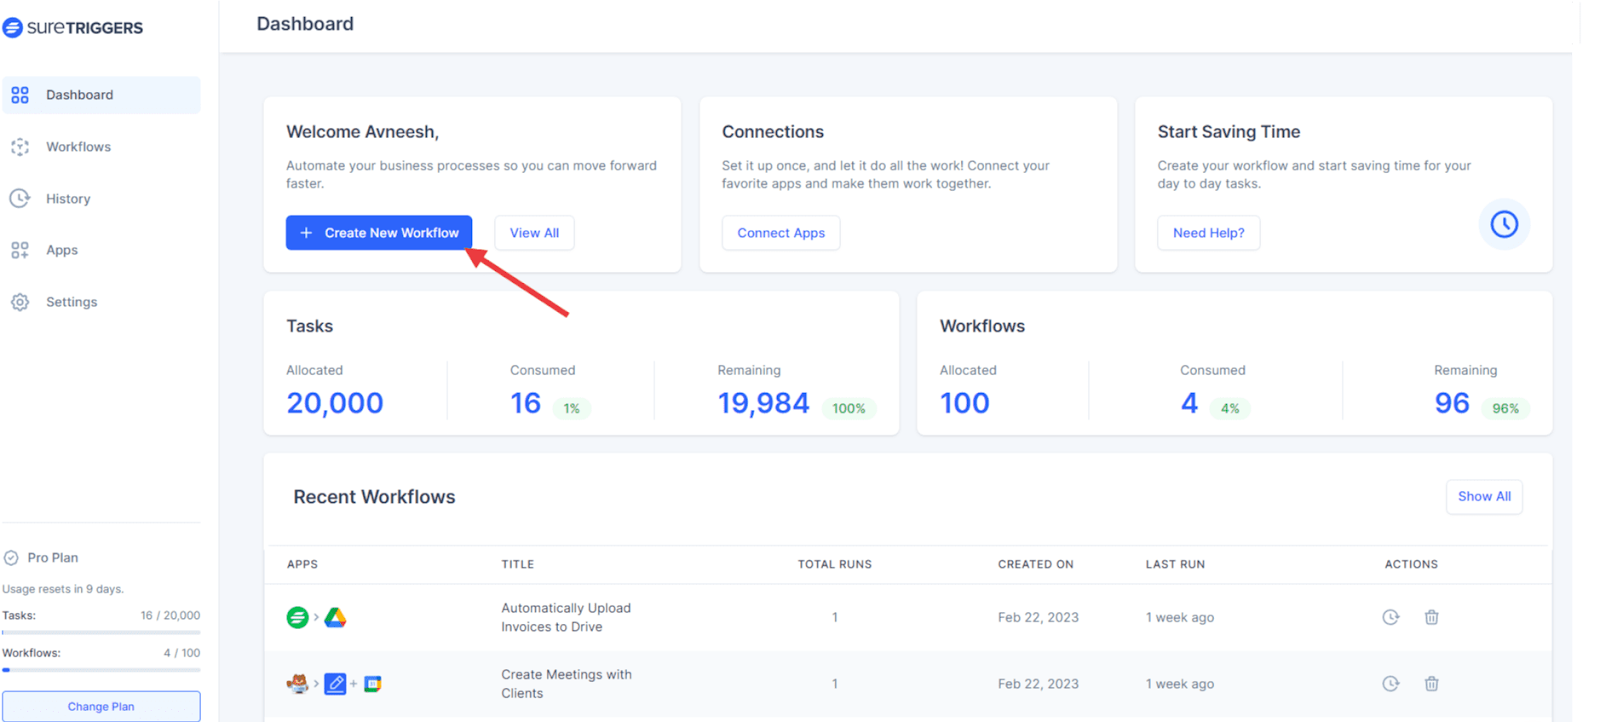
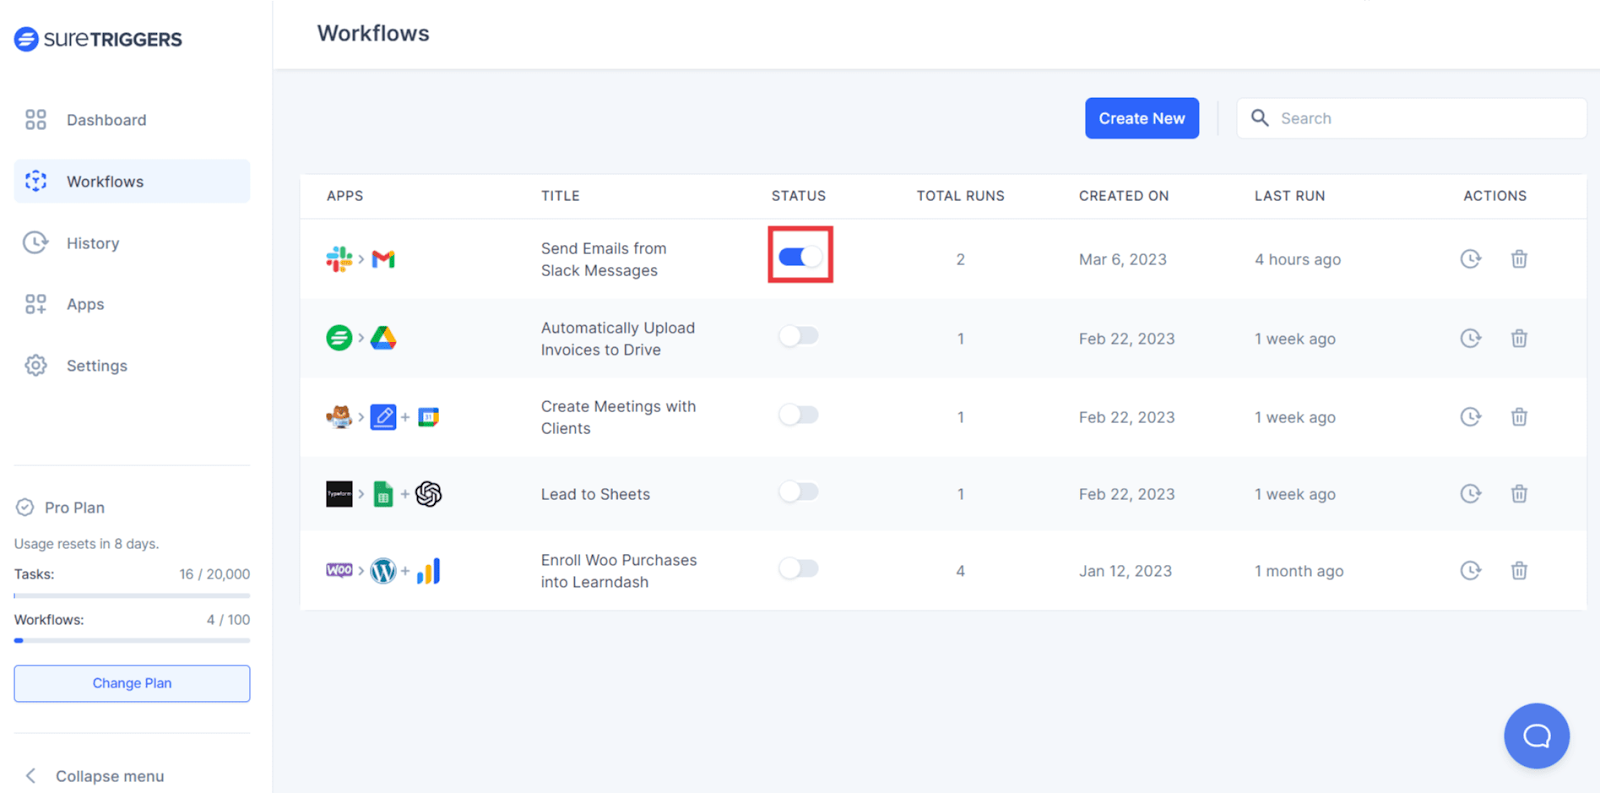
- Click on the “Create New Workflow” button on the dashboard screen.
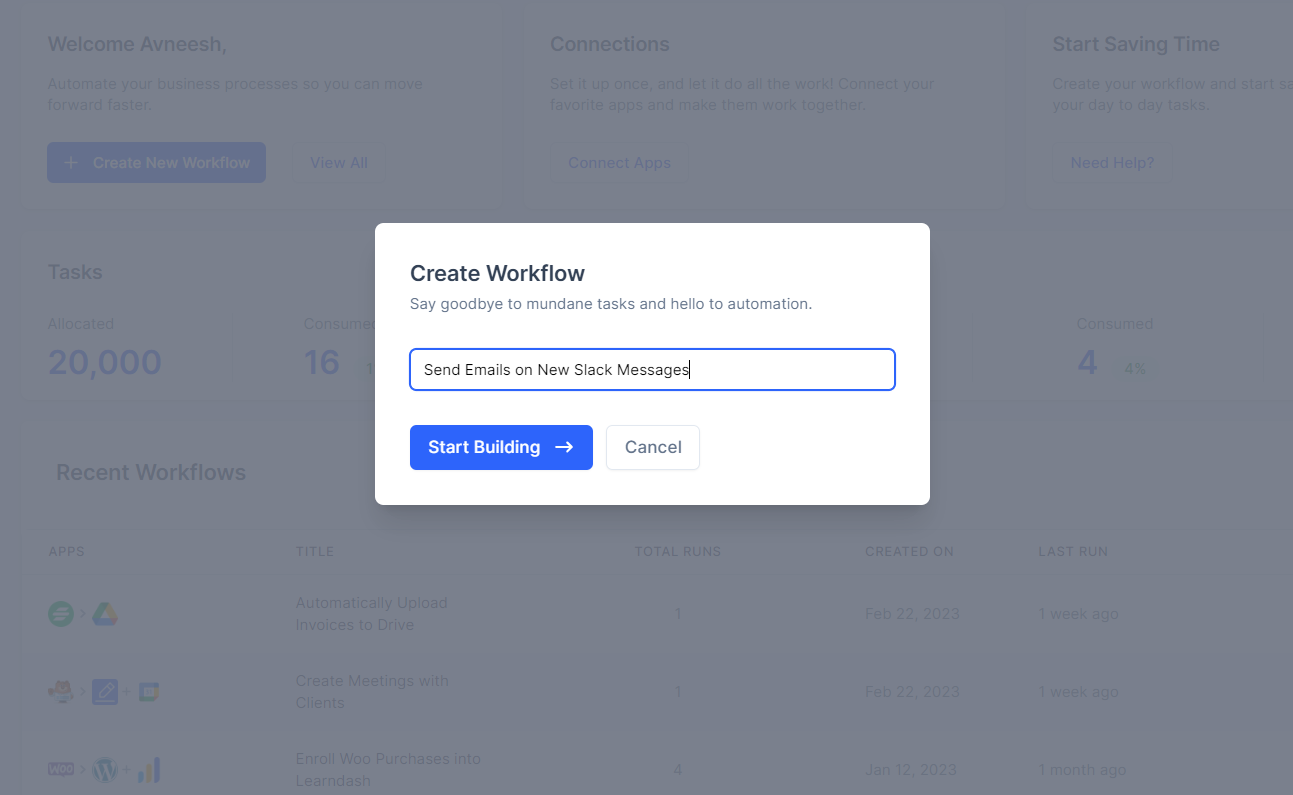
- Give a unique name to your workflow and click on the start building your workflow button. This will take you to the canvas builder page where you can configure your workflow.
Step 2: Choose a trigger app
Select the app that you want to use as the trigger for your workflow. For example, if you want to create a workflow that sends an email every time there’s a message in specific Slack channel, then you would select Slack as your trigger app.
Step 3: Set up the trigger event
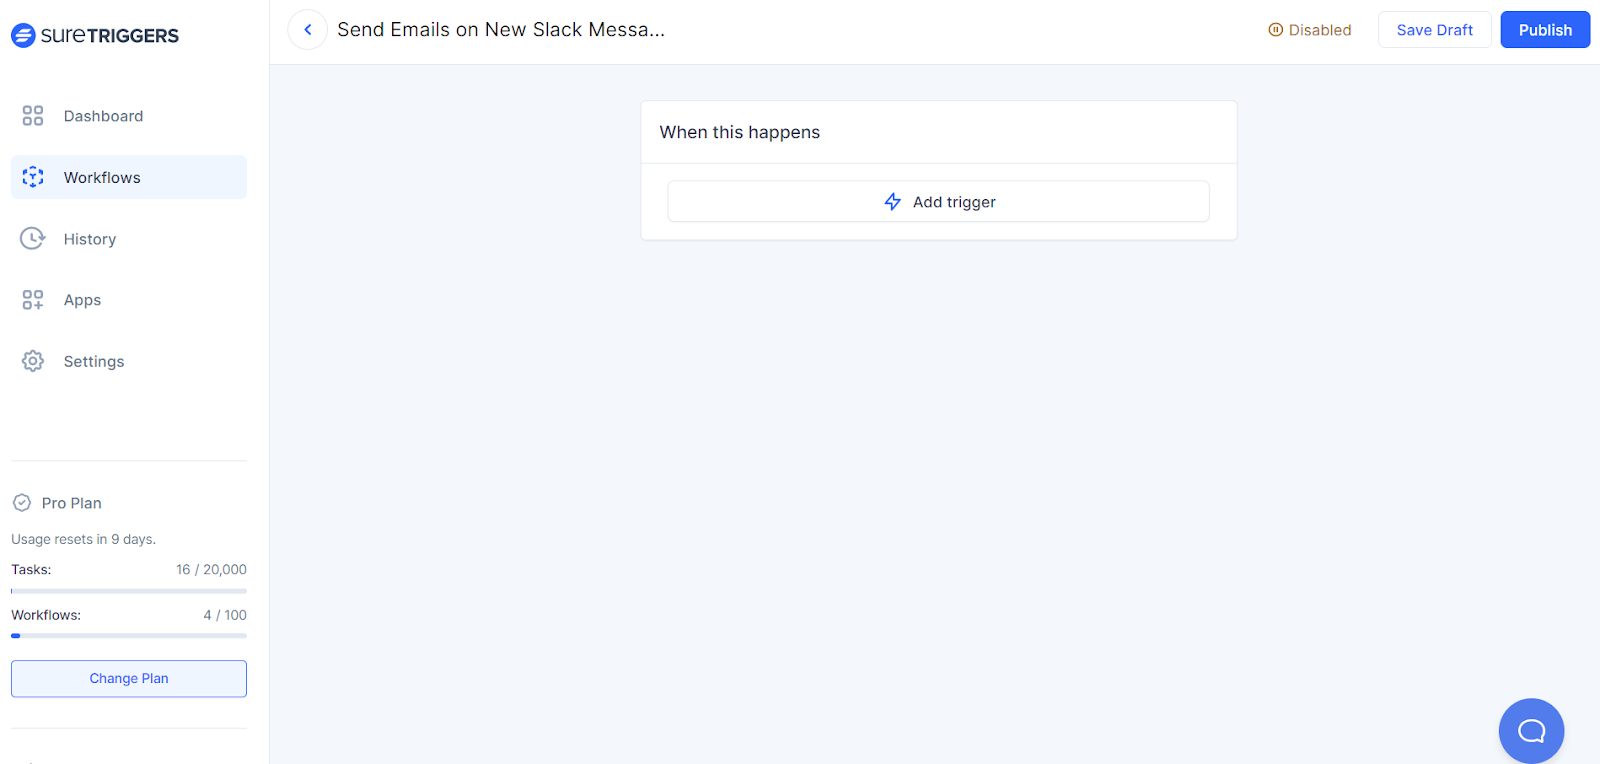
- Select when do you want this workflow to run by selecting the appropriate trigger event.

- Connect your Slack account with SureTriggers by clicking on create new connection button. You can simply follow the prompts that appear after clicking the create new connection button.

- Configure the trigger app(Slack) as per the instructions on the screen. This configuration can be different and as per the selected app & event.
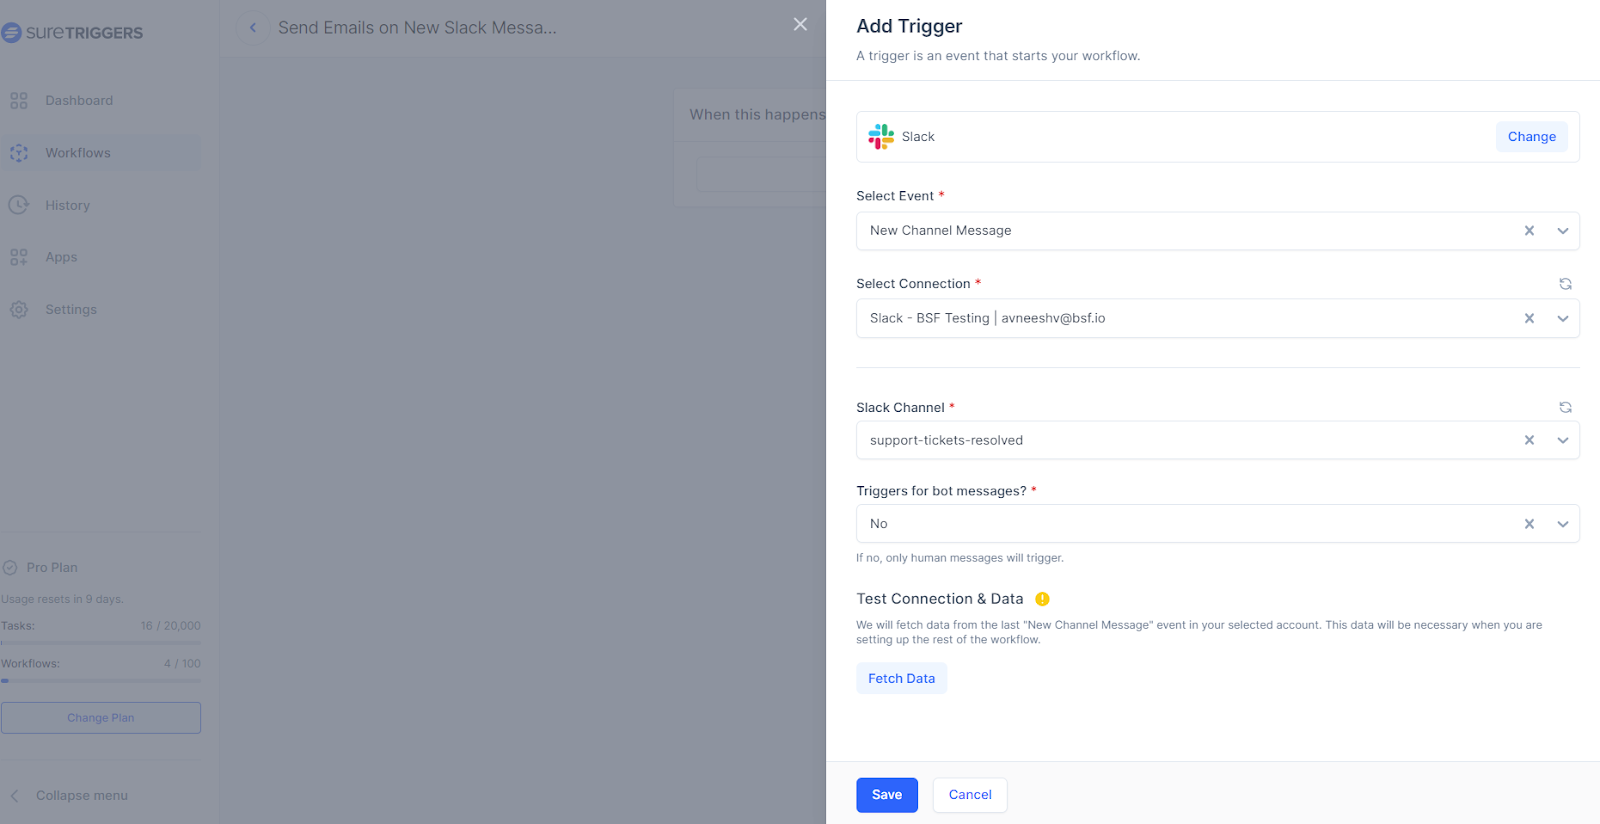
- Once the steps are configured. Fetch the last data available in your Slack account for the ‘New Channel Message’ trigger to get the data that will be mapped in action steps.

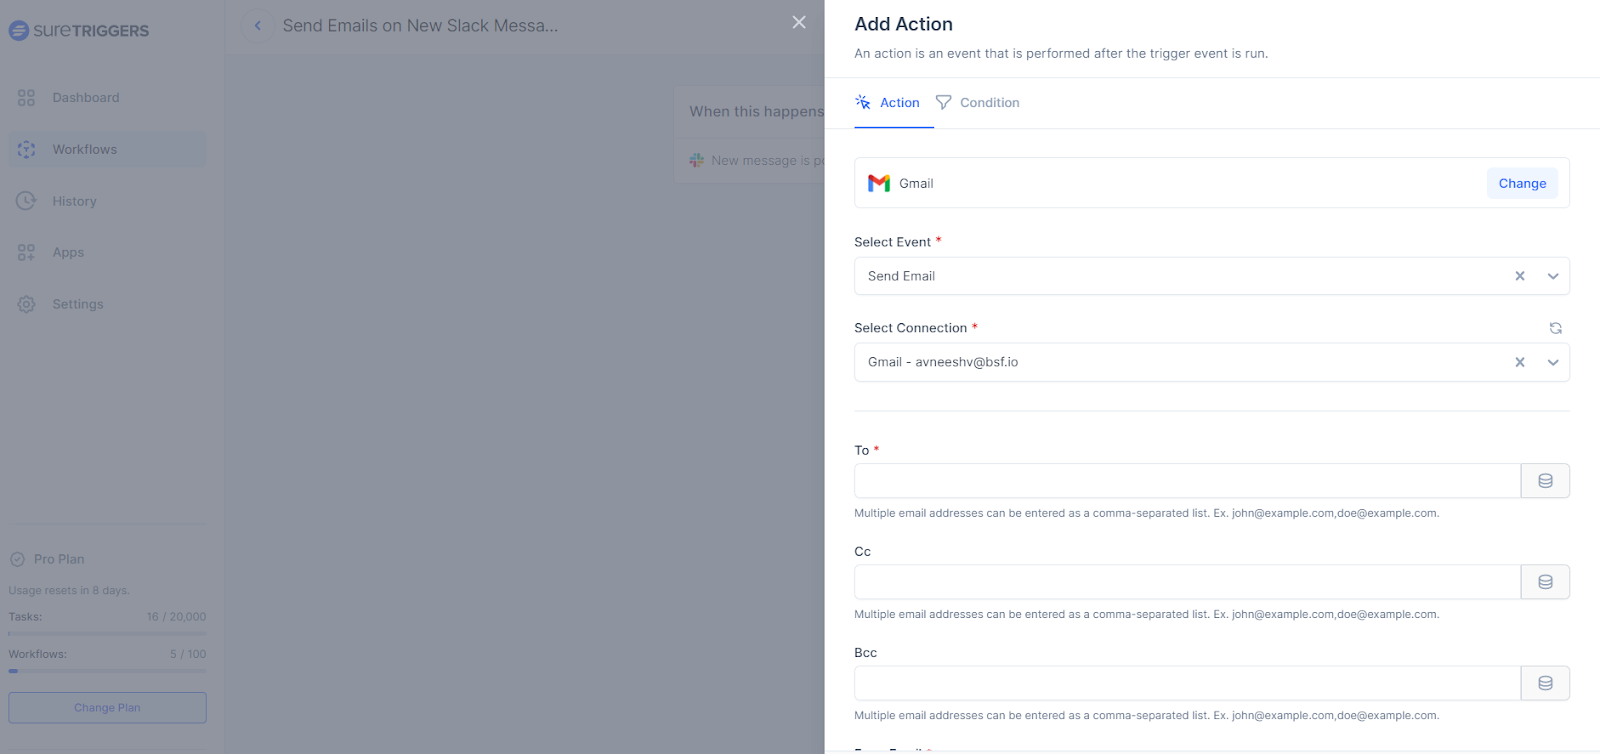
Step 4: Set up the action app & event
- Select the app that you want to use as the action for your workflow. Action step would be executed when the trigger is received.
- Connect your action app with SureTriggers same as you did for the trigger app.
- Configure the action steps as per instructions on the screen.
- Test the action event to ensure action step is configured correctly
- Save the action step.
Step 5: Publish the workflow
Once you’ve set up the trigger and action, you can perform the trigger event(Send a slack message in the channel) to ensure that everything is set up correctly and working as expected.

That’s it! With these steps, you can create a workflow in SureTriggers and start automating your workflows.
Of course, the specific details of each step will vary depending on the apps you’re using and the specific workflow you’re trying to automate, but these steps provide a general framework that you can follow for any workflow.
Recommended Articles
How to sign up for SureTriggers?
Common terms that you’ll come across in SureTriggers