No results found. Try again with different words?
Search must be at least 3 characters.
Workflows: All You Need To Know!
In SureTriggers, workflow is a set of triggers and action steps that help you automatically perform tasks in different applications.
How to Create a Workflow?
A workflow consists of one trigger and one or more actions. Once you’ve decided what you want to automate, you can follow the steps below to create the workflow:-
Step 1: Add Trigger
- Go to SureTriggers
- Click on the ‘Create New Workflow’ button
- Give a unique name to this workflow
- Click on the ‘Add Trigger’ button when you’re on the Workflow editor screen
- Select the trigger app
- Select the trigger event
- Select the connection/account of the app that you want to use
- Fetch the last data available in the trigger app by following the steps shown on the screen
- Once the data has been fetched, you can save your trigger step.

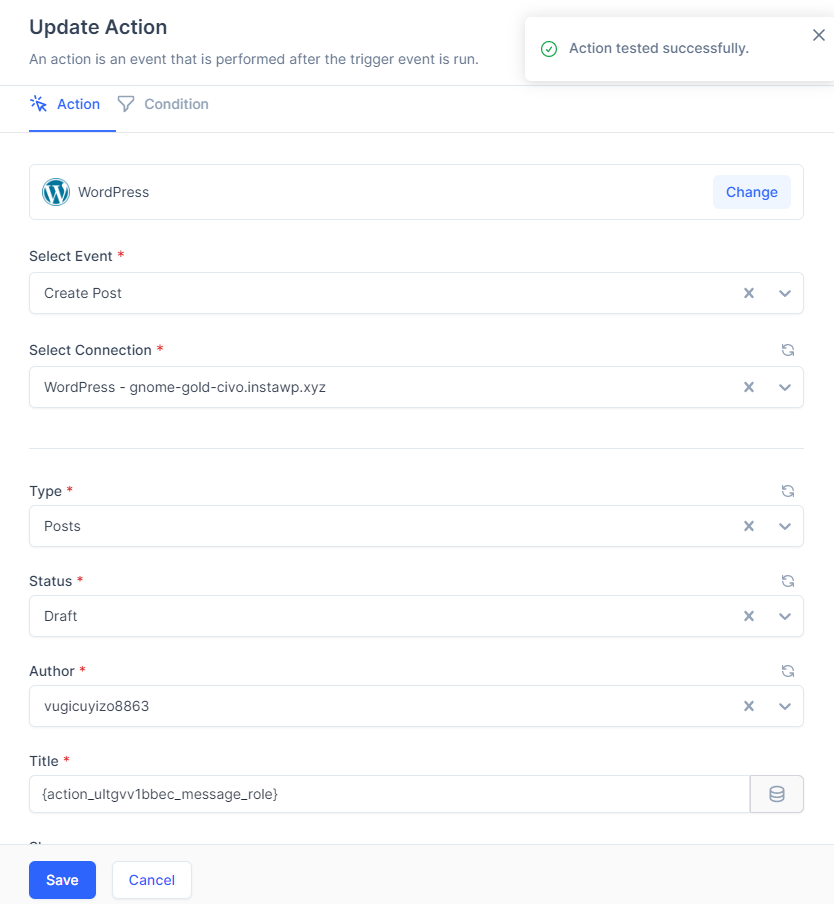
Step 2: Add Action
- Click on the plus icon that appears on the workflow editor screen after you’ve added the trigger
- Select the action app – the app in which you want to take the action when the trigger is received.
- Select the action event – it will specify the action that you want to take in the selected app.
- Select the app account
- Map the data to the fields that appear after you select the app account
- Perform a test action to make sure that all information is mapped correctly and that the step will perform the intended action.
- Once the test action is successful, you can save this step.
Step 3: Publishing Your Workflow
Once you’ve configured and saved all the steps in the workflow, you can publish the workflow to take it live.
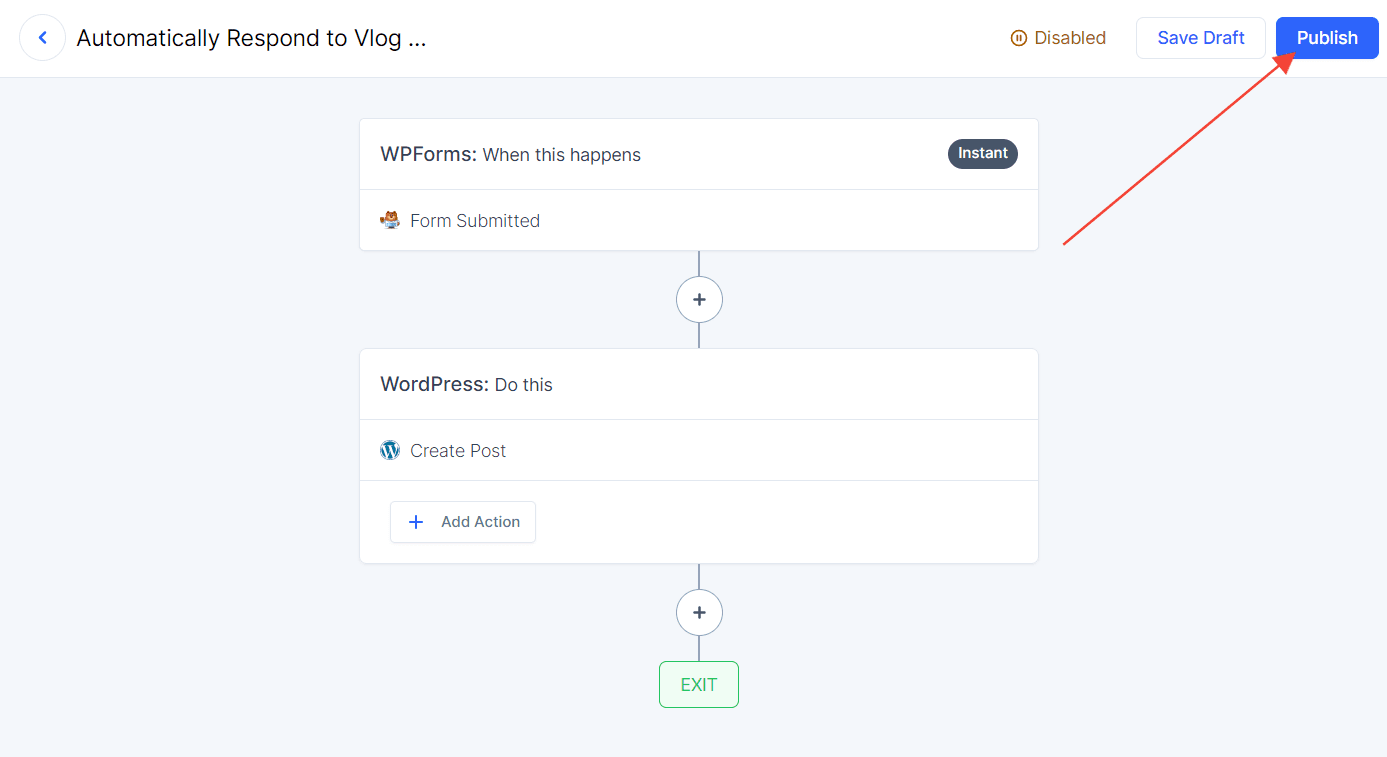
Now whenever the trigger event takes place in the trigger app, the actions would be performed in your action apps!
There you created a workflow!
Add Unique Actions/Triggers to Your Workflows
Additionally, you can add some unique actions to your workflows that make your workflows more powerful and customizable like:-
- Schedule (Trigger)
- Filter
- Condition
- Branches
- Delay
You can search for these applications while selecting the action app.
How to Create Multi-Step Workflows?
In SureTriggers, you can also create multi-step workflows that allow you to take more than one action in different apps when the trigger event happens.
To create a multi-step workflow, you can add more than one action to your workflow as described above.
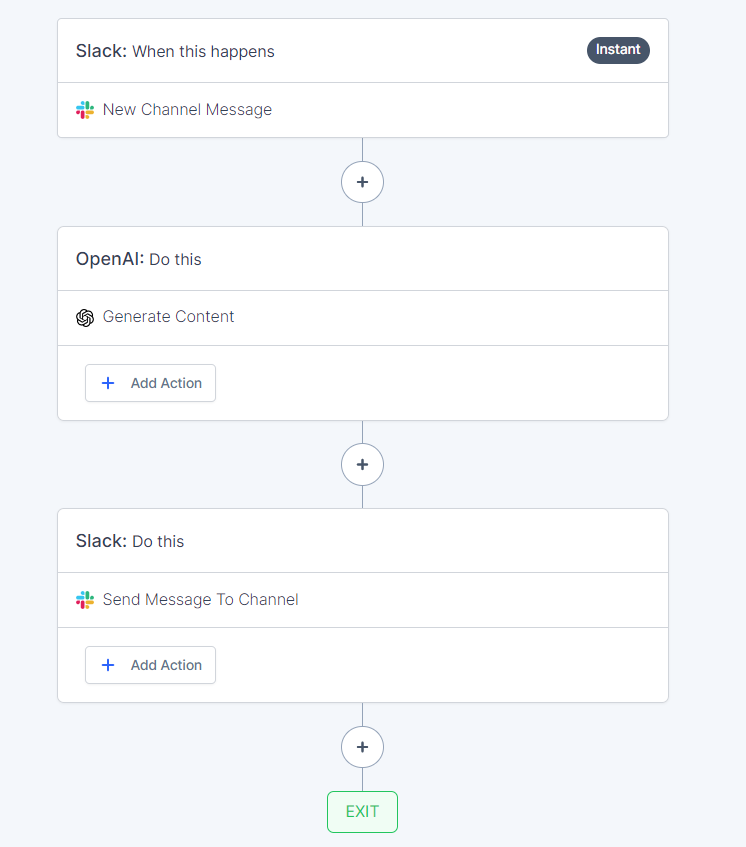
For now, there are no restrictions on the number of actions that you can add to a workflow.
How to Editing an Existing Workflow?
If you’ve published a workflow and you want to add a new step to do more action in the same workflow, you can edit the same workflow instead of creating a new workflow.
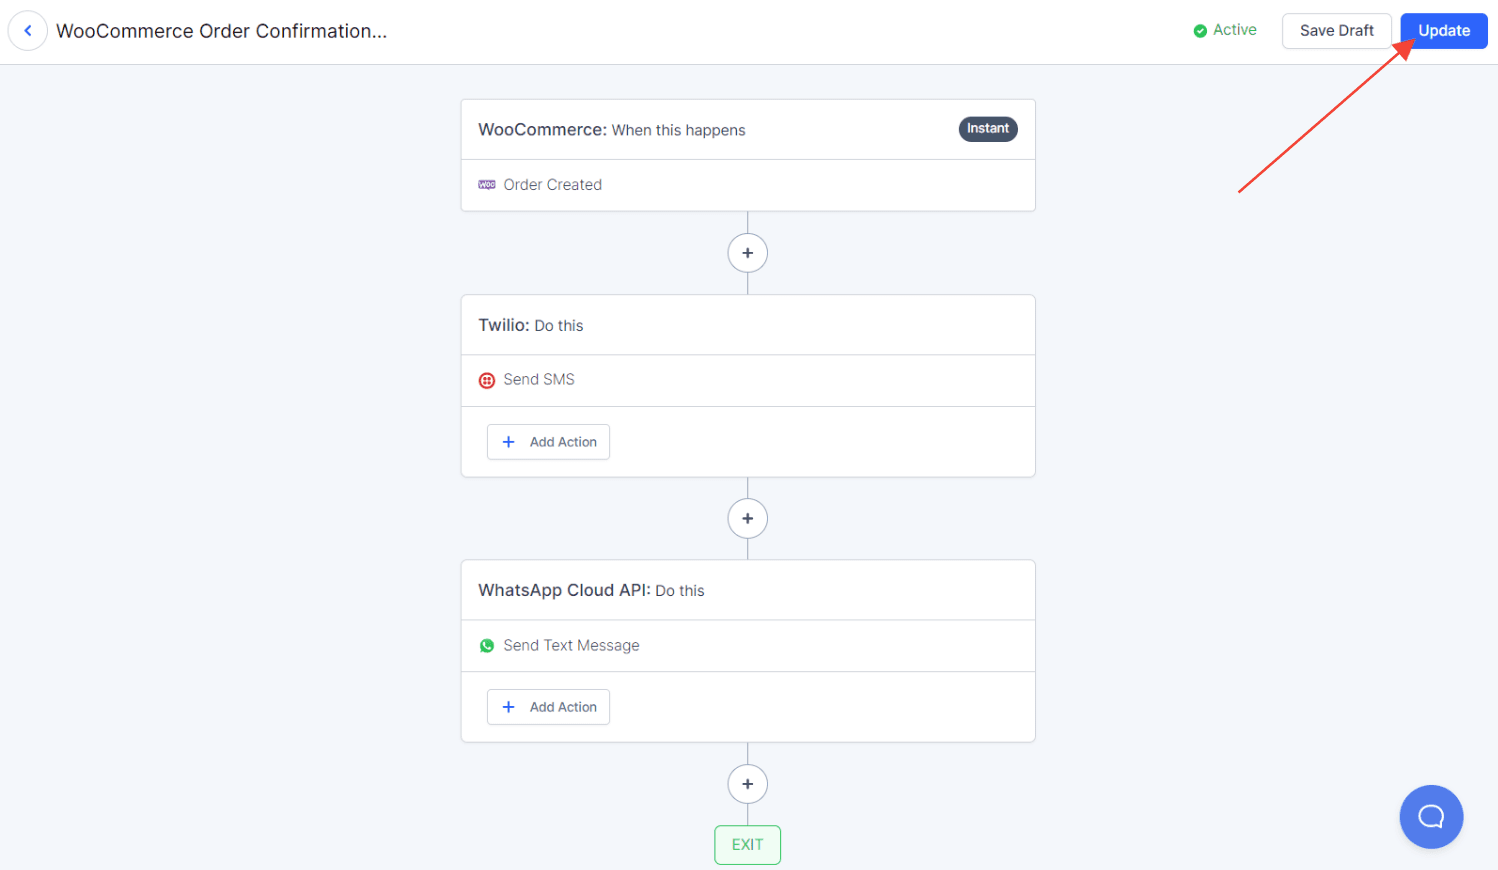
For example, you had a workflow to send an order confirmation SMS via Twilio when a customer makes a new purchase from your WooCommerce store. But now, you decide to send the same text message on WhatsApp too.
To achieve this you can simply edit the same workflow and add a new action by following the steps below:-
- Go to Workflows in SureTriggers
- Find the Workflow that you want to edit
- Click on the title of the workflow
- Add the new actions when you’re on the workflow editor screen
- When the actions had been added to the workflow, click on the update button.
Now, the new action will be executed when the trigger is received.
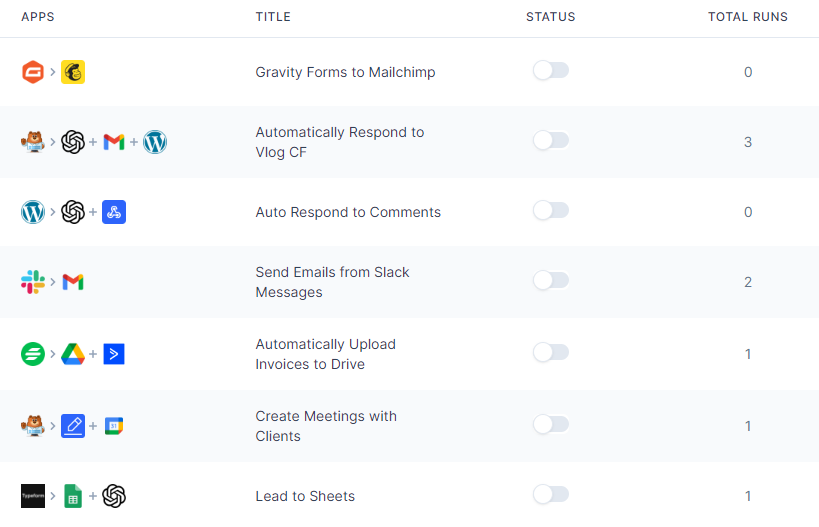
How to Disable or Delete a Workflow?
If you do not require a particular workflow to run anymore for a certain duration of time, you can disable it.
For example, you created a workflow to send Discord channel messages for the new WooCommerce orders but your store is under maintenance for a while.
For the time your site is under maintenance, you can disable the workflow so unrequired messages are not sent on Discord. Later you can enable the workflow when your store is up and running!
Note: Disabling your workflows will not affect the history of this workflow.
But in case, you do not want to run this store anymore, you can permanently delete the workflow. To delete a workflow:-
- Disable the workflow by clicking the toggle to the left side
- Click on the delete icon on the right side of the screen
- That’s all. Your workflow will disappear from your SureTriggers account.

Note: Once you delete a workflow, the history associated with it will be deleted as well.
There you have all the information related to workflows. Hope this information helps!
Let us know if you have any questions.
We don't respond to the article feedback, we use it to improve our support content.