
- Prerequisites
- Building an Integration
- Setting Up Authentication
- Setting Up Triggers & Actions
- Publishing Integration
- How To Authenticate Your Application Using The API Key Method
- How to Set-Up the Integration Based on Auth Type Bearer Token
- How To Authenticate Your Application Using OAuth 2.0
- How To Authenticate Your Application Using Basic Auth
- How To Authenticate Your Application Using The JWT Bearer Method
Automatically Create ClickUp Tasks from Slack Messages!
In today’s fast-paced work environment, managing multiple tools and applications can be overwhelming.
But fortunately, there are tools that can connect your applications with each other to automate some processes.
In this article, we will explore how to connect ClickUp with SureTriggers and automatically create tasks in ClickUp from Slack channel messages.
By setting up this integration, you can save time and ensure that important tasks are not overlooked.
Whether you are a team leader or a member of a team, this guide will provide step-by-step instructions on how to set up this automation and improve your team’s productivity.
Let’s get started!
Imagine That You Manage a Project on ClickUp
Imagine you lead a software development project that is being managed on ClickUp.
And your team uses a communication platform called Slack to send messages to each other. Your team also communicates in group chats called Slack Channels.
Being involved in software development or any collaborative activity, one of the frequent tasks that everyone in the team would do is creating tasks in project management tools like ClickUp.
It helps in keeping track of what things need to be done to build a feature.
Also, people keep adding suggestions in the form of tasks so that they can discuss them later.
So it’s like if a team member gets an amazing idea, they’ll have to log in to the project management tool account, find the project, write task details, etc.
They will have to repeat the same steps every time they want to create a task.
Sounds tedious and time-consuming, right?
Most people avoid putting in good ideas or forget to create tasks due to the inconveniences like this.
But worry not, we will create a workflow in SureTriggers that will make life easier for your team.
This workflow will automatically create a task in ClickUp when team members send messages to a specific Slack channel.
So, instead of manually going to ClickUp, and creating tasks, your team can now focus on more important things while SureTriggers takes care of the rest.
How to Create the Workflow?
Before you begin to create the workflow, make sure:-
- You have a ClickUp account.
- You have a SureTriggers account.
- You have a Slack workspace.
- Your ClickUp and Slack workspaces are connected to SureTriggers.
Check out our guide on connecting apps in SureTriggers to learn more.
Once Slack and ClickUp accounts are connected with SureTriggers you can follow the steps below to create the workflow:-
Step 1: Setting Up Slack Trigger for New Channel Message
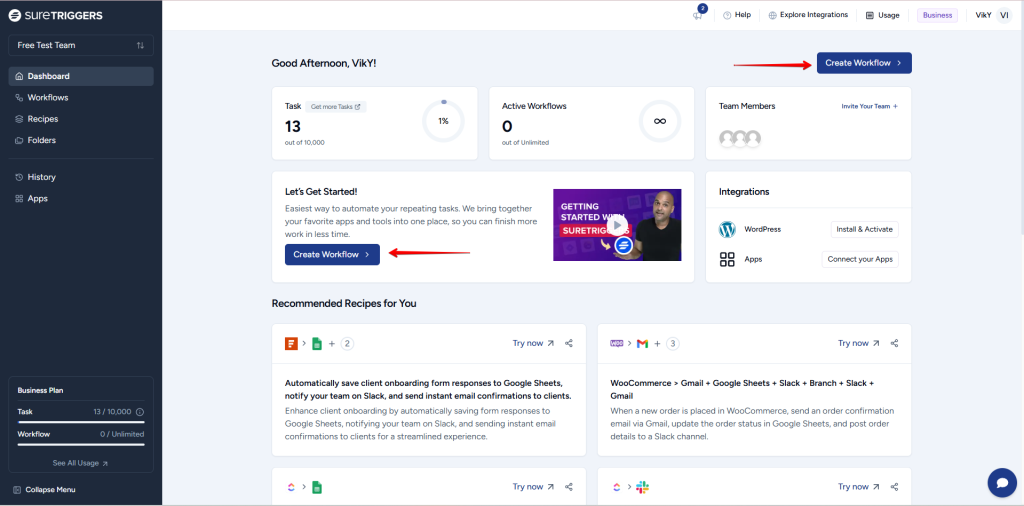
- Go to the SureTriggers dashboard
- Click on the Create Workflow button
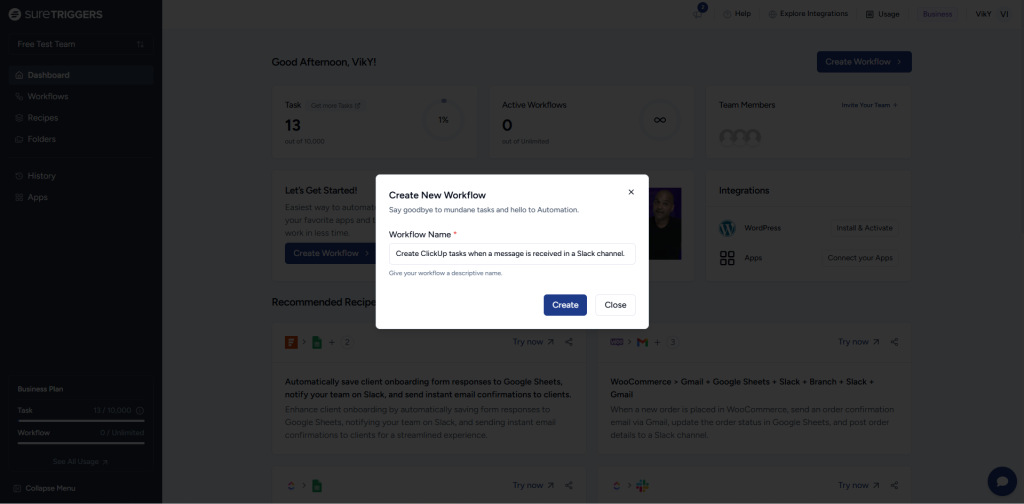
- Give a descriptive name to this workflow and click on Create.
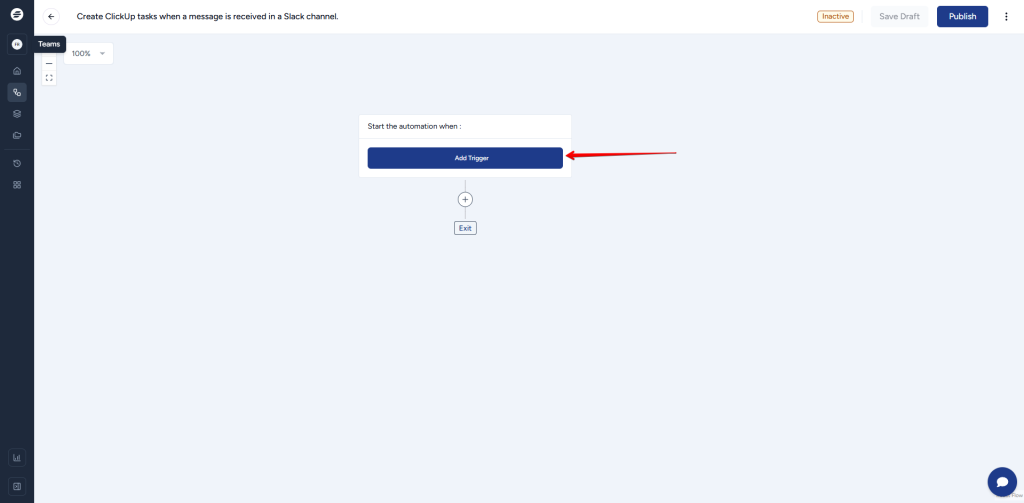
- Click on the Add Trigger Button.
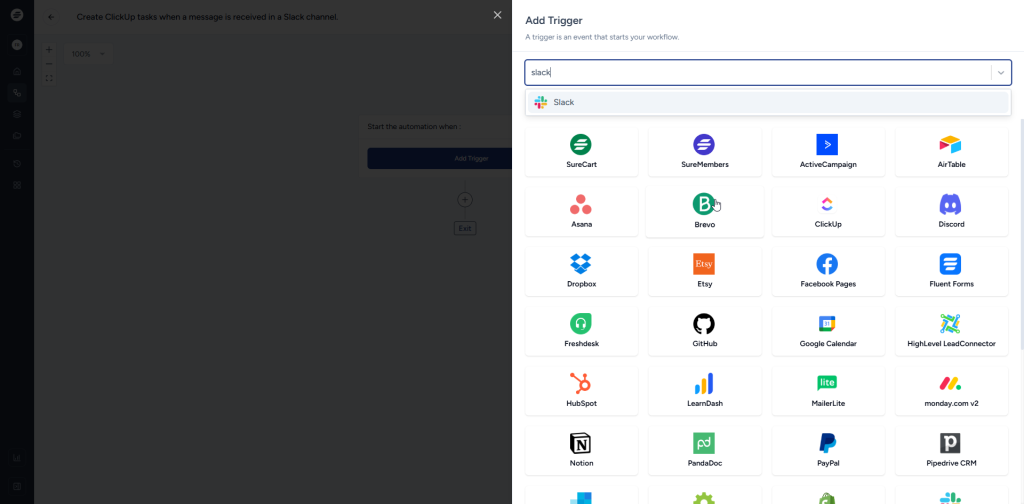
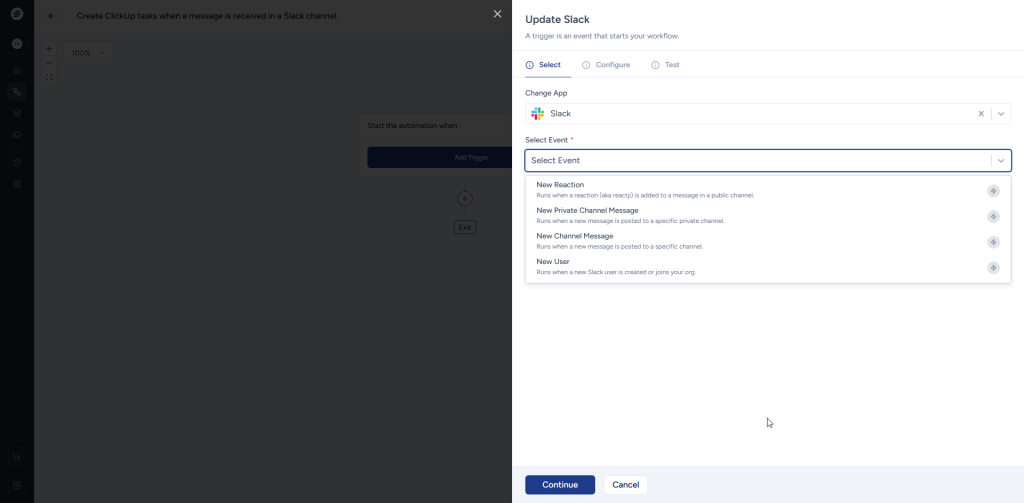
- Select the trigger app as ‘Slack’
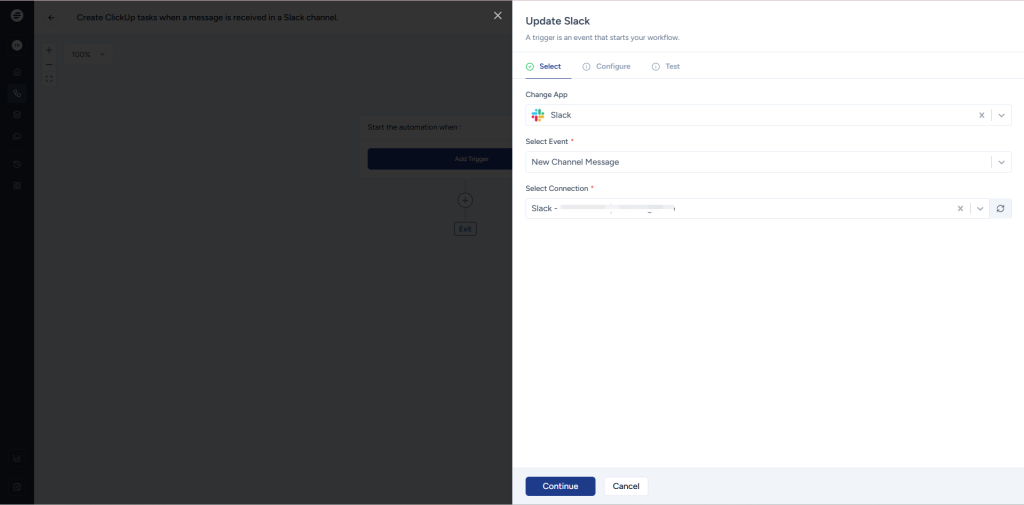
- Select trigger event as ‘New Channel Message’
- For Select Connection, choose the desired Slack account.
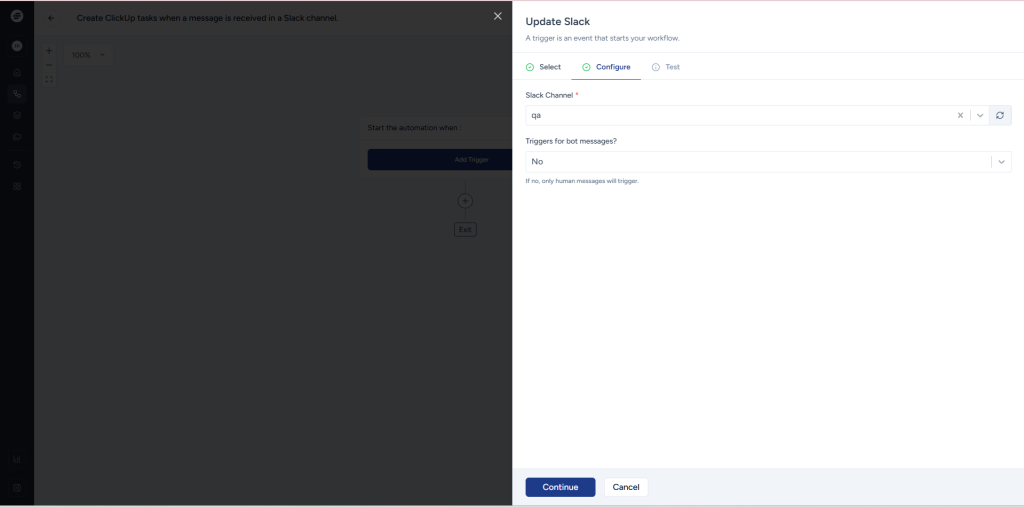
- After selecting the connection, you’ll see a dropdown to select channel. This dropdown has the list of all the channels created in your Slack workspace.
From the dropdown, Select the preferred Slack channel where you will be sending message to create tasks in ClickUp.
If you do not have any preferred channel, you can create a new one in Slack by following these steps.
- You’ll also see a dropdown asking for Triggers for bot messages? You can select no if you want to avoid creating tasks in ClickUp when bots send a message to your selected channels.
Now, you will need to provide a sample message to SureTriggers so the message can be used to create tasks in ClickUp. To do that leave the SureTriggers tab as it is in your browser and continue with the steps below:-
- Login to your Slack workspace from web or Slack desktop app.
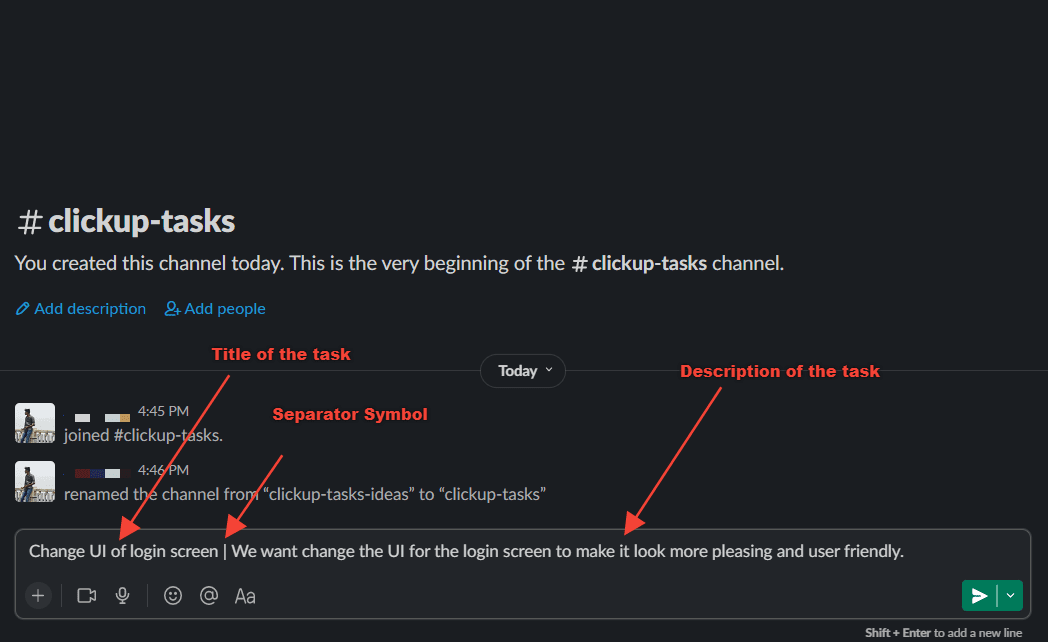
- Go to the Slack channel that you created for ClickUp tasks and send a sample message in that channel.
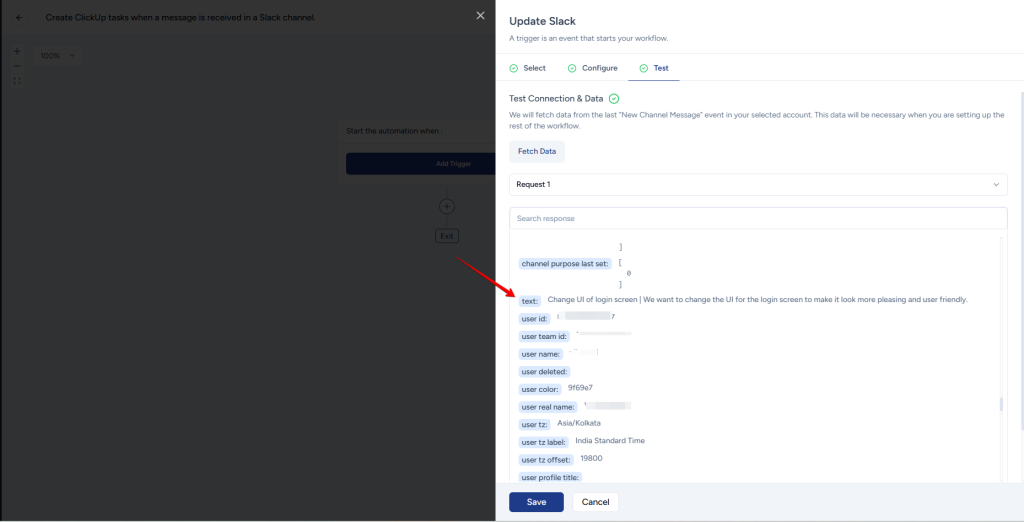
Make sure your sample message should include – a task title, a separator symbol to separate task title and description, and task description.
Sample Message: Change UI of login screen | We want to change the UI for the login screen to make it look more pleasing and user friendly.
- Send your sample message
- Return to your SureTriggers tab in your browser.
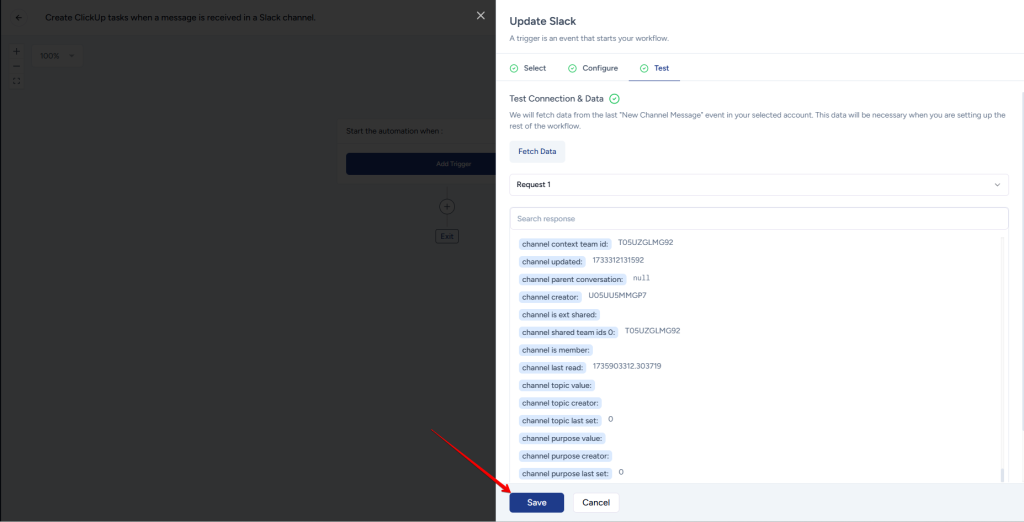
- Click on the ‘Fetch Data’ button so SureTriggers can fetch the sample message that you sent in the Slack channel. We will use the information in the message to create ClickUp tasks.
- When the trigger data is fetched and you see information related to your recently sent Slack message on the screen, click on the save button.
You just successfully set up the trigger event. Congratulations! 🎉
Next, we’ll set up an action step.
Step 2: Separate Task Title & Description Using Formatter
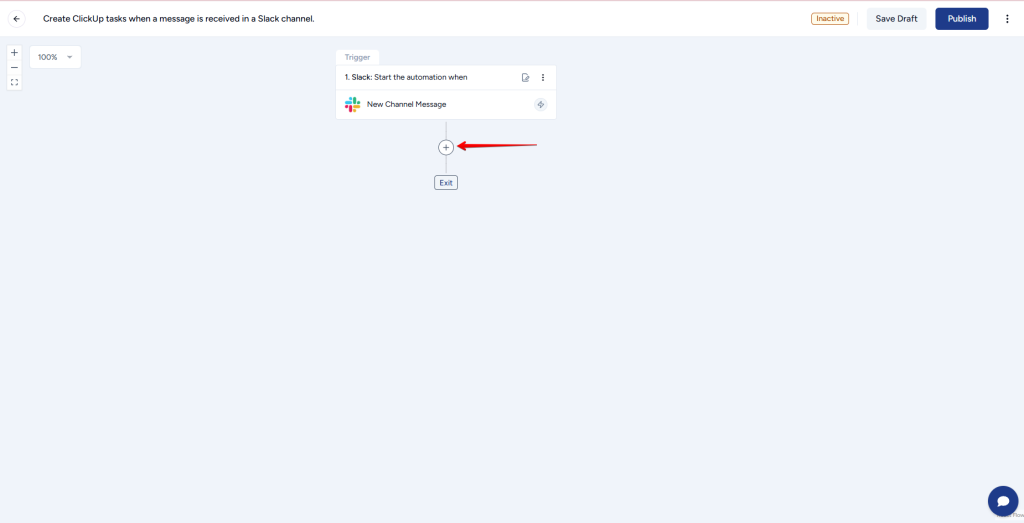
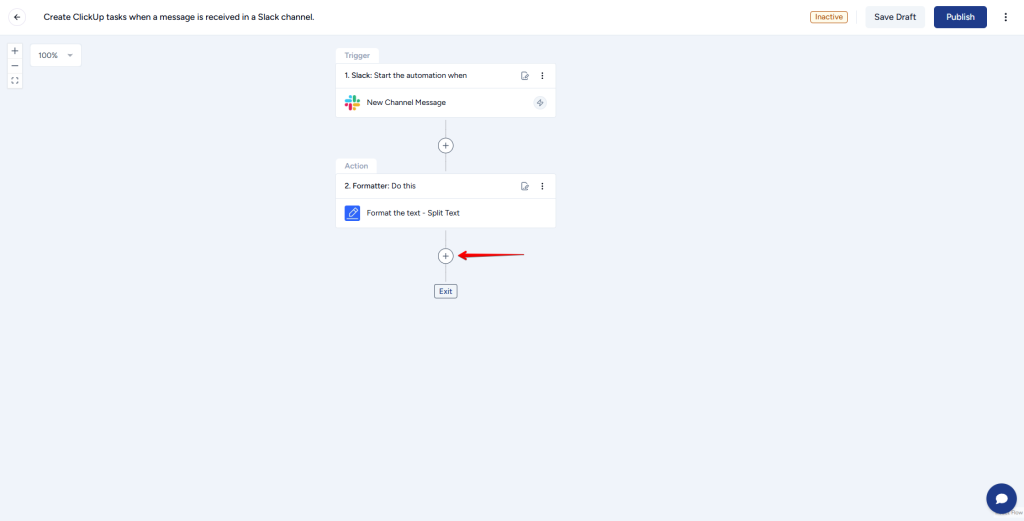
- Click on the + icon to add an action step that will be performed after the trigger event happens.
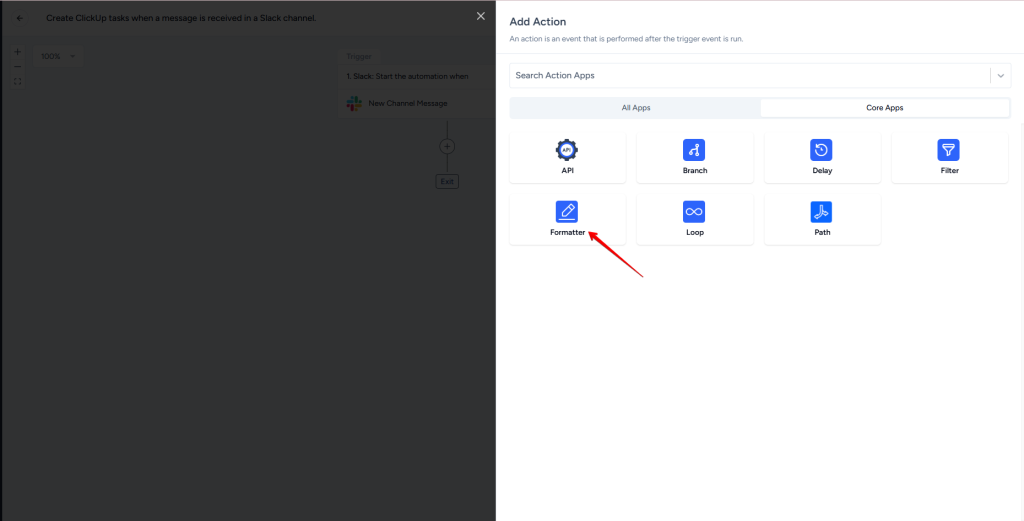
- Search ‘Formatters’ in the search bar and select the formatter app. It’s an app specially built by SureTriggers to manipulate texts, numbers, and dates.
- Select ‘Text’ from the ‘Select Event’ dropdown and ‘Split Text’ from the ‘Select Action’ dropdown.
Split Text action will help you separate the task title & description from your Slack message.
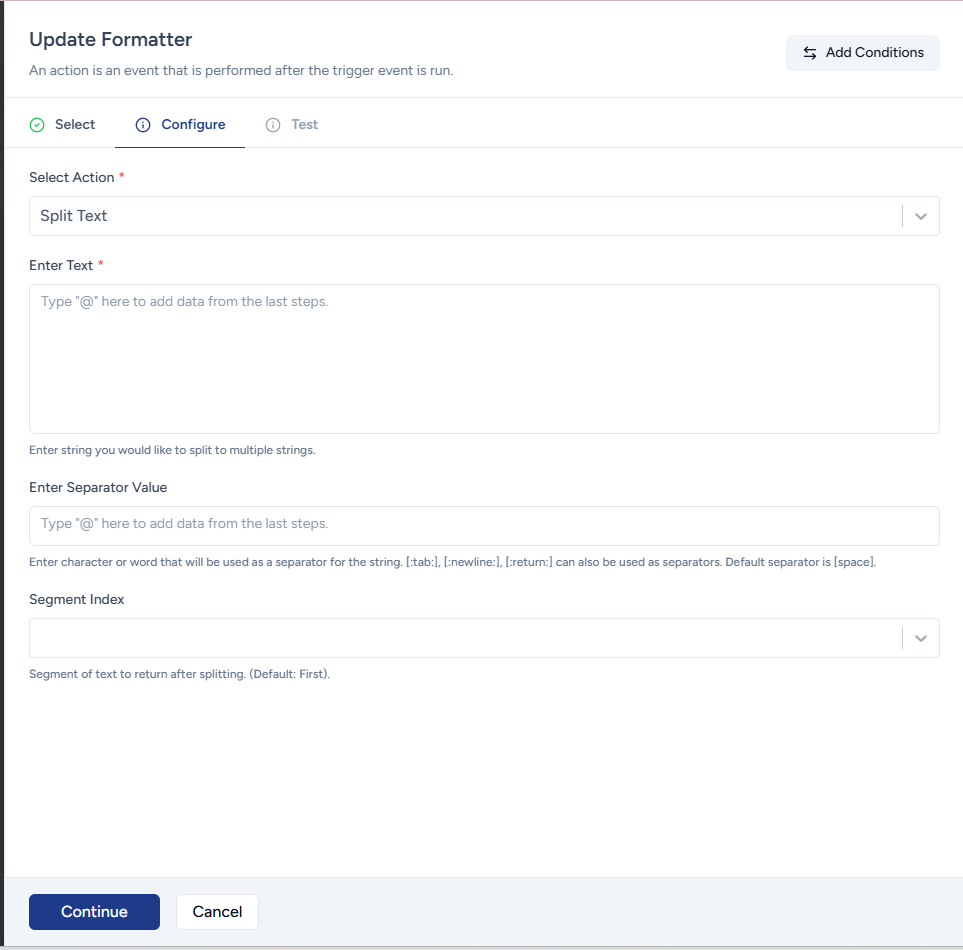
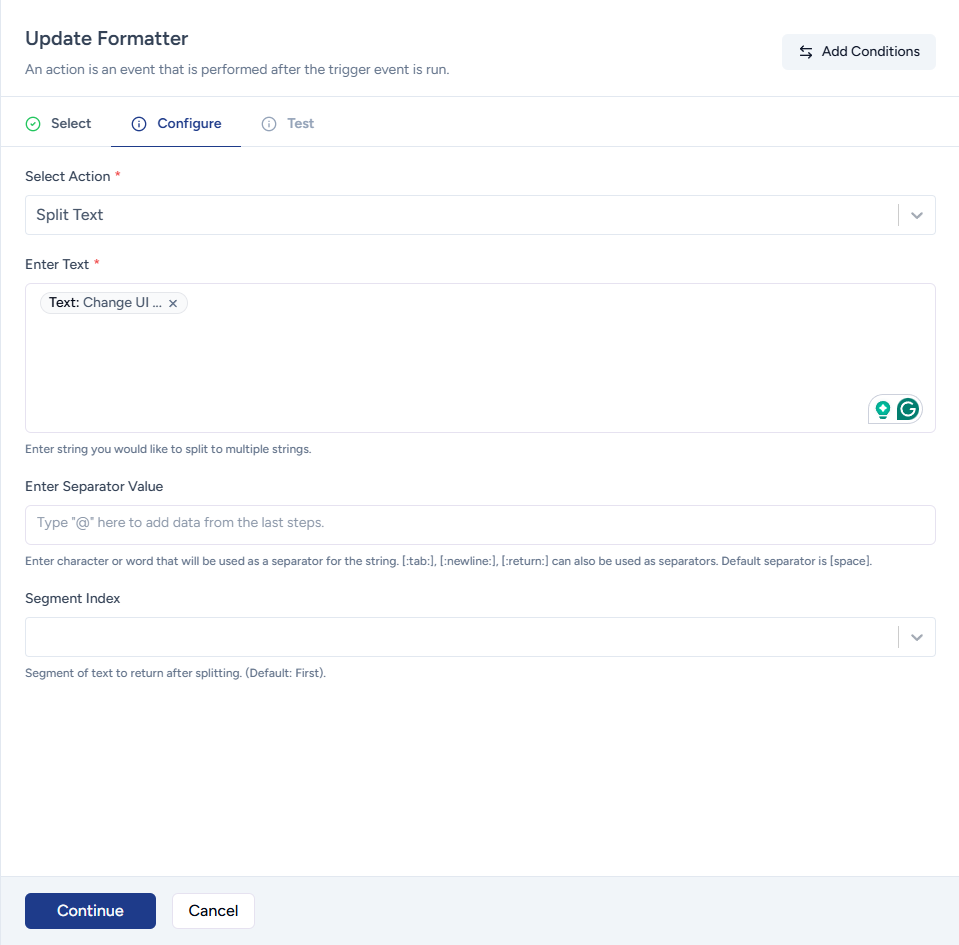
- Now, inside the Enter Text field, type @ to bring up the dynamic field dropdown, allowing you to map the Slack message from the Slack trigger. After typing @, type ‘text’ and select ‘text’ from the dropdown. This maps the dynamic field ‘text’ from the Slack trigger.
- Use your PC’s keyboard to type the separator symbol in the ‘Enter Separator Value’ that you’re using to separate the task title and task description in your Slack message.

- Select the segment index as ‘All’ to get all the separated texts including before the separator and after the separator. Once done, click on the Continue button to proceed to the next tab and test the action.

- Click on the ‘Test Action’ button to get the separated result.
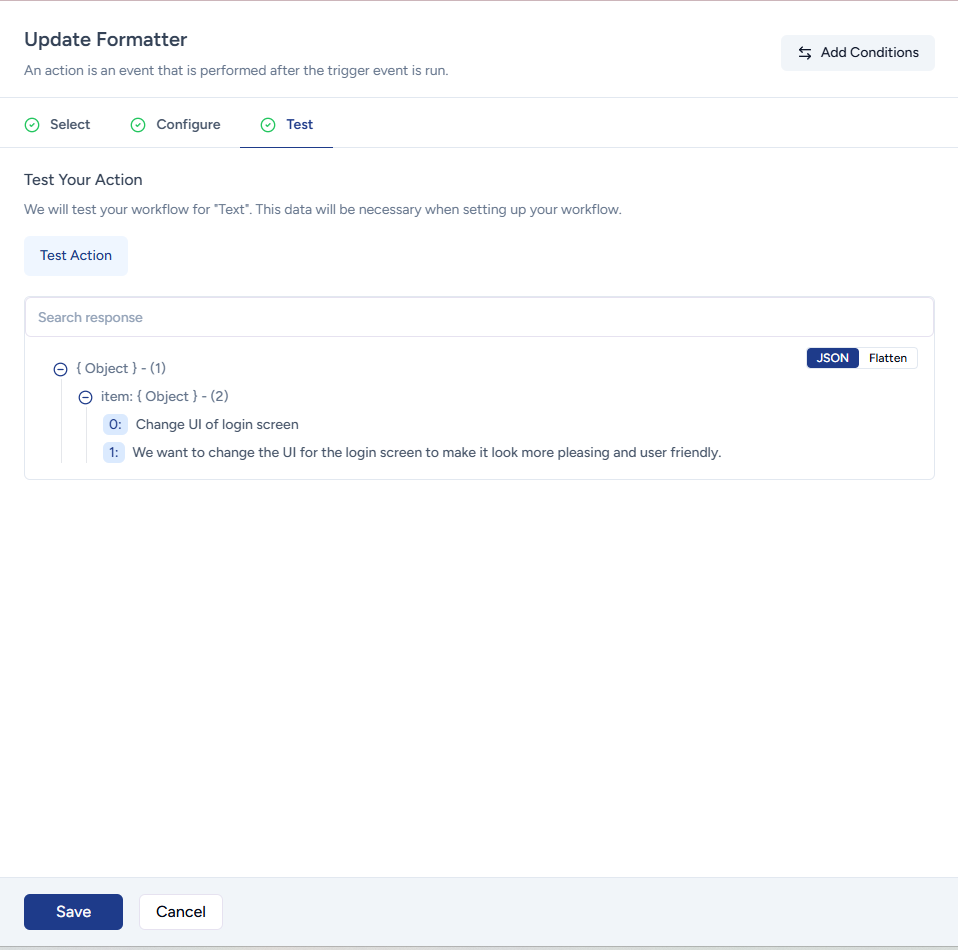
- Once the separated result is on your screen, save this step.
You just setup your first action step.
Time to setup the next action step.
Step 3: Automatically Create Tasks in ClickUp
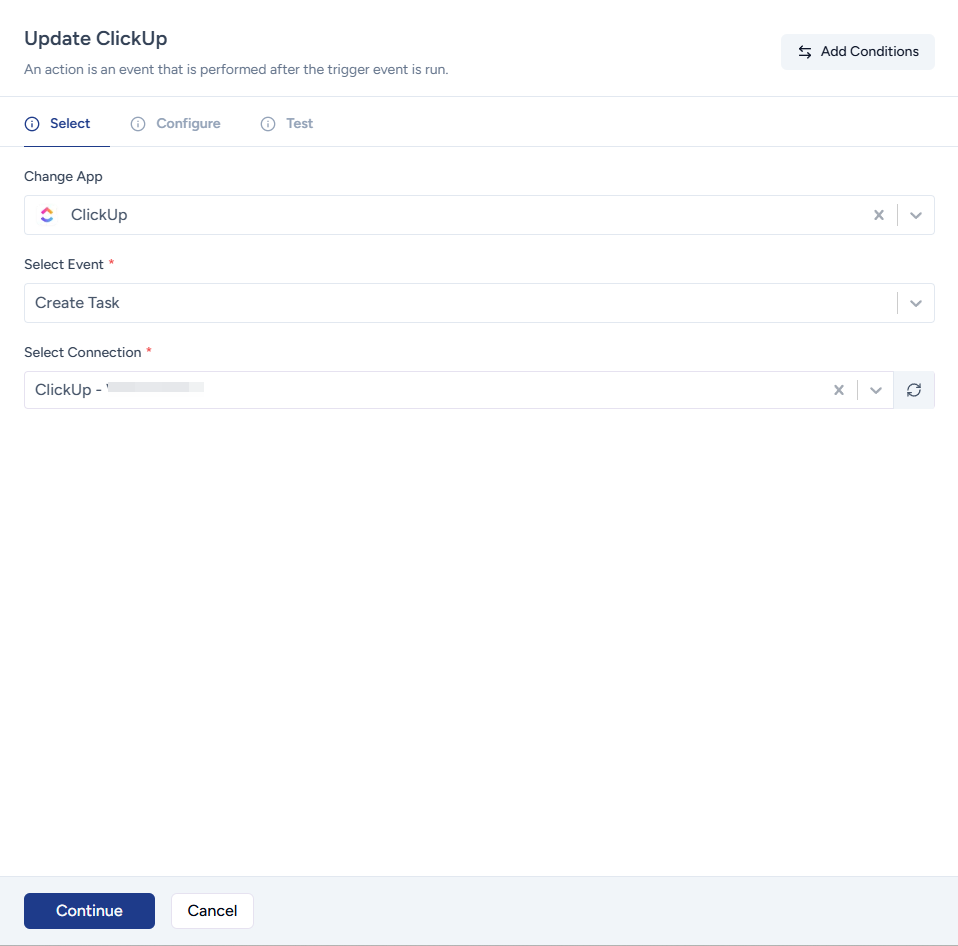
- Click on the plus icon to add the second action step.
- Search for ClickUp and Select it.
- Select the action event as Create Task.
- For Select Connection, choose the ClickUp account where you want to create tasks. Once done, click on the Continue button to proceed to the next tab to configure the action.
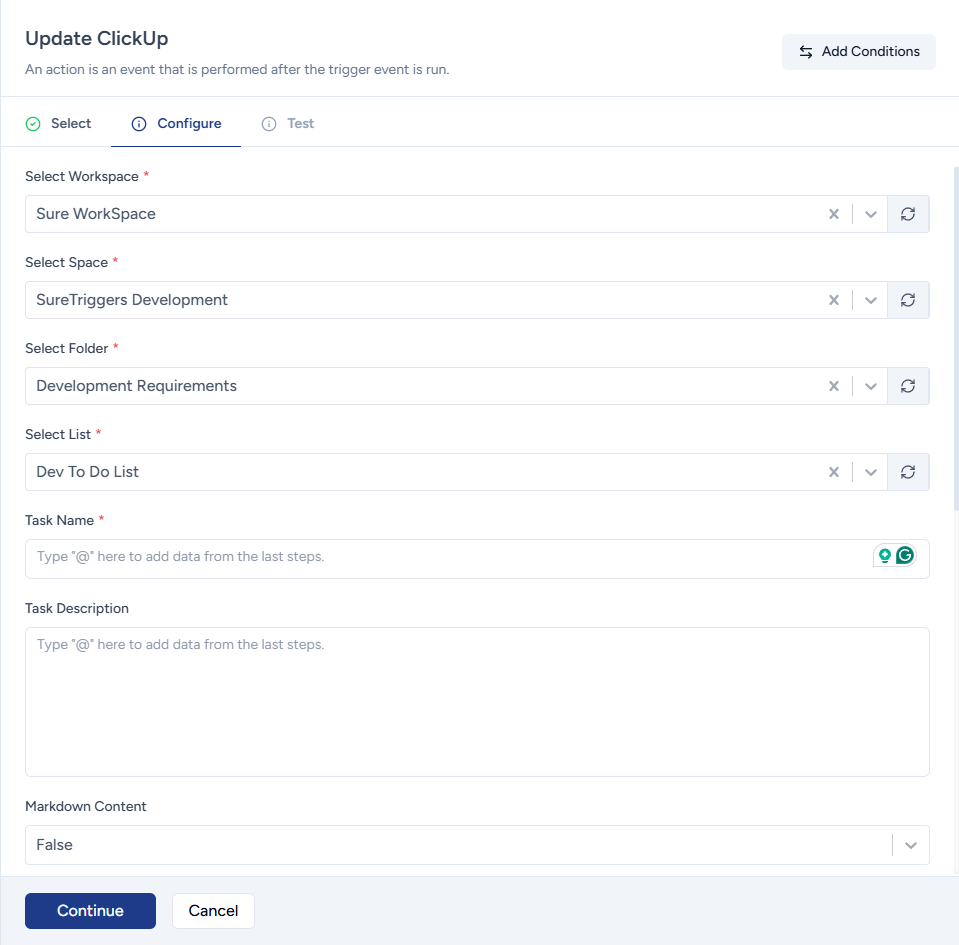
- Select the ClickUp workspace where you want to create the tasks from Slack message.
Selecting the workspace will fetch the spaces, selecting spaces will fetch the folders, and selecting the folder will fetch the list.
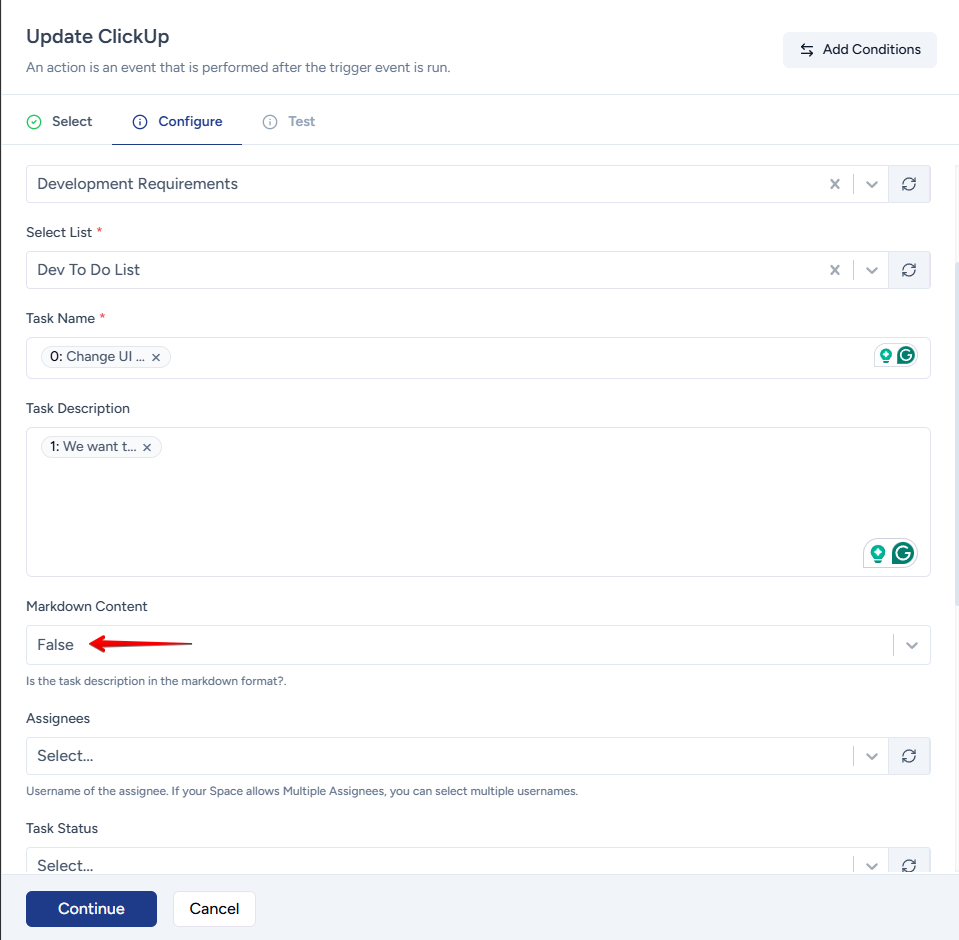
- When the dropdown to select list appears, select the list where you want to create the task.
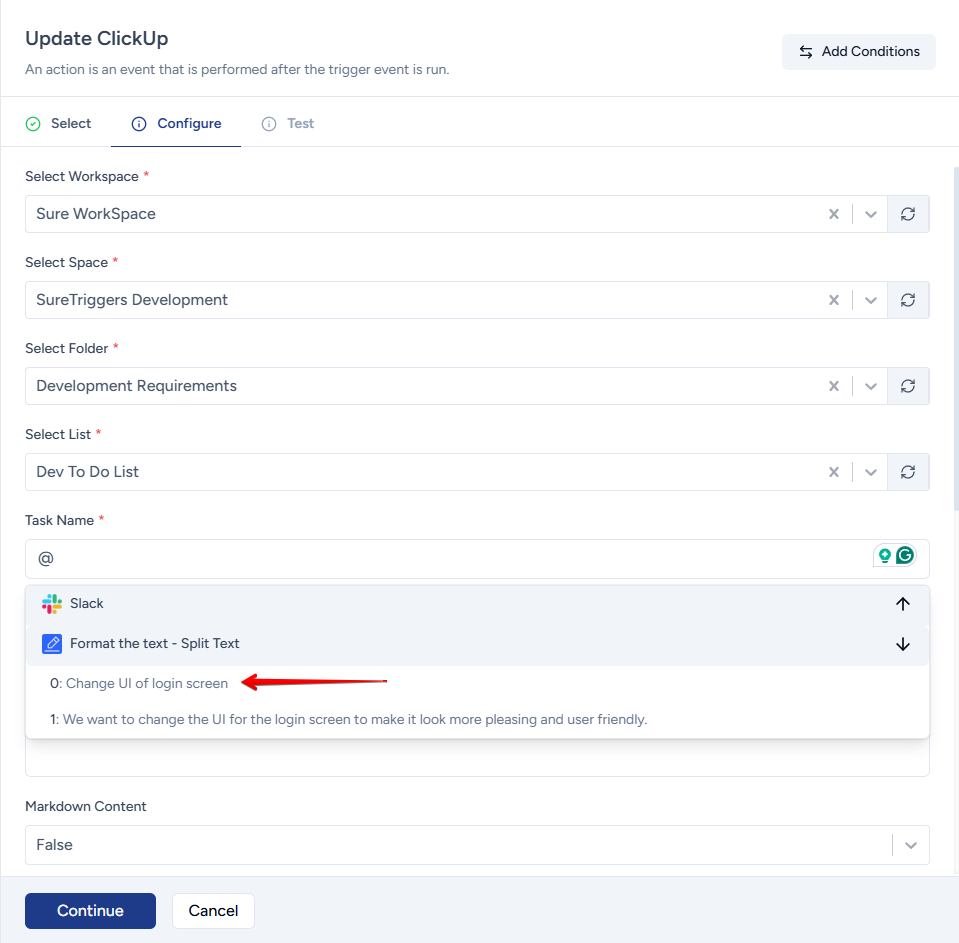
- Now, inside the Task Name field, type @, then expand the dropdown for Formatter from the dynamic fields dropdown, and insert Item 0 from the Formatter step.
This part of your Slack message will be the task’s title.
- Time to map the description for the task. Again, inside the Task Description field, type @, then expand the dropdown for Formatter from the dynamic fields dropdown, and insert Item 1 from the Formatter step.
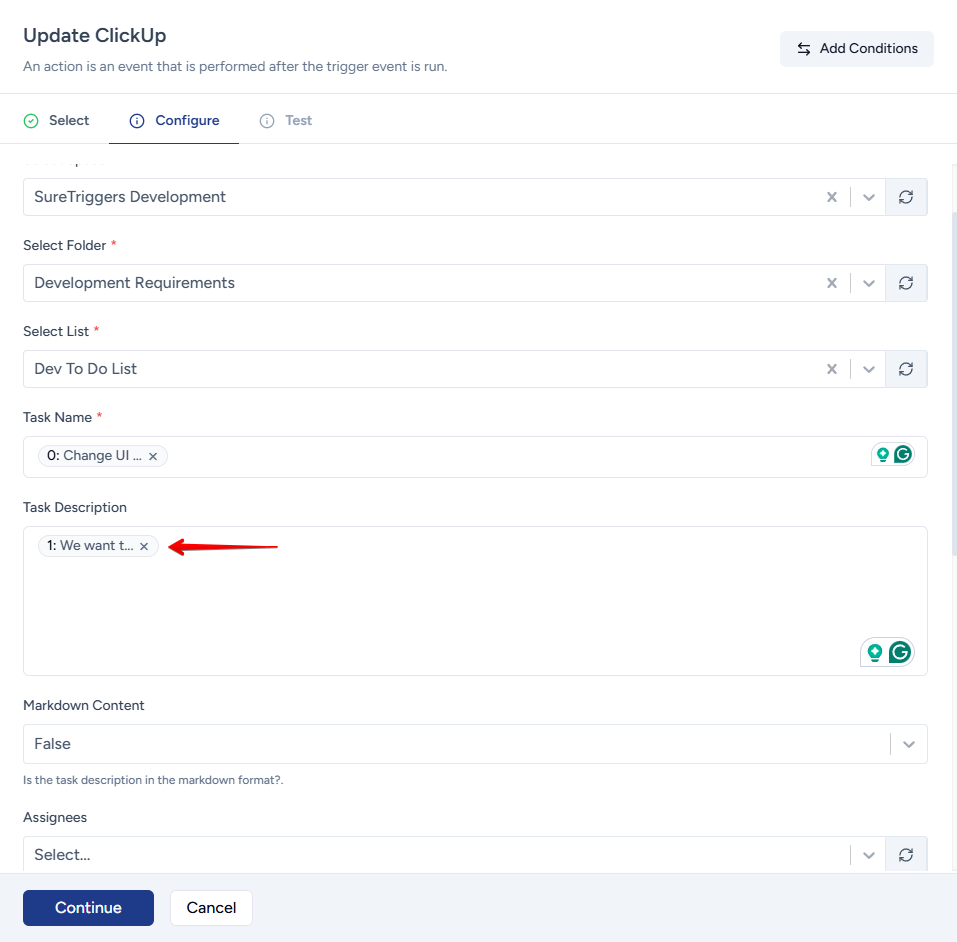
- Select false for the MarkDown Content field as we’re not providing the description in Markdown format.
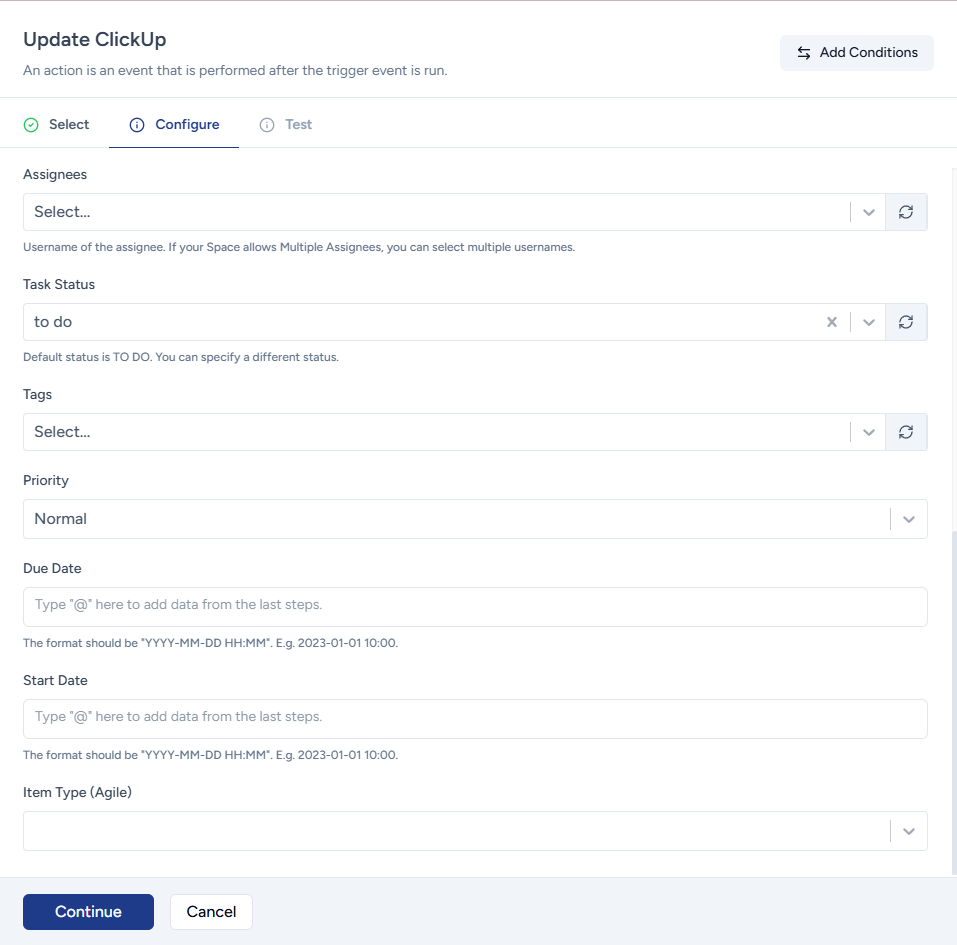
- Then select the inputs for the other fields below the task description like assignee, status, priority, etc. based on your requirement.
These fields are optional so if you prefer to add more information to your task later, you can leave these fields blank.
- Click on the Test Action button once you’ve added information to all the fields as per your requirement.
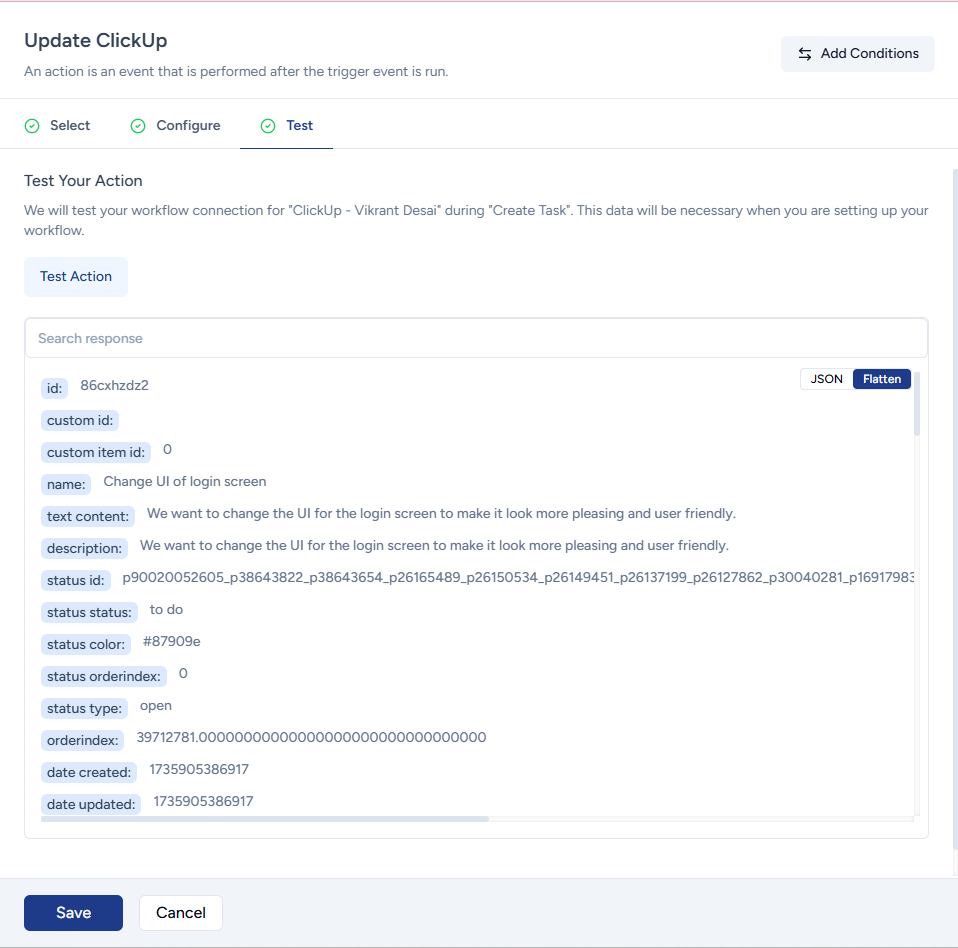
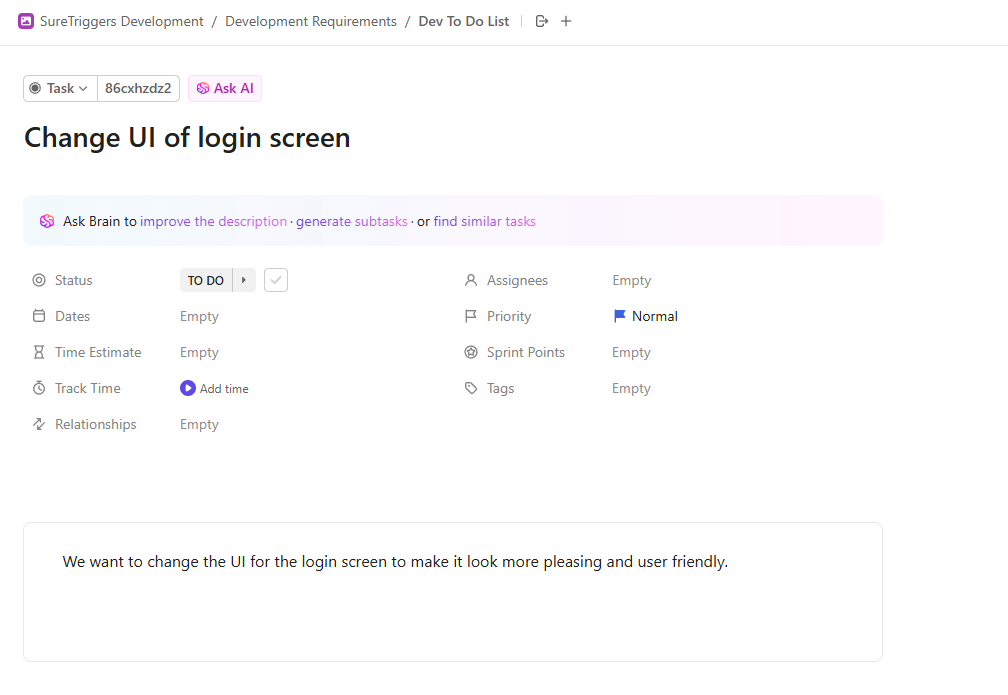
- After the test action is successful. You can check your ClickUp list to see the newly created task by SureTriggers and save this step too.
- It’s time to activate this workflow. Click on the Publish button on the top right of the screen.

That’s all you had to do!
You’ve successfully created a workflow that will automatically create new tasks from messages in a Slack channel.
You can test this workflow by sending a message to the Slack channel that you selected in your trigger.
Note: Make sure to use the same separator to separate the task title and task description in your Slack message that you used in the formatter step as the segment index.
Let Us Know If You Need Any Help!
Hope this article helps you understand how you can automate ClickUp-related work using SureTriggers.
So if you have been doing a task manually that can be automated, it’s time you create a workflow in SureTriggers.
And if you get stuck, don’t hesitate to reach out to our support team. We will be happy to assist you and ensure that everything works smoothly.
We don't respond to the article feedback, we use it to improve our support content.