- Prerequisites
- Building an Integration
- Setting Up Authentication
- Setting Up Triggers & Actions
- Publishing Integration
- How To Authenticate Your Application Using The API Key Method
- How to Set-Up the Integration Based on Auth Type Bearer Token
- How To Authenticate Your Application Using OAuth 2.0
- How To Authenticate Your Application Using Basic Auth
- How To Authenticate Your Application Using The JWT Bearer Method
Using Delay App in OttoKit
What is the Delay App in OttoKit?
The Delay app in OttoKit is an action app that allows you to add a delay between two steps in a workflow.
Let’s say you’re looking to streamline the process of gathering feedback from your customers following a purchase from your e-commerce store.
To do this, you could set up a workflow that automatically sends an email to your customers after they make a purchase. To allow some time for them to receive and use the product, you could add a delay of 7 days so that the email is sent a week after the order was placed.
By using the Delay app, you can ensure that each step in your workflow happens at the desired time, in the right order, and with the right amount of time in between.
How Delay App is Used?
Here are a few examples of how you could use the Delay app in your workflows:
Email Campaigns: You could use the Delay app to send the first email immediately, the second email 24 hours later, and the third email 48 hours after that.
Customer Support: You could use the Delay app to delay sending a follow-up email to a customer until 48 hours after they opened the ticket.
Sales: You could use the Delay app to delay sending a follow-up email to a lead until 72 hours after they filled out a contact form on your website.
These are some common examples of how you can use the Delay app in your workflows. The Delay app can be very helpful to create advanced and multi-step automations.
Types of Delay You Can Add Between Your Workflow Steps
There are two types of delays that you can add in your workflows – Delay For & Delay Until
Delay For: This type of delay allows you to specify a time duration for which the delay should be added before the next step in your workflow. For example, you can use Delay For to add a delay of 24 hours before sending a follow-up email to a customer.
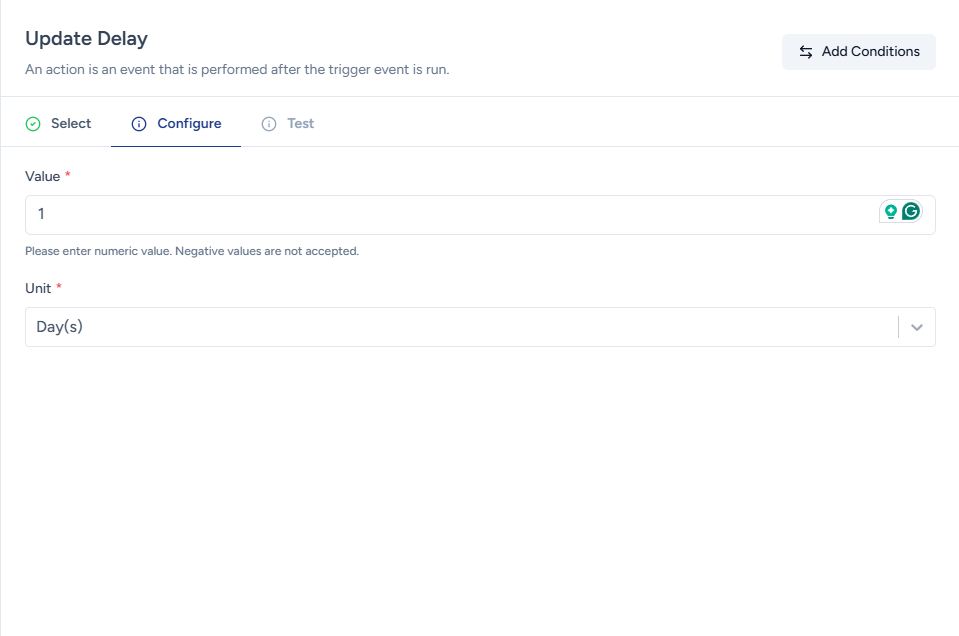
Delay Until: This type of delay allows you to specify a specific date and time until which the delay should be added before the next step in your workflow. For example, you can use Delay Until to add a delay until a specific date and time before sending out a newsletter to your subscribers.
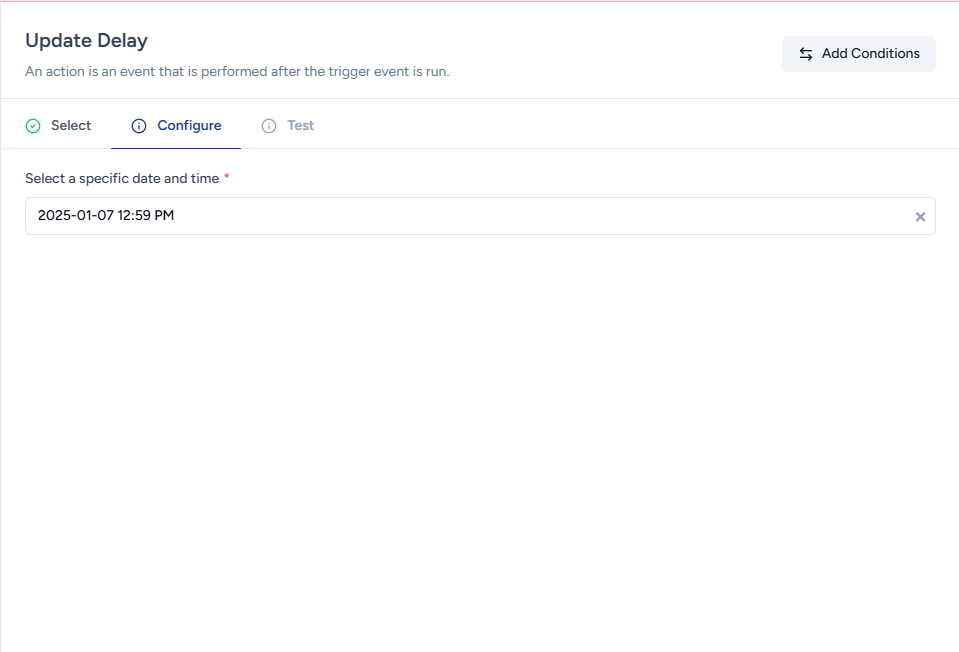
How to Set Up Delay App in Your Workflow?
To set up the delays in workflow, simply follow these steps:
- Go to your OttoKit account.
- Open the workflow where you want to add a delay before the particular action.
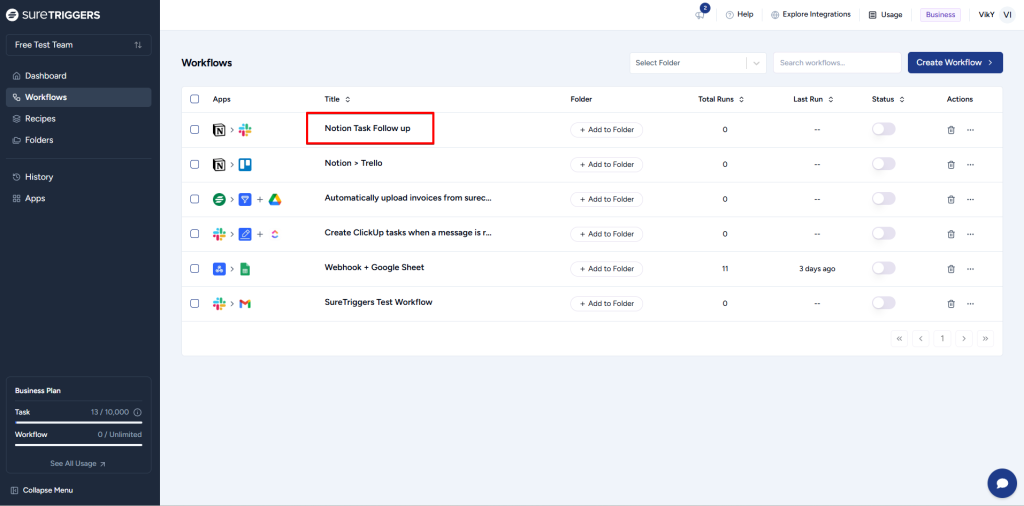
- Click on the plus icon before the step before which you want to add the delay.
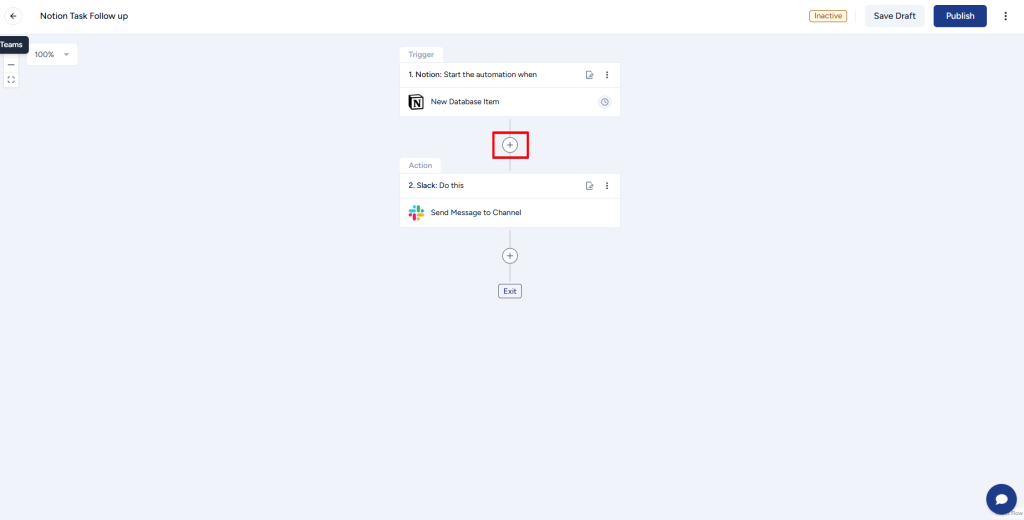
- Select the Delay app.
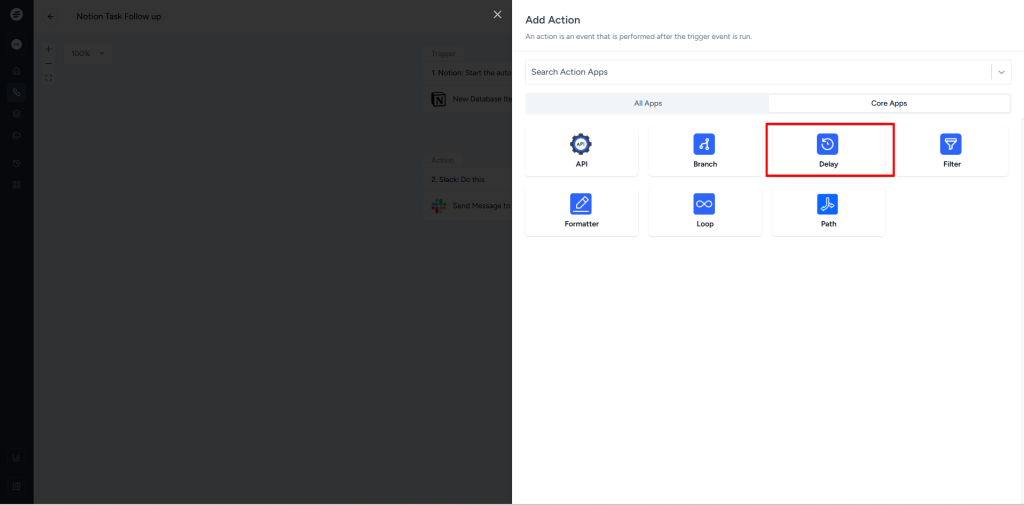
- Select the delay type you want to add and click on the “Continue” button located at the bottom of the flyout.

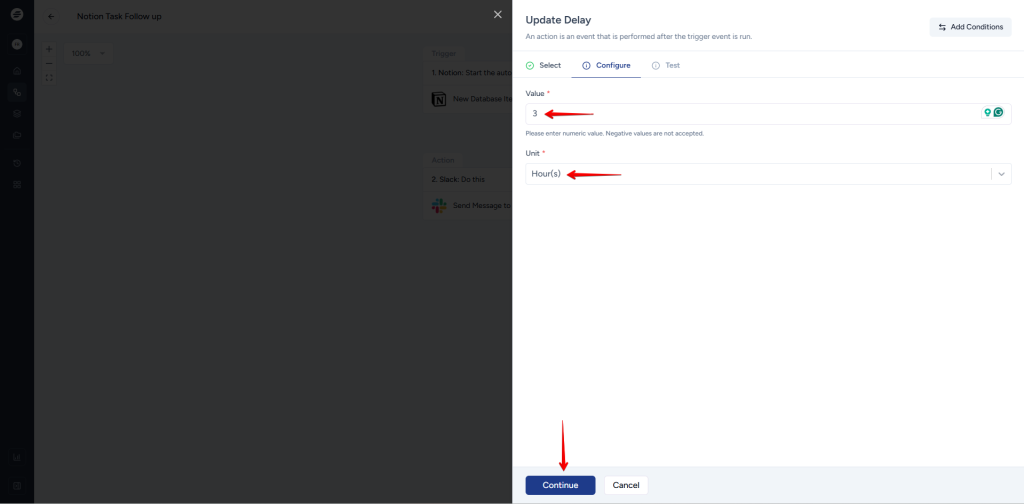
- Set the delay time as per your requirement and click on the “Continue” button located at the bottom of the flyout.
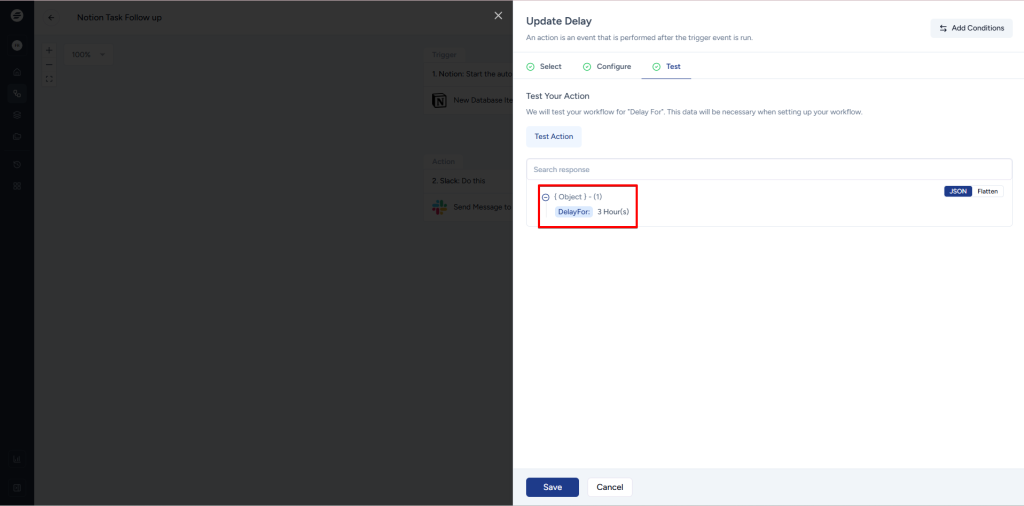
- Click on Test action.
- Save the step.
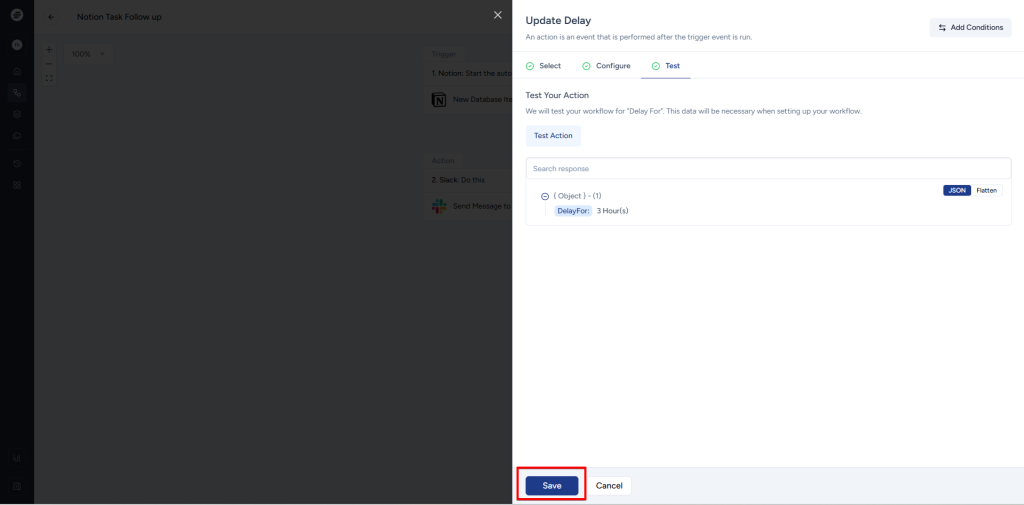
Now, the delay has been added between the step above and the below delay step.
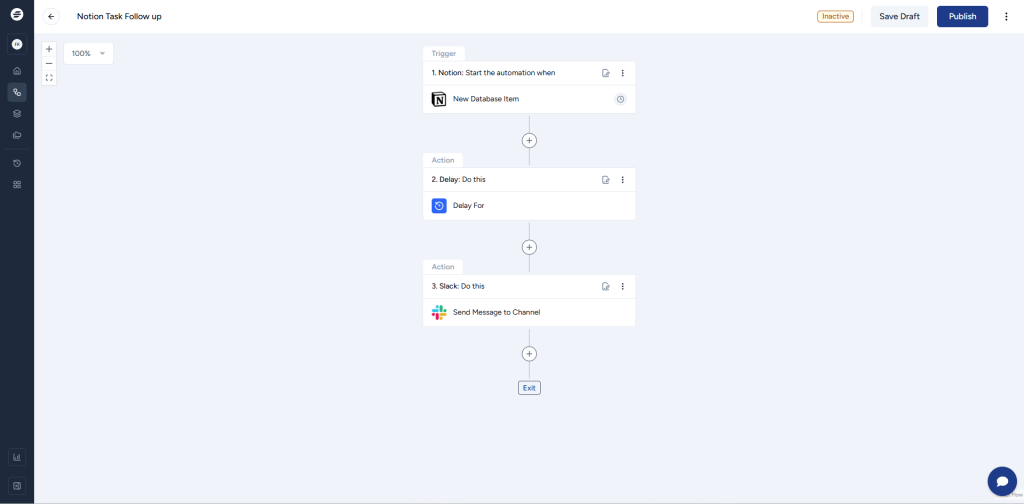
You can follow the same steps to add a delay between any two steps in your workflow. You can add as many as delay steps you want in a workflow.
Note: The above example explains how you can add delay in two steps in an existing workflow. By following the same steps, you can add delay while creating new workflows too.
Hope now you understand everything about the Delay app in OttoKit. But if you still have questions, do not hesitate to reach out to us. We’ll be glad to help!
We don't respond to the article feedback, we use it to improve our support content.