- Prerequisites
- Building an Integration
- Setting Up Authentication
- Setting Up Triggers & Actions
- Publishing Integration
- How To Authenticate Your Application Using The API Key Method
- How to Set-Up the Integration Based on Auth Type Bearer Token
- How To Authenticate Your Application Using OAuth 2.0
- How To Authenticate Your Application Using Basic Auth
- How To Authenticate Your Application Using The JWT Bearer Method
Using Branch App in OttoKit
One of the internal apps in OttoKit is the Branch app. It’s very helpful in creating advanced workflows.
In this article, we’ll take a closer look at what the Branch app is, its use cases, and a step-by-step guide on how to set it up.
What is Branch App?
The Branch app in OttoKit is an action app that helps you route two different action paths based on some criteria.
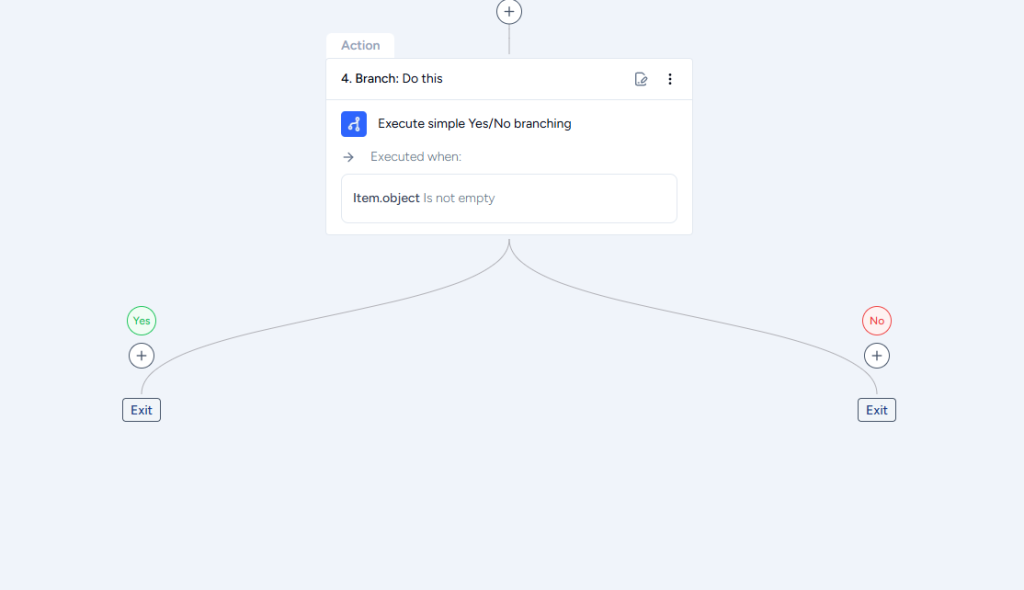
This means that you can create a workflow that will automatically perform different actions depending on a specific condition.
Let’s say you’ve created a workflow to notify your team members on Slack whenever a task is created in your project management tool. With the Branch app in OttoKit, you can take it a step further by automatically assigning the task to a specific team member based on the tag added to the task.
For instance, if the task has a “marketing” tag, you can use the Branch app to notify it in the marketing channel. On the other hand, if the tag is “development,” you can route the task to a different team member who handles development-related tasks.
What are some use cases with Branch apps?
The Branch app can be used in various scenarios to automate your workflows and make your life easier. Here are some examples:
Splitting customer feedback: If you receive customer feedback through various channels (such as email, social media, or website forms), you can use the Branch app to split feedback based on the type of feedback. For example, you might route complaints to a customer service team, while routing feature requests to a product team.
Handling different shipping options: If you run an e-commerce store, you can use the Branch app to handle different shipping options. For example, you might offer free shipping for orders over a certain amount, and charge for shipping for orders below that amount. You can use the Branch app to split orders into different paths based on whether they qualify for free shipping or not.
Routing employee requests: If you manage a team of employees, you can use the Branch app to route different types of employee requests to the appropriate team member. For example, you might route time-off requests to a manager received via email, while routing IT support requests to a help desk.
How to Set Up Branch App?
Let’s walk through an example of how to set up the Branch app in OttoKit.
Imagine you’re running a software company and you’re looking for ways to increase efficiency across teams. To help with this, you’re using a project management tool (in our example, we’ll use ClickUp) to keep track of all the tasks required to build the software.
Here’s what you want to achieve: Whenever a task with the tag “Design” is created in your project management tool, you want to send a message to the designers’ Slack channel. And when a task is created without the tag or any other tag, you want to send a message to the developers’ Slack channel.
Now, we’ll set up a single workflow in OttoKit and route the actions down two different paths, depending on the criteria. The Branch app in OttoKit makes this easy to do.
To set up the branch app for this workflow, follow the steps below:
- Go to your OttoKit account.
- Create a new workflow.
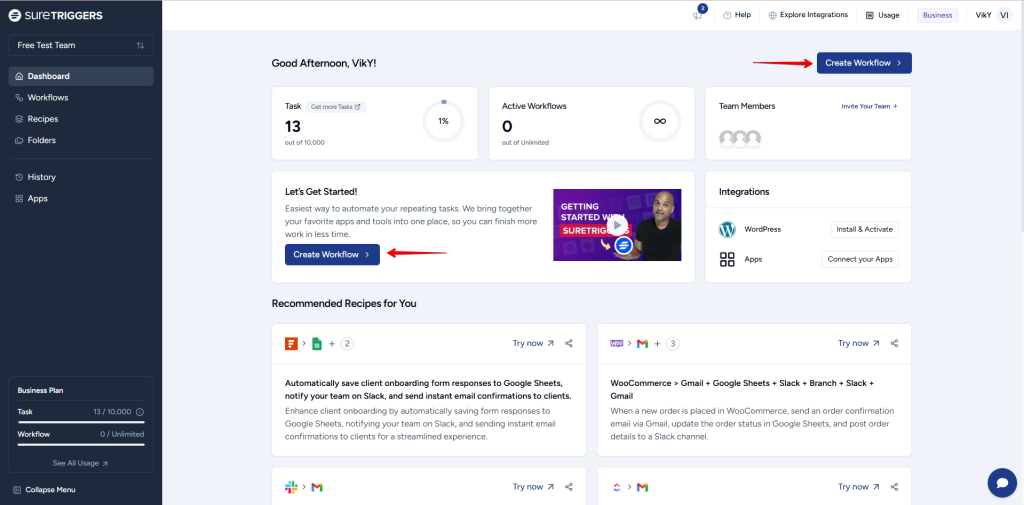
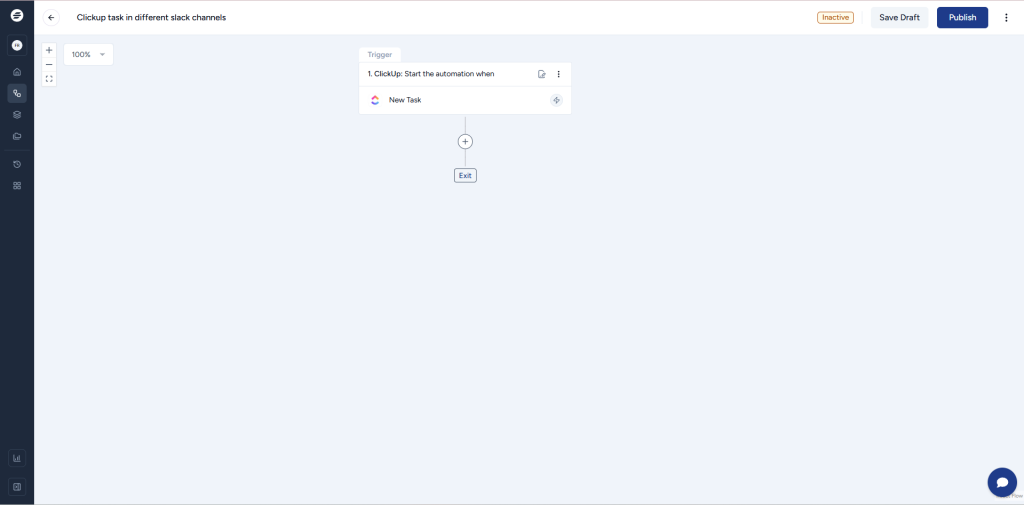
- Set up the trigger for the Task Created event in ClickUp. Make sure your ClickUp tasks have a field of Tag. It will be fetched by OttoKit and will be used as criteria to route different actions.
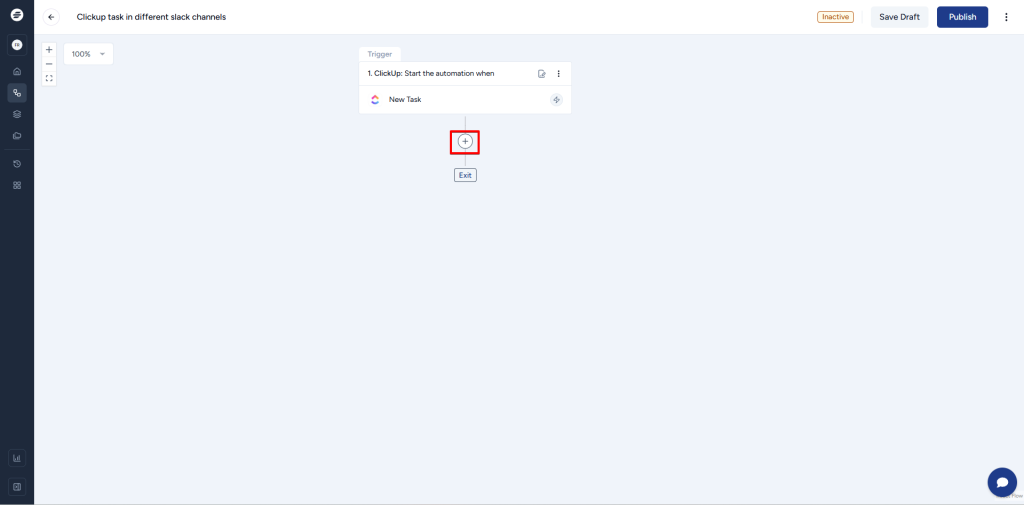
- Add a new Action Step by clicking on the plus icon.
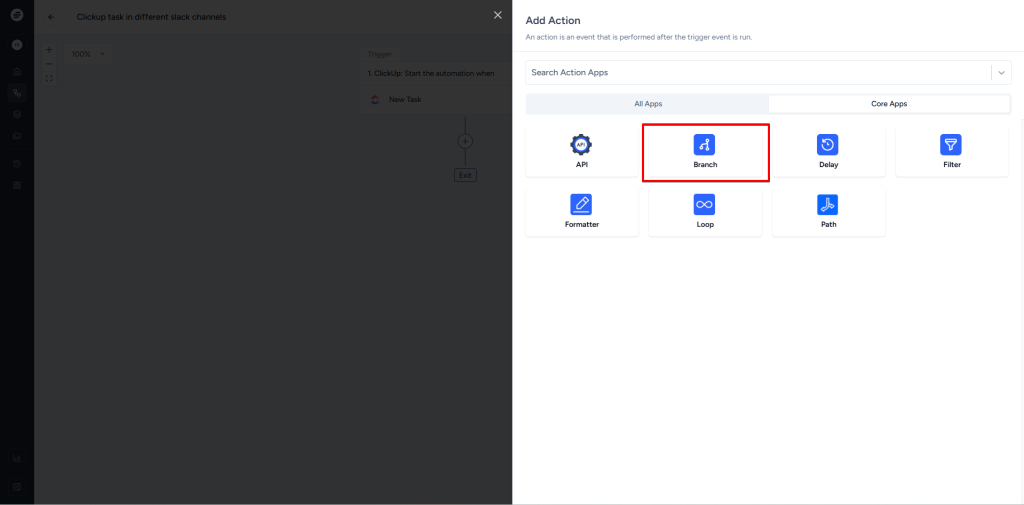
- Select the Branch app.
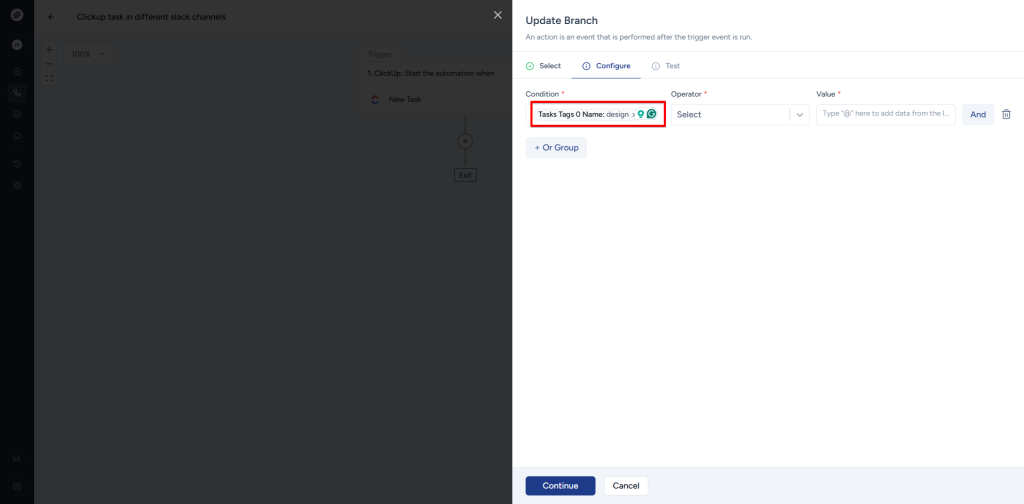
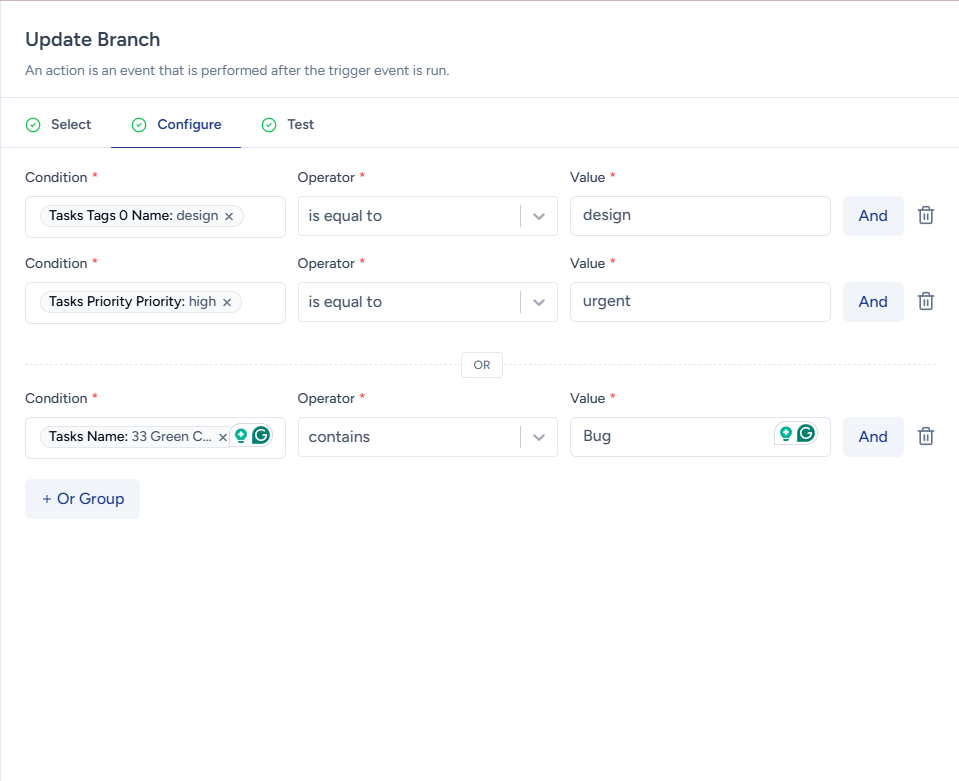
- Provide the criteria as per the need for conditions. In this example, it’s the tag.
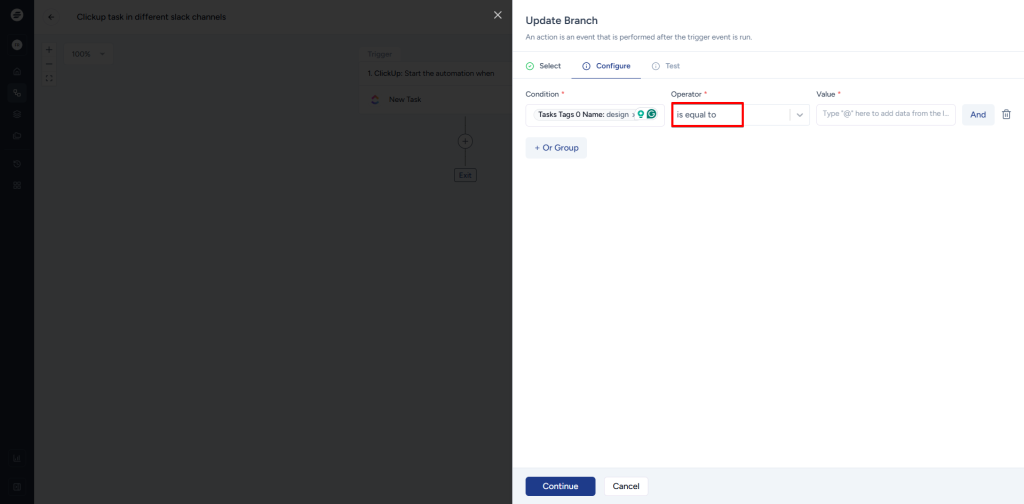
- Select the operator as per the need.
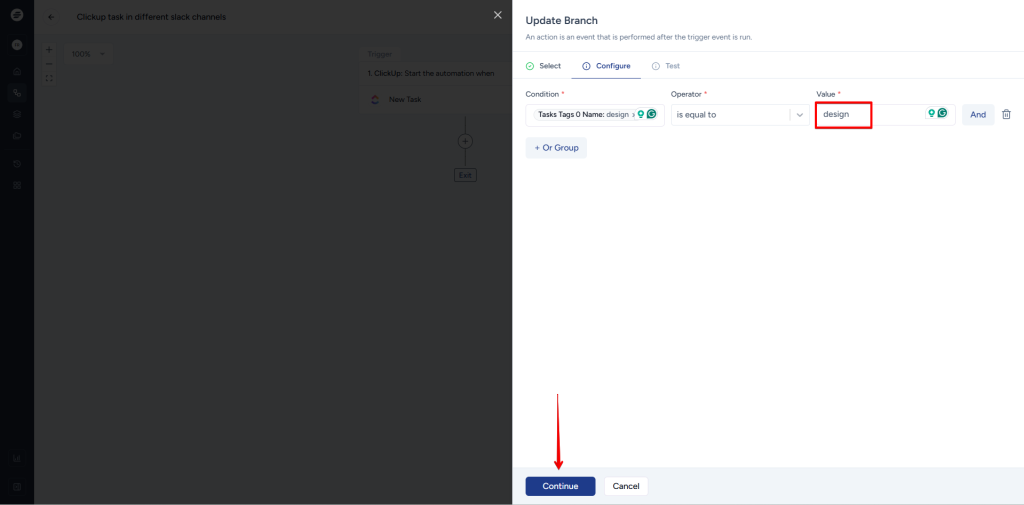
- Type the value in the last field manually for this condition and click on the “Continue” button located at the bottom of the flyout.
- Click on the Test Condition button.
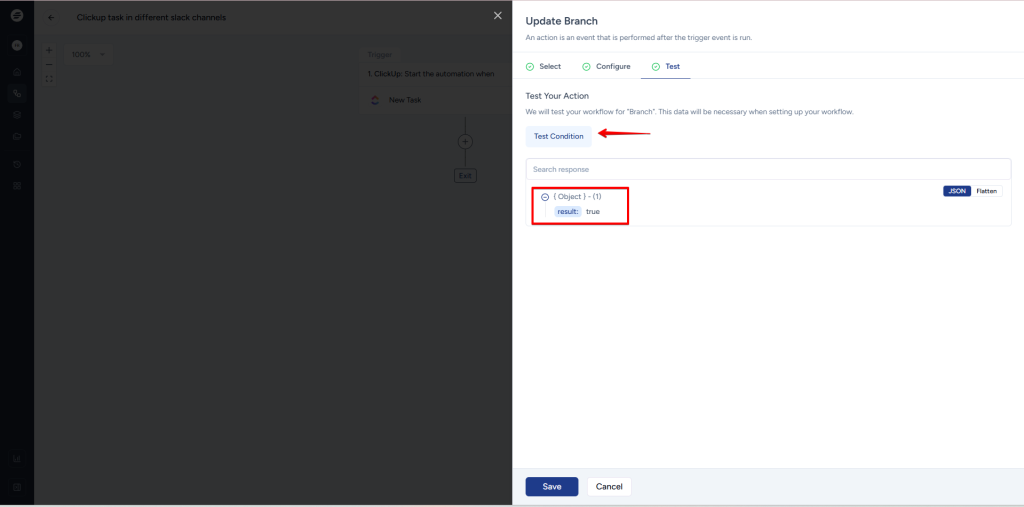
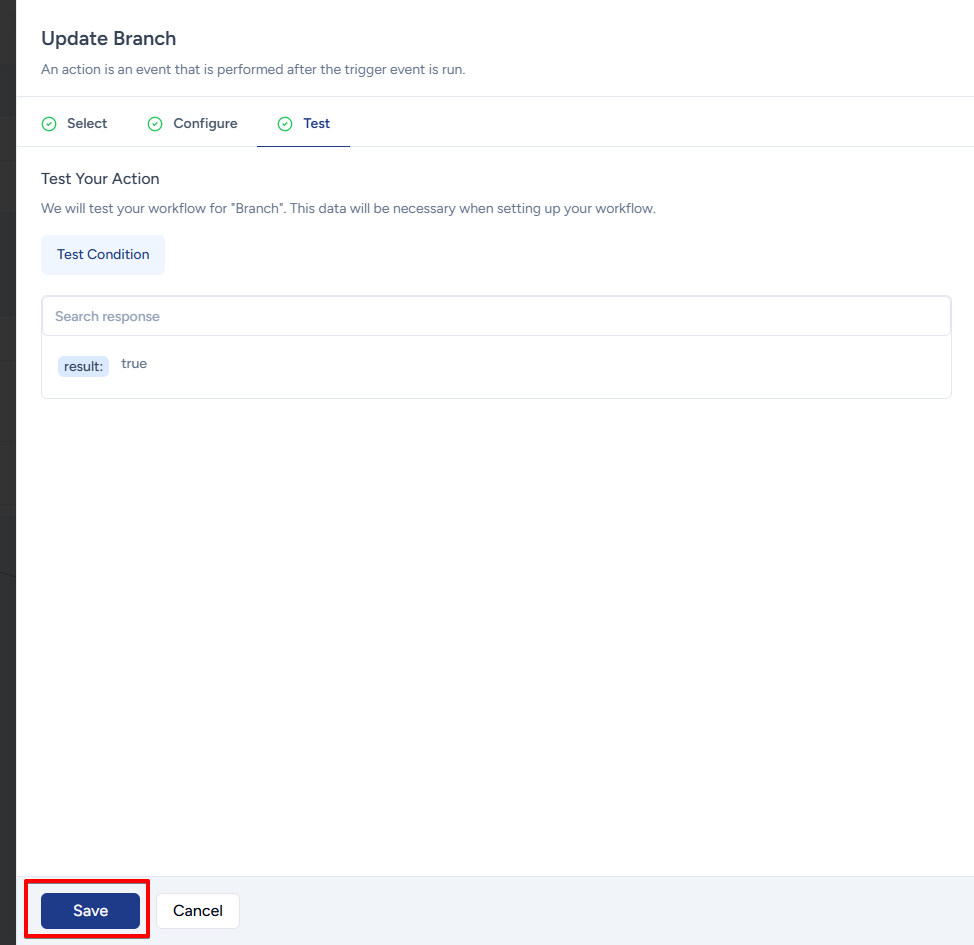
- Save this Branch step.
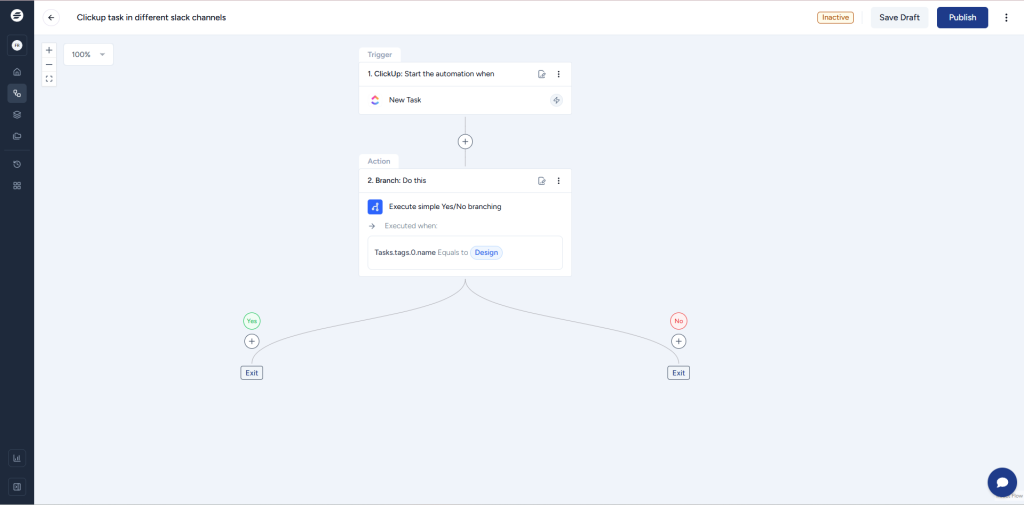
Now, your workflow will be routed to different paths.
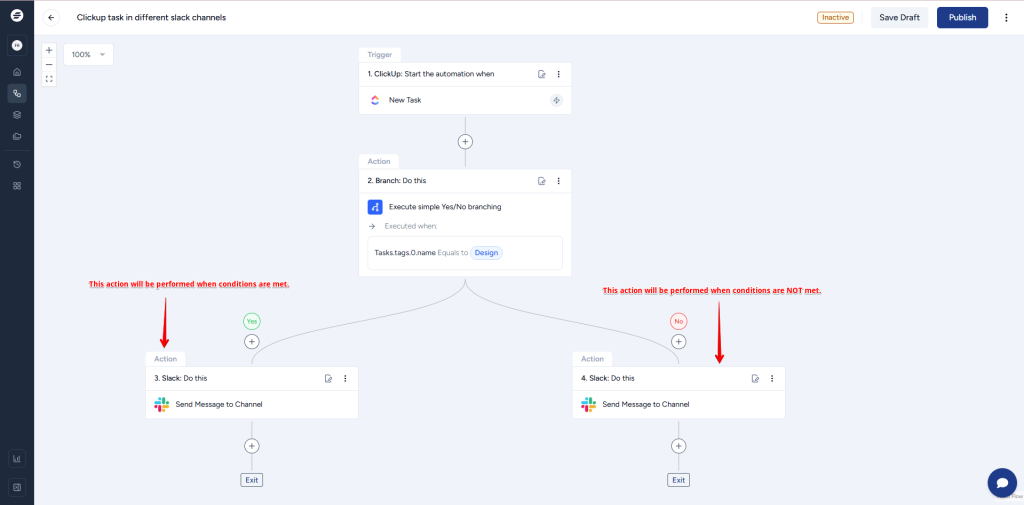
- Set up the next action steps for both conditions. In our example, we’ll set up two actions to send messages in different Slack channels based on whether the condition is met or not.
- Publish the workflow.
That’s it! Now, whenever a new task is created in ClickUp, the workflow will automatically send the appropriate send message to the right channel based on the tags added to the task.
Note: you can add more than one condition while setting up the criteria in the branch app based on your needs.
In summary, the Branch app in OttoKit is a valuable tool for creating advanced workflows. Try it out for yourself and see the benefits of using the Branch app in OttoKit.
And in case you get stuck, we’re here to help!
We don't respond to the article feedback, we use it to improve our support content.