
- Prerequisites
- Building an Integration
- Setting Up Authentication
- Setting Up Triggers & Actions
- Publishing Integration
- How To Authenticate Your Application Using The API Key Method
- How to Set-Up the Integration Based on Auth Type Bearer Token
- How To Authenticate Your Application Using OAuth 2.0
- How To Authenticate Your Application Using Basic Auth
- How To Authenticate Your Application Using The JWT Bearer Method
- How to Set-Up the Integration Based on Auth Type Session Auth
- How To Authenticate Your Application Using Custom Auth
How To Authenticate Your Application Using Custom Auth
This guide provides a comprehensive, step-by-step process to set up Custom Authentication in the App Builder.
When setting up authentication in SureTriggers App Builder, you are building a screen where users will enter their connection details (like custom tokens or other unique identifiers) to connect their app with SureTriggers.

Let’s get started!
Why Custom Authentication Is Required
Custom authentication involves using a user-defined method to authenticate API requests. This can involve proprietary protocols, such as token-based authentication with custom headers or unique data structures that you define for your application.
Custom authentication is required when none of the standard authentication methods such as API Key, OAuth, or more, fit the needs of an application.
Here are some cases where you might need custom authentication:
- Proprietary authentication protocols: Some applications may use proprietary methods for verifying users, such as unique token generation or session-based credentials that don’t follow the standard API key or OAuth workflows.
- Legacy systems: Older applications or APIs built before the widespread adoption of standard methods might use outdated or non-standard ways of authentication. Custom authentication gives developers the flexibility to integrate these systems.
- Complex authorization logic: If the app requires multi-step verification or dynamic tokens that change based on user behavior, environment, or request context, a custom solution allows for more flexibility in how credentials are processed and validated.
- Multi-credential use cases: Developers might need users to provide multiple pieces of information (e.g., a token, User ID, and a password) for authentication. Custom authentication allows you to combine these fields into one setup.
- Enhanced security: Some developers may require custom authentication to implement additional security measures, like encrypted tokens, IP whitelisting, or device-based authentication, which wouldn’t fit into simpler, pre-defined authentication methods.
In these cases, custom authentication provides the flexibility to align with the unique requirements of the app’s security and data handling protocols.
Note: To understand which authentication method your app requires, read your app’s API documentation.
Authenticating Your App With Custom Authentication
Here’s how you can authenticate with the App Builder using the API Key method:
- Login to your App Builder dashboard.
- Here, click on the “Build New App” button. Fill in all the details of your app in the flyout, and then click on the “Create” button to create the app. Check out this article to learn more.
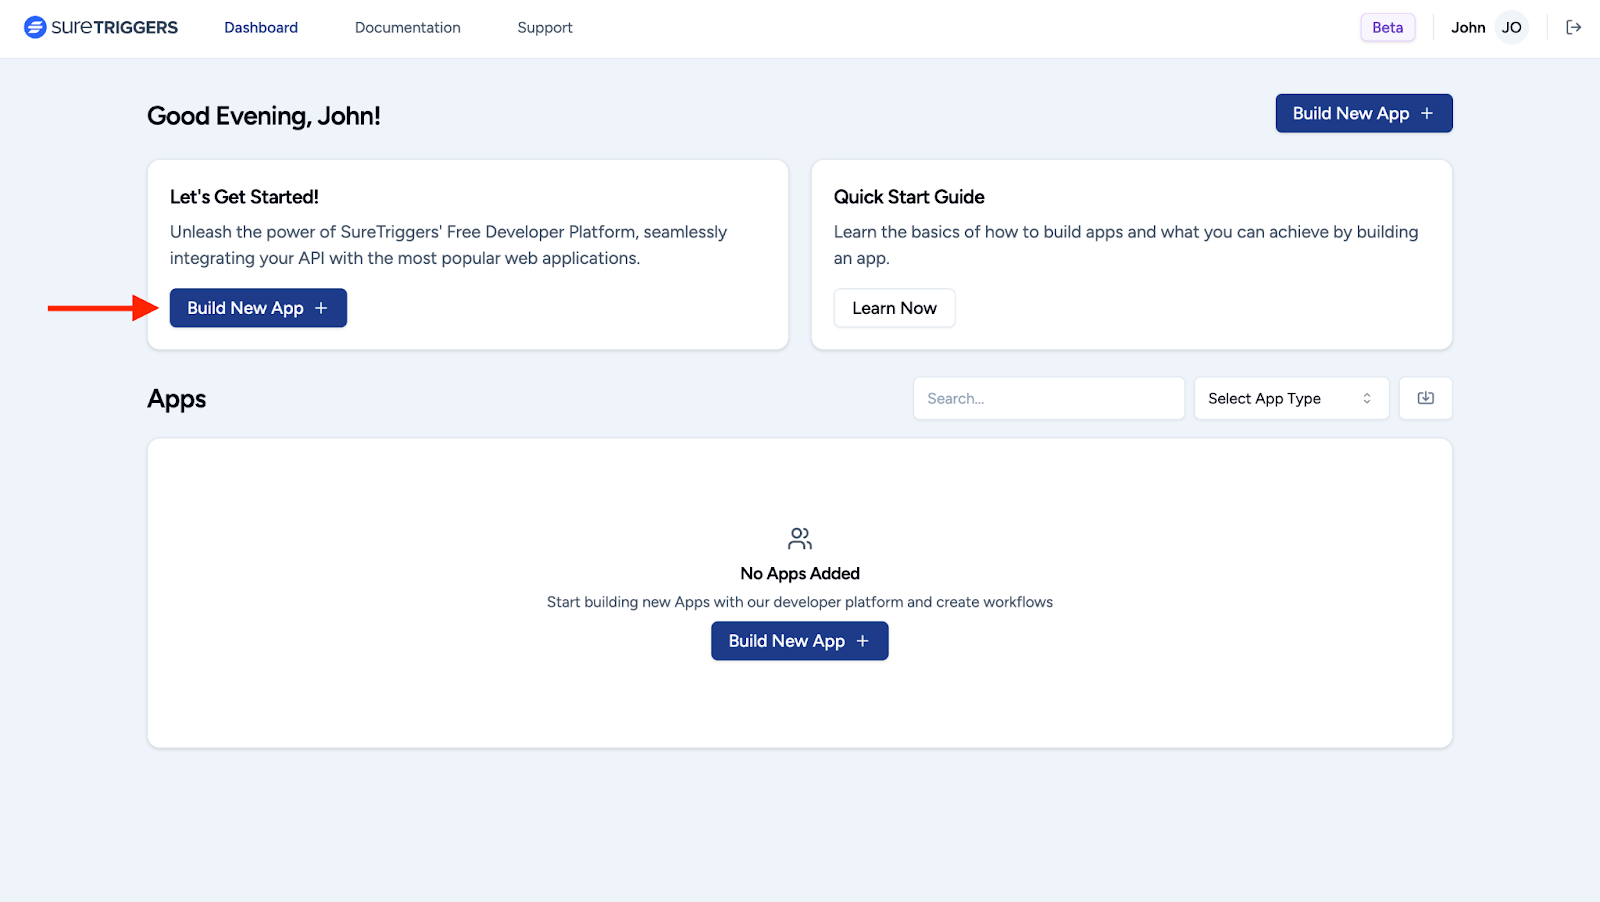
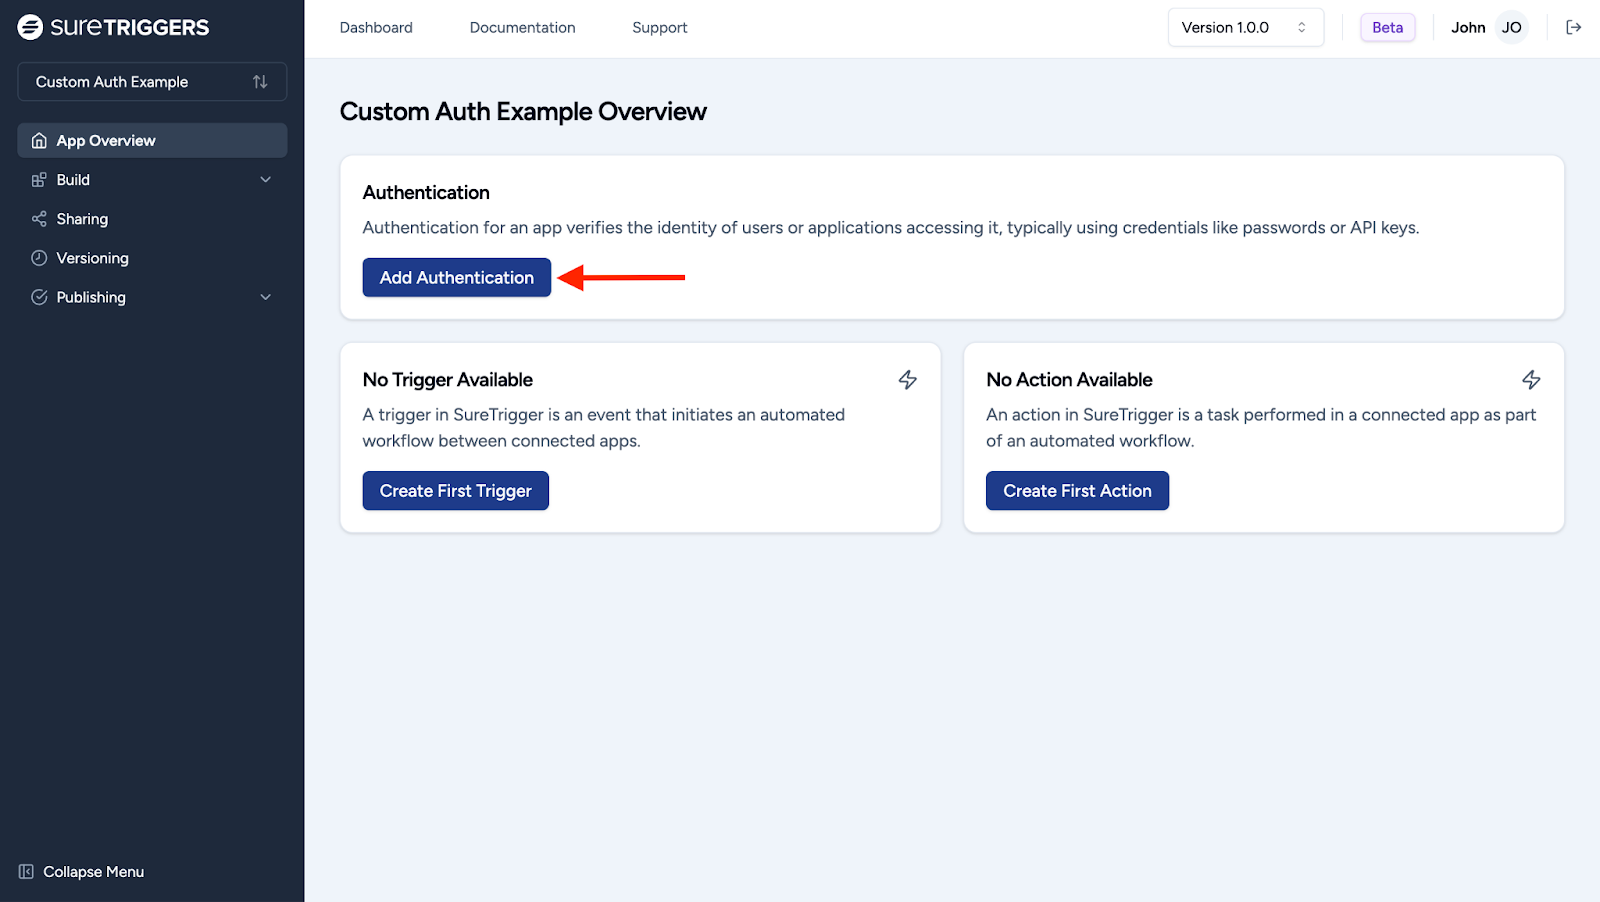
- You’ll be automatically redirected to the “App Overview” page. Here, click the “Add Authentication” button to proceed.
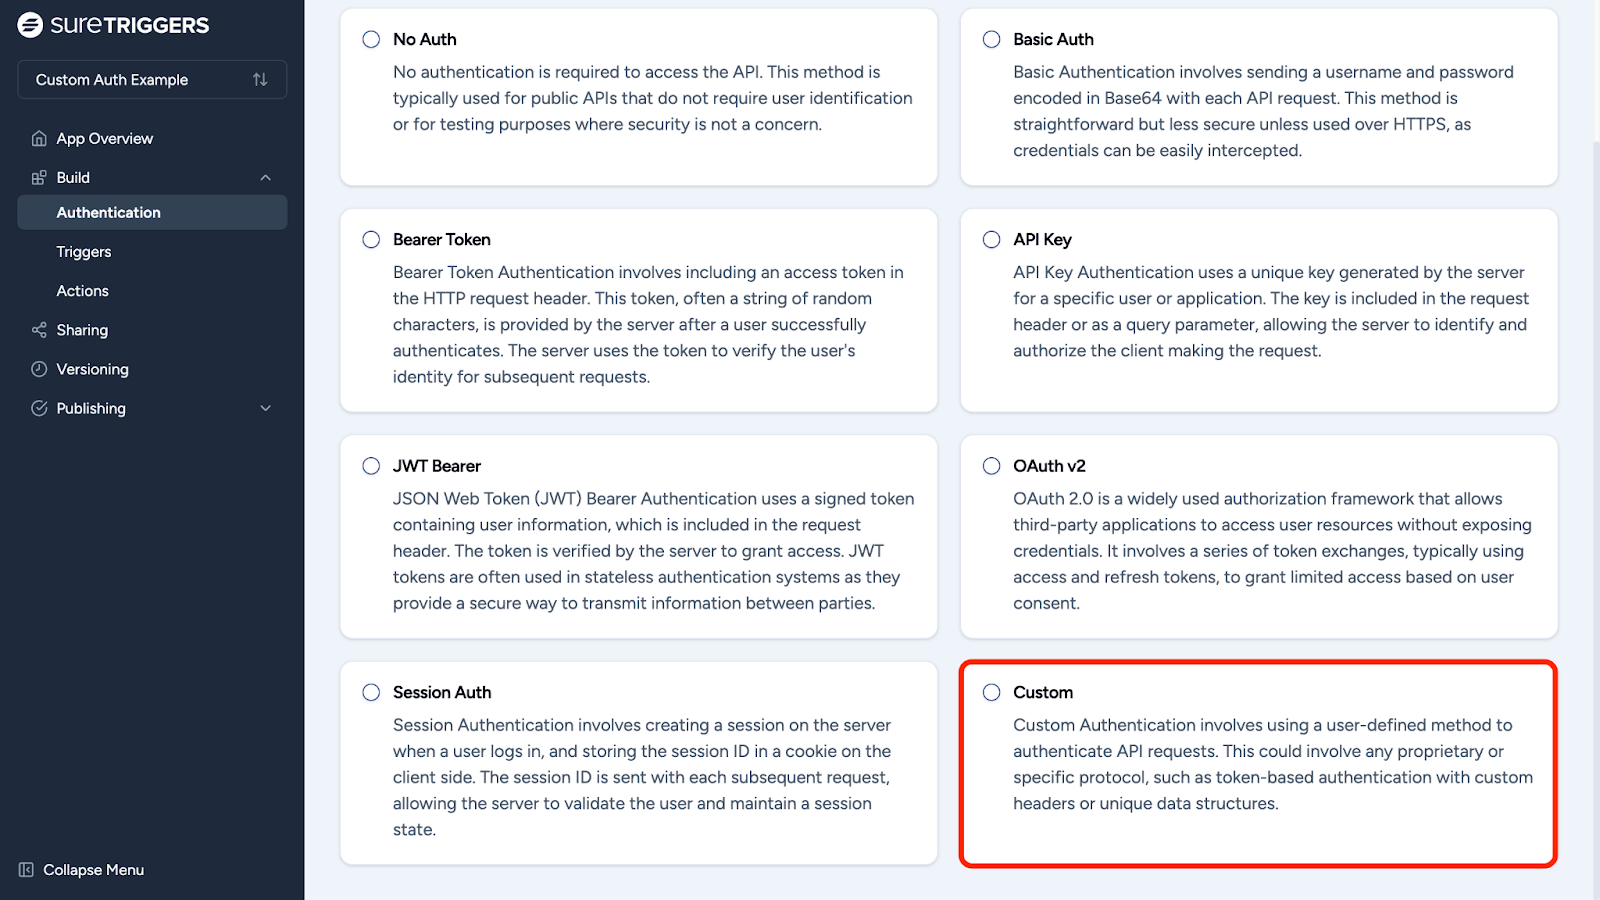
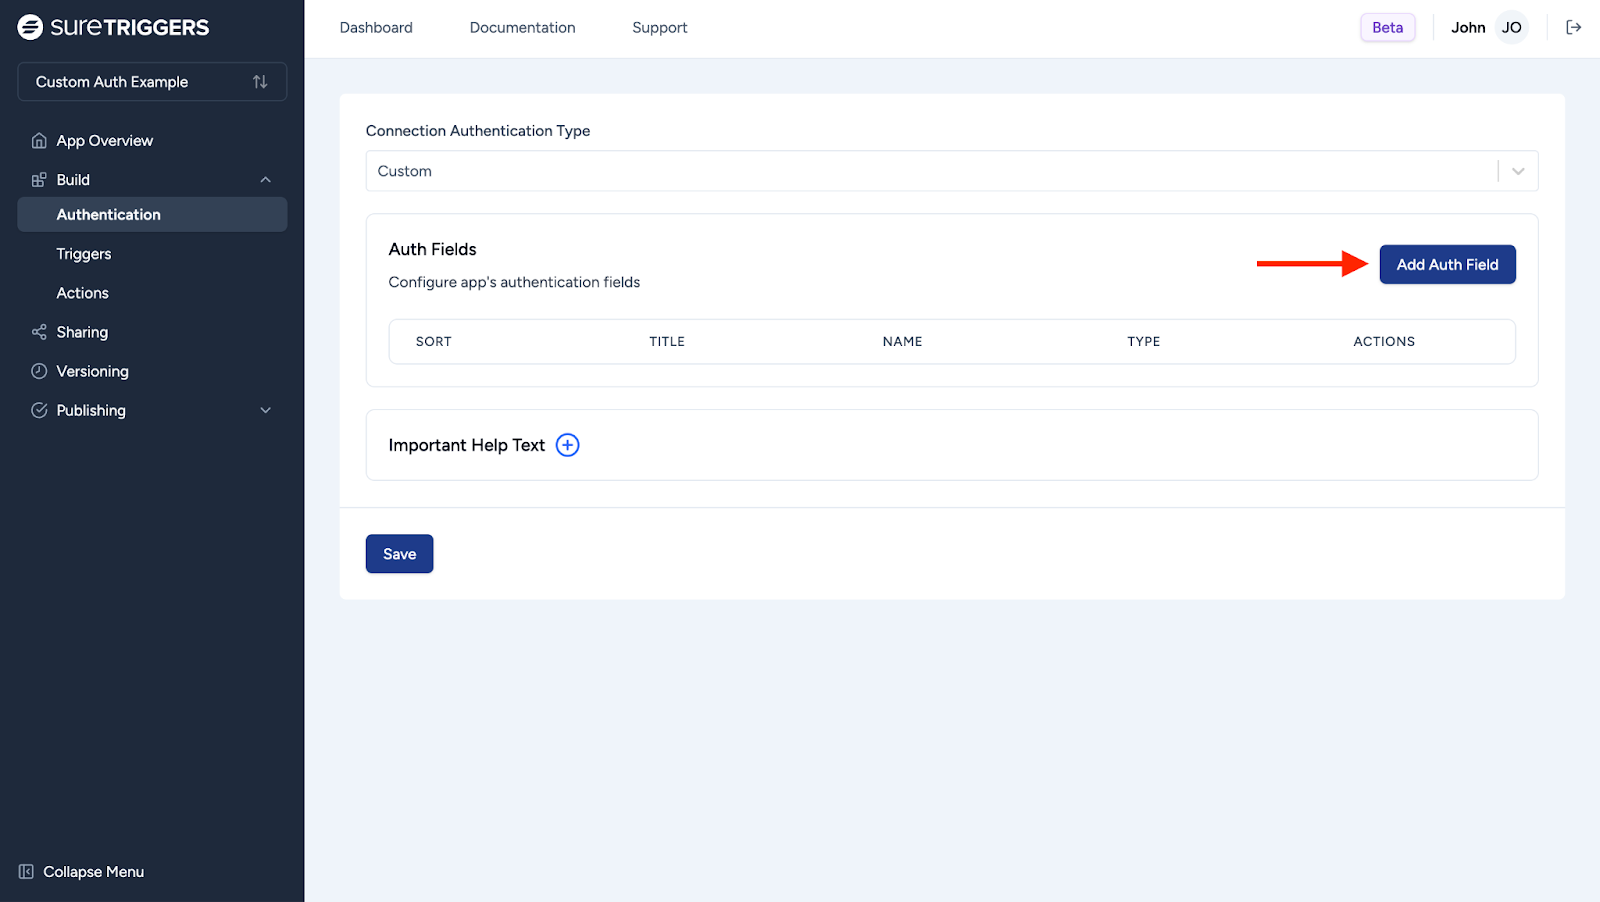
- On the Authentication page, select “Custom”.
Now, you need to add input fields for the connection. This is required for SureTriggers users to pass the required credentials while creating the connection between your application and the SureTriggers platform.
With custom authentication, you can define your own fields for users to input connection details.
Only then users will be able to add your app as a part of their automation workflows. Here are some example input fields for apps requiring an API key:
To do this, click the “Add Auth Field” button. Here, you can add multiple fields required for users to authenticate with your app.
On this flyout, fill in all required inputs as follows:
- Provide a user-friendly name for each field, such as “API Token” or “Validation Key,” to help users understand what information is required. This will change according to your app’s API docs.
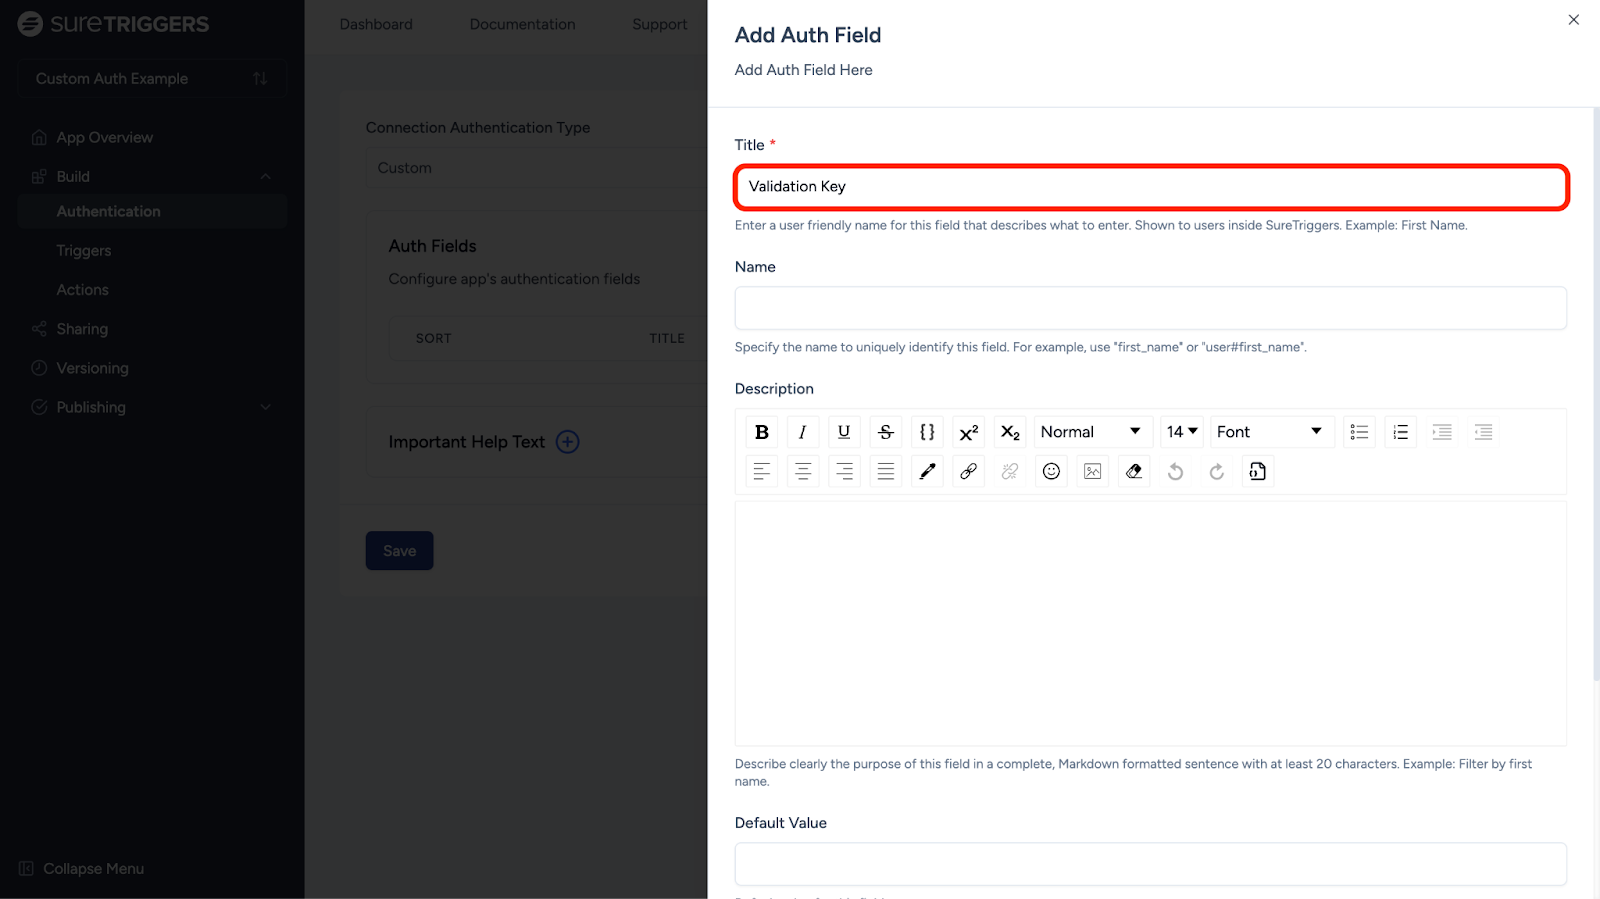
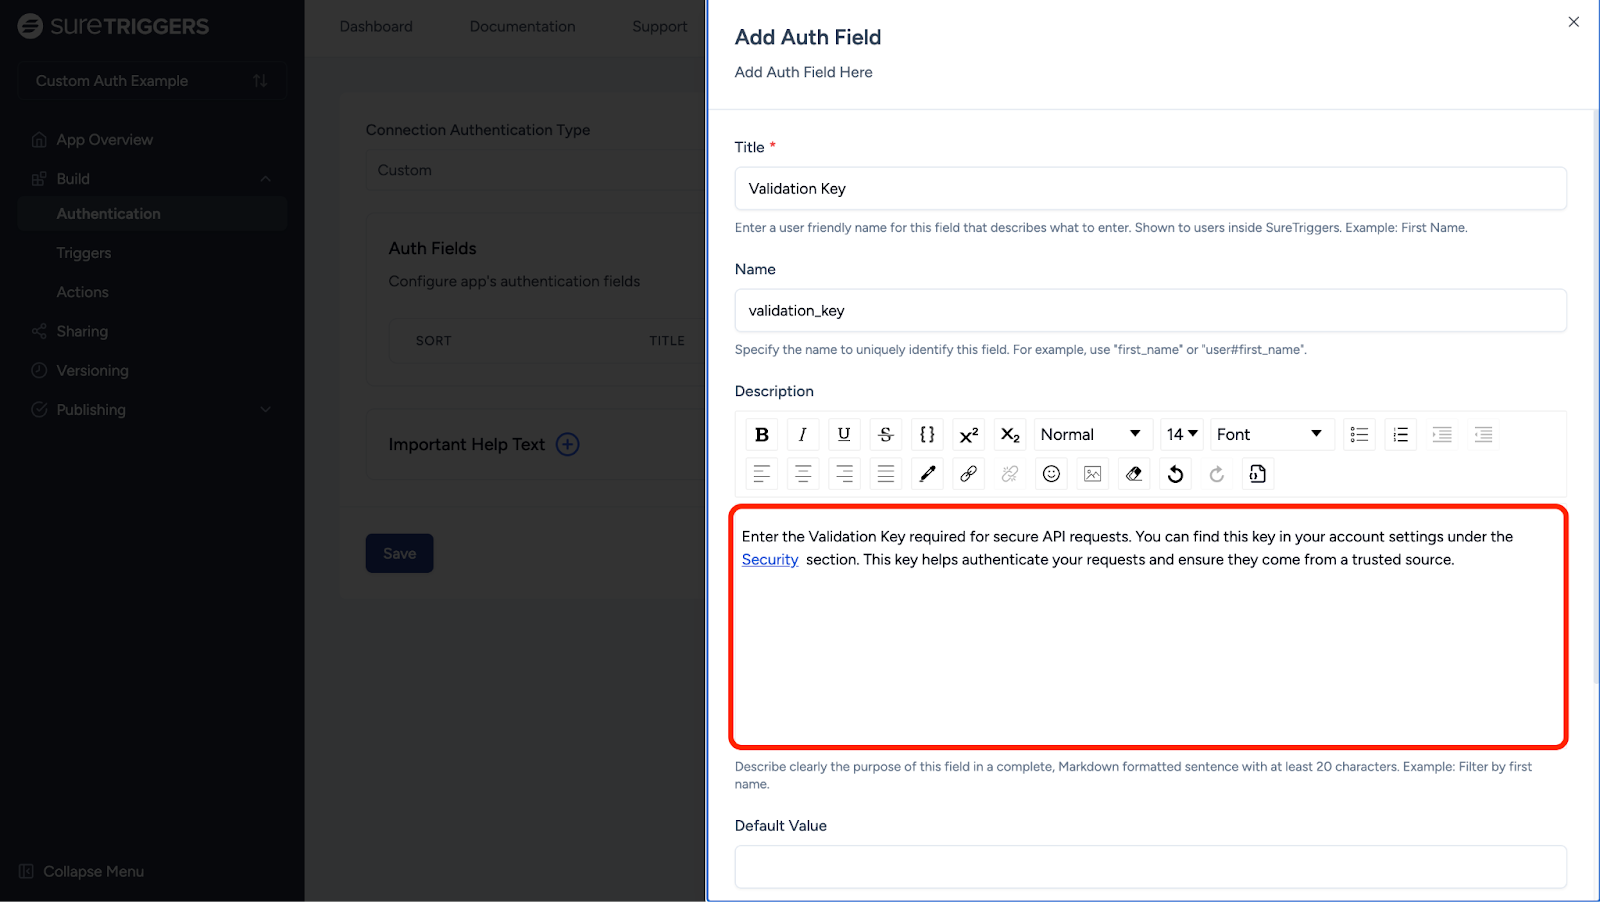
- In the “Name” field, assign an internal label, such as “api_token” or “validation_key,” to identify the data being sent.
Later, when users set up automation, SureTriggers can use this label to make sure the right information is sent at the right time, without needing to set it up again.
Note: You’ll need to map this label when creating actions and triggers to ensure the correct data is used in your workflows.

If you leave this field blank, a unique key will be automatically assigned.
- In the “Description” field, explain where users can find these details in your app or platform settings.
- Mark the field as required if it’s essential for the connection. You can do this by checking the following box.
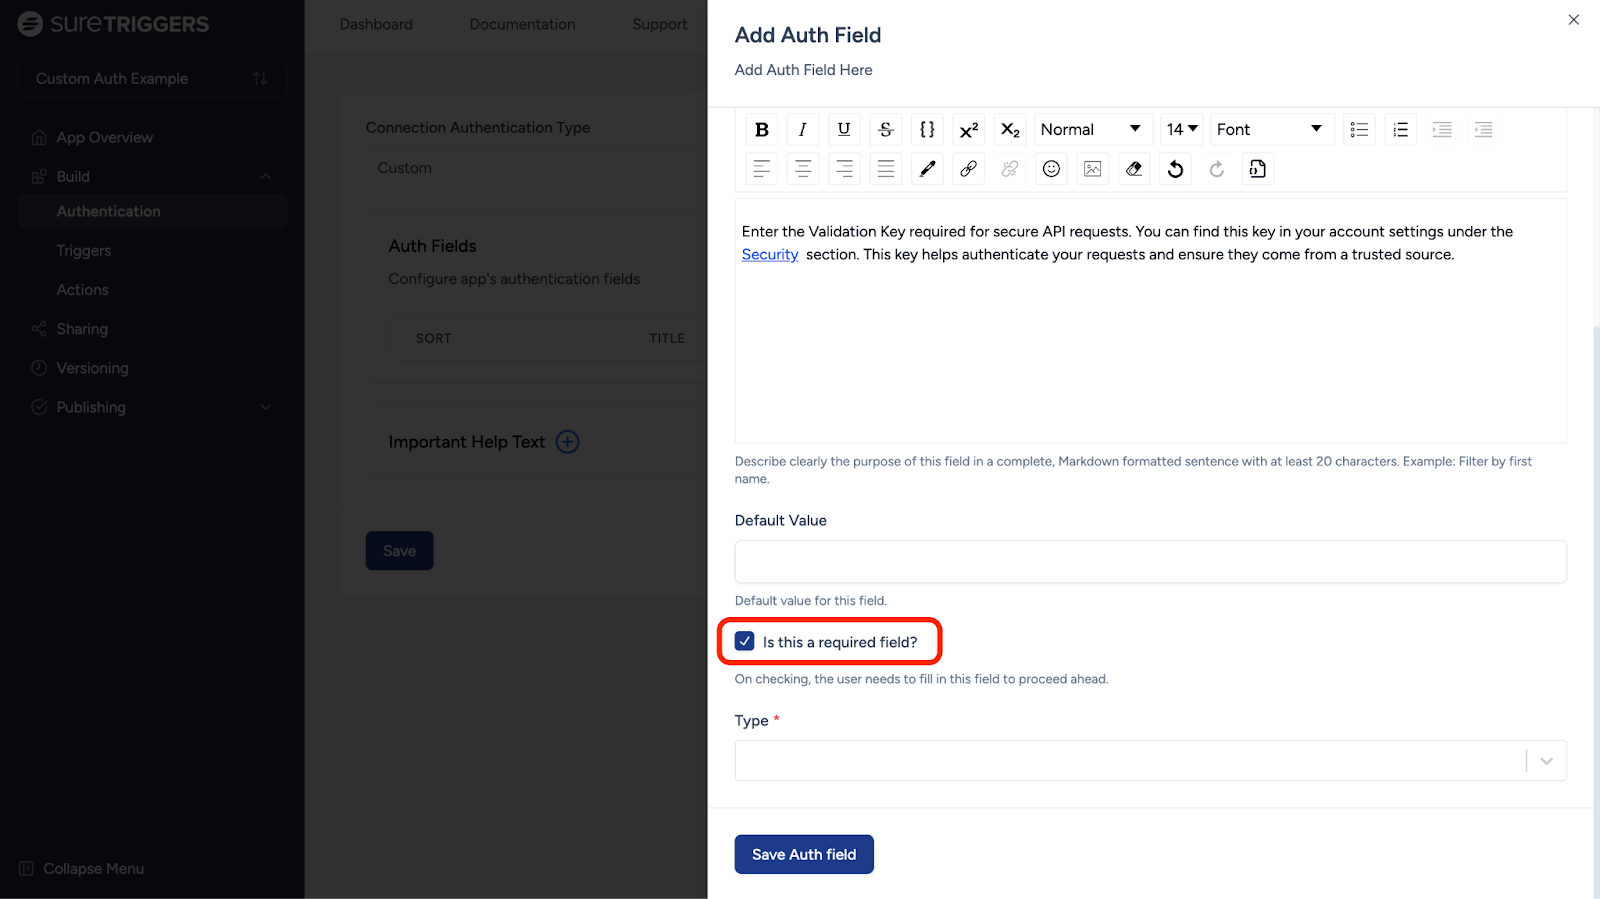
- It’s a good practice to select “Password” for sensitive fields like tokens or secret keys. This ensures that the input is hidden for security.
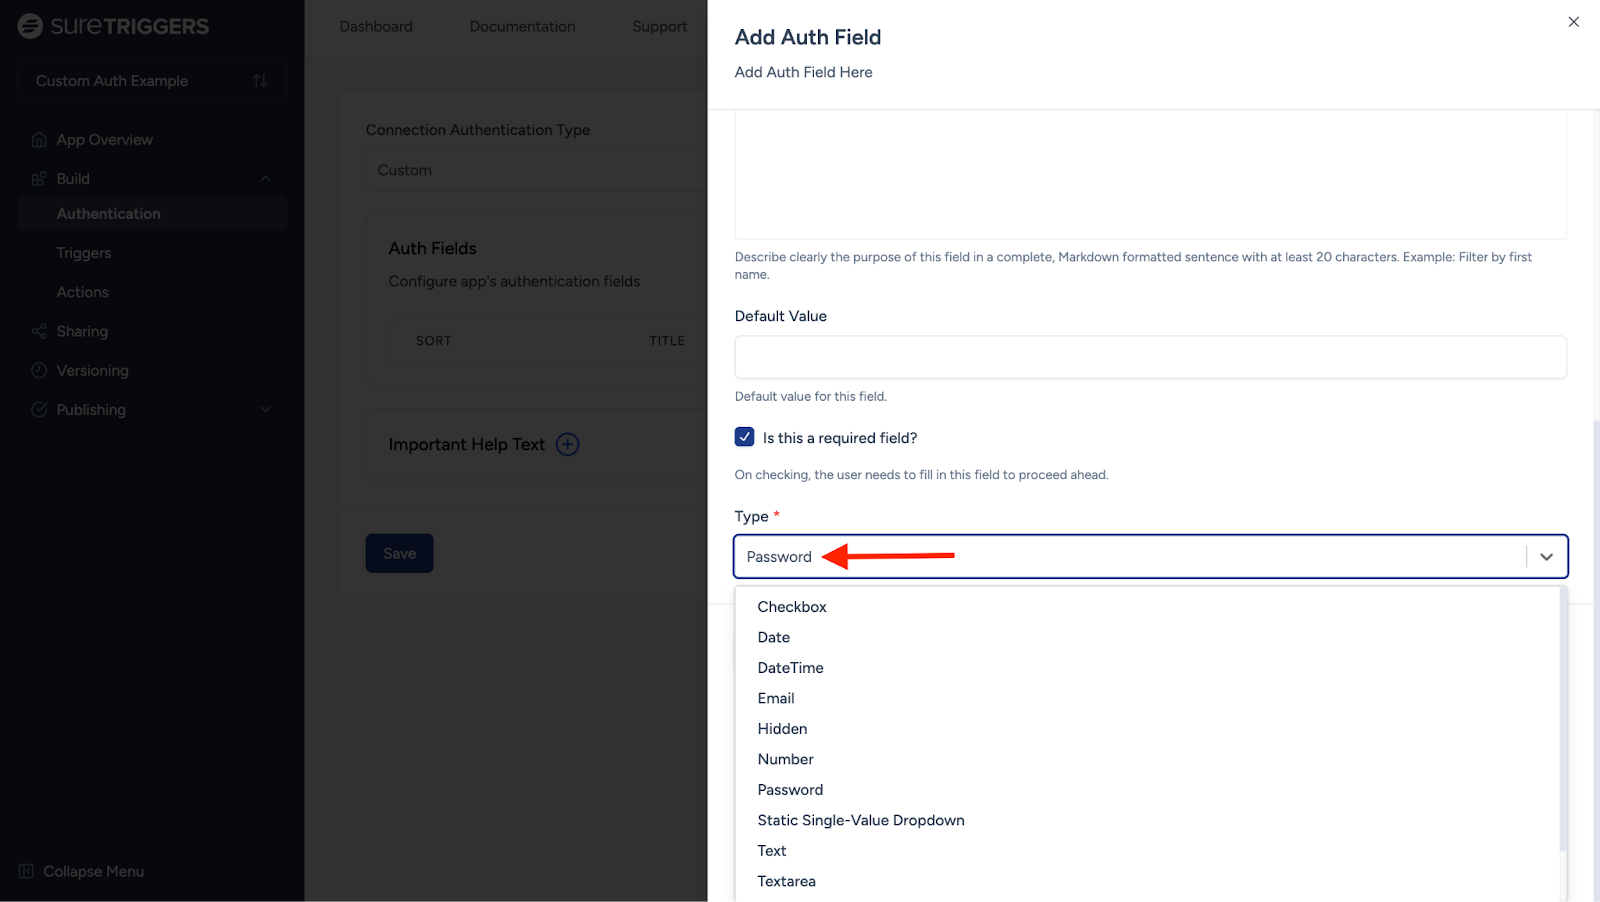
Finally, click the “Save Auth Field” button to save your authentication settings. If your app needs more authentication fields, click the button again and add the additional information for each field.
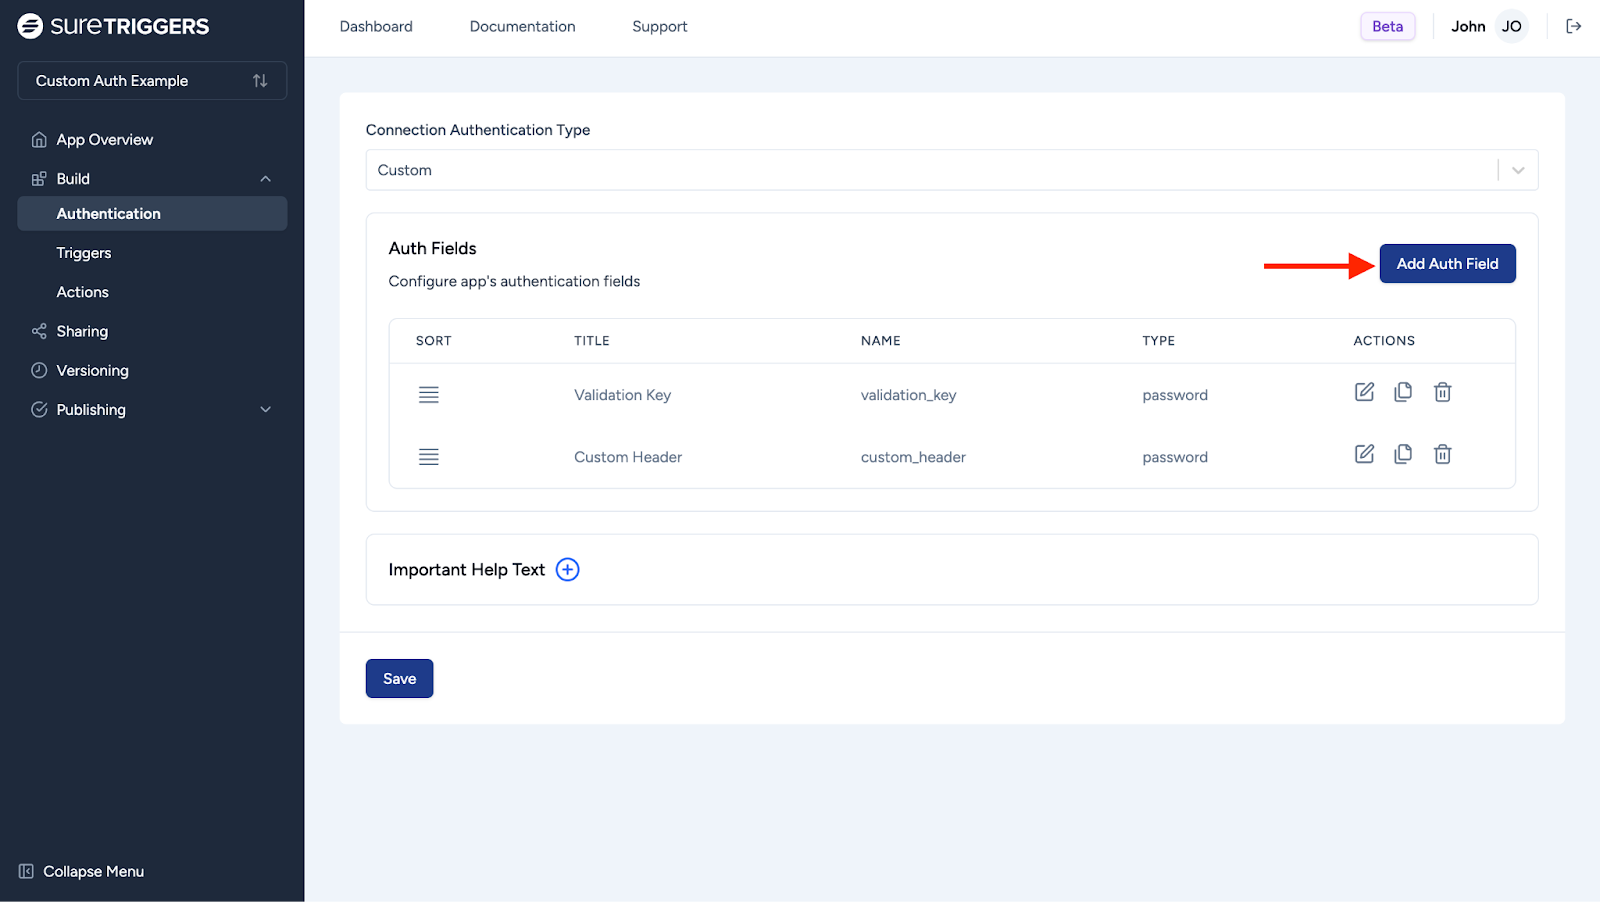
You can click on the “Save” button at the bottom to save your authentication.
That’s all! You can now start setting up actions and triggers for your app.
And if you have any questions, feel free to contact us. We’re always here to help!
We don't respond to the article feedback, we use it to improve our support content.