- Prerequisites
- Building an Integration
- Setting Up Authentication
- Setting Up Triggers & Actions
- Publishing Integration
- How To Authenticate Your Application Using The API Key Method
- How to Set-Up the Integration Based on Auth Type Bearer Token
- How To Authenticate Your Application Using OAuth 2.0
- How To Authenticate Your Application Using Basic Auth
- How To Authenticate Your Application Using The JWT Bearer Method
- How to Set-Up the Integration Based on Auth Type Session Auth
- How To Authenticate Your Application Using Custom Auth
Setting Up Authentication
In this article, we’ll cover the initial steps to build your integration after you’ve filled out a form providing basic details like name, logo, tagline, etc.
Next, we’ll set up some authentication rules for your integration.
You’ll learn what authentication is and how to set it up for your integration.
What is Authentication?
Authentication is the process of verifying the identity of a user or application that wants to connect with OttoKit.
This ensures a secure data transfer between OttoKit and the app account in your integration.
Once you set up the authentication process for your app, your users can use any of its triggers or actions without needing to authenticate multiple times.
Types of Authentication Methods
Different authentication methods are used depending on various apps and web services. OttoKit can connect with your app using any of the authentication methods.
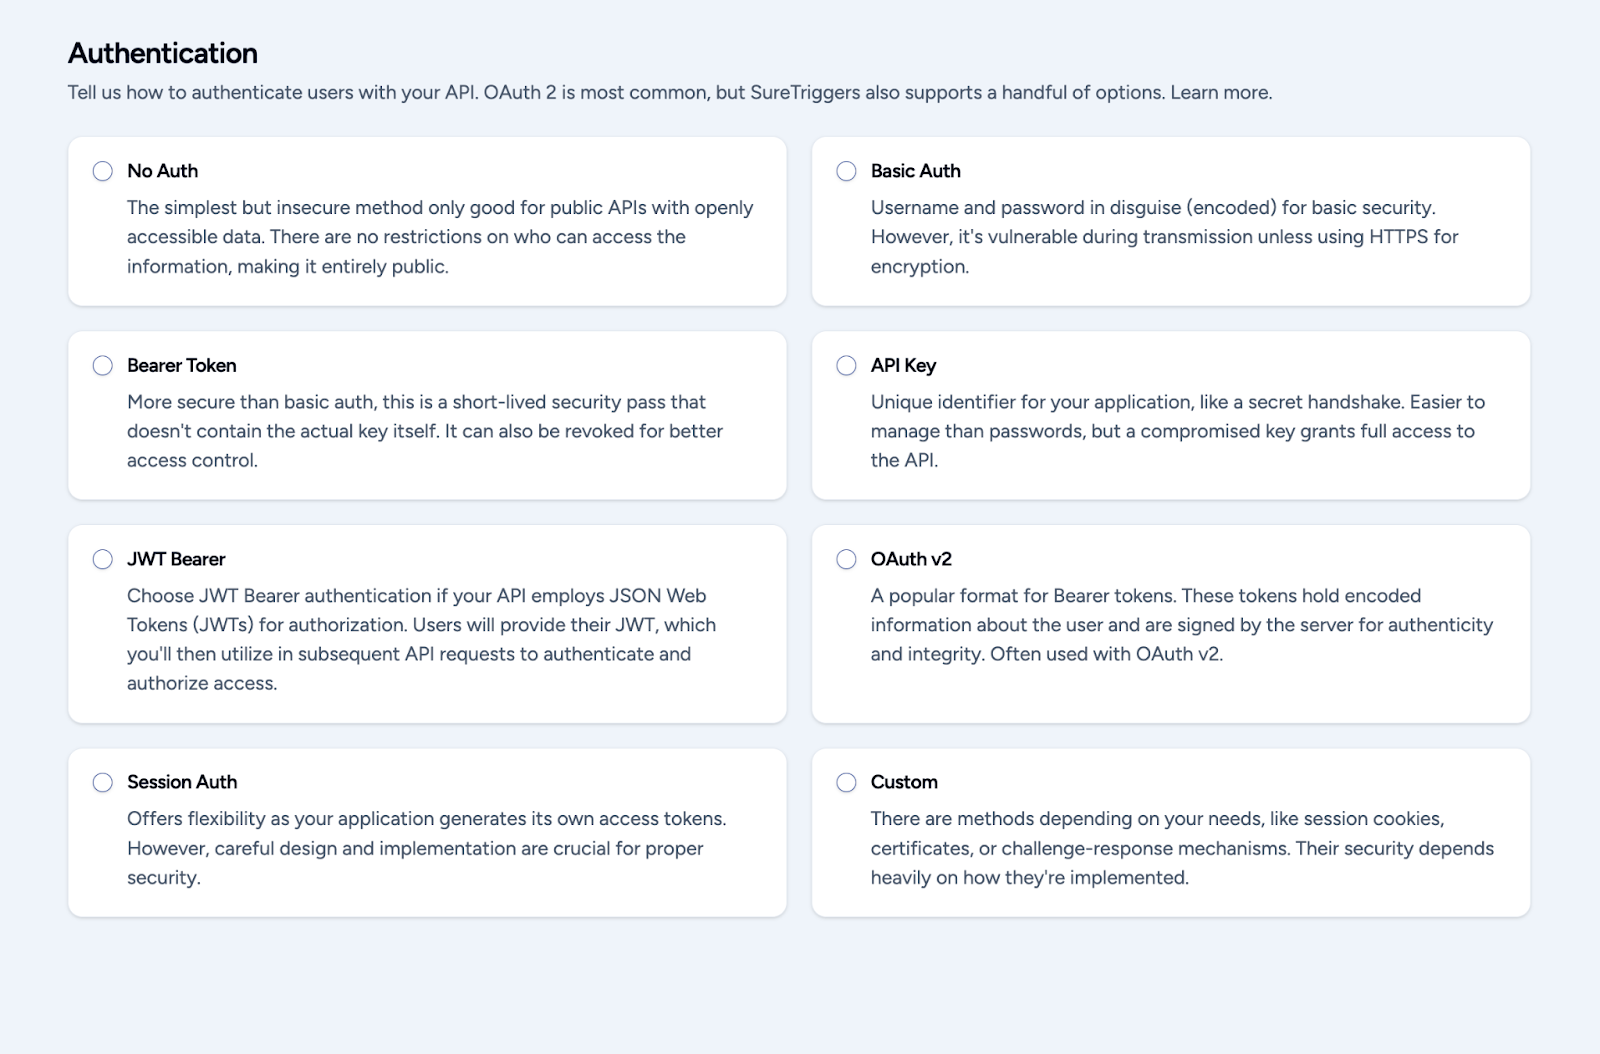
Here are the authentication methods supported by App Builder:
- No Auth
- Basic Auth
- Bearer Token
- API Key
- JWT Bearer
- OAuth v2
- Session Auth
- Custom
You can check the authentication method required to integrate your app by checking the API documentation of the app you’re building.
Based on the API documentation provided by the application owner/developer, you can use any of the above methods to authenticate your app.
Process of Setting Up Authentication for Your Integration
Step 1: Preparing the fields for the authentication screen
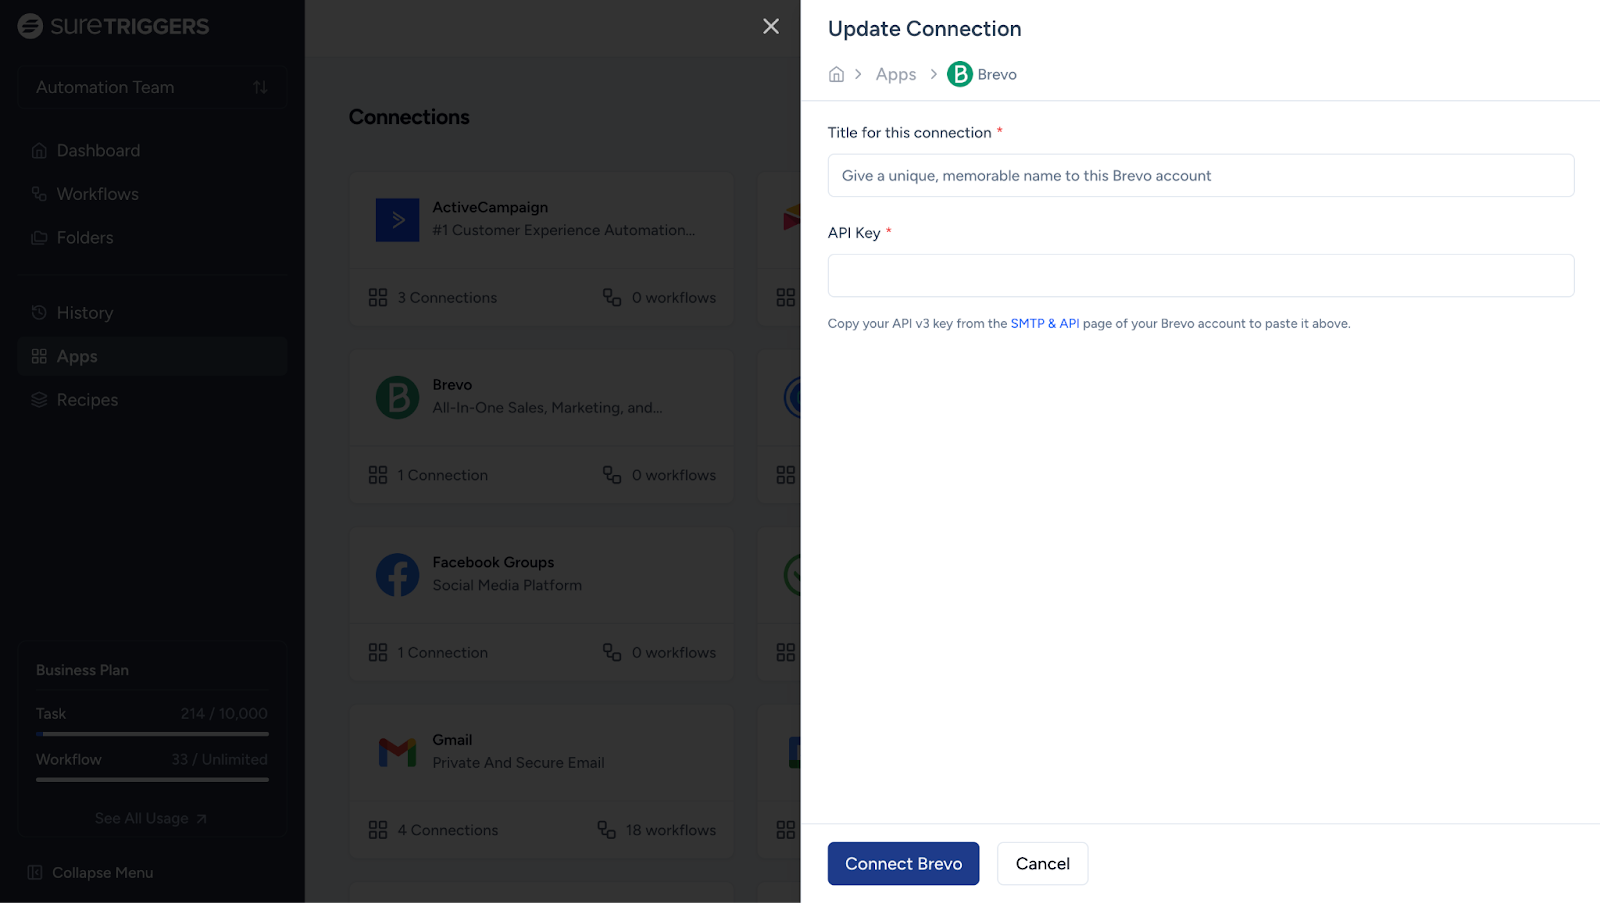
Remember while setting up authentication for your app, you’re building the screen where people add the connection from, such as the one you see in the image below:
We’ll understand this with an example. Let’s connect a sample app, called Brevo, using the “API Key” authentication method.
According to Brevo’s API documentation, we need to pass the API key in the header with the key set as api-key. The value should be whatever the user enters in the field.
Value is dynamic, and the key is static.
So we pass the same key (api-key) from OttoKit, and users just need to provide the API key from their account.
This is all that’s required to authenticate OttoKit with Brevo.
Now, we will build the integration fields required for this process.
To do this, we’ll access the integration that we created previously.
- Go to Build > Integration and select the “API Key” as the authentication method.
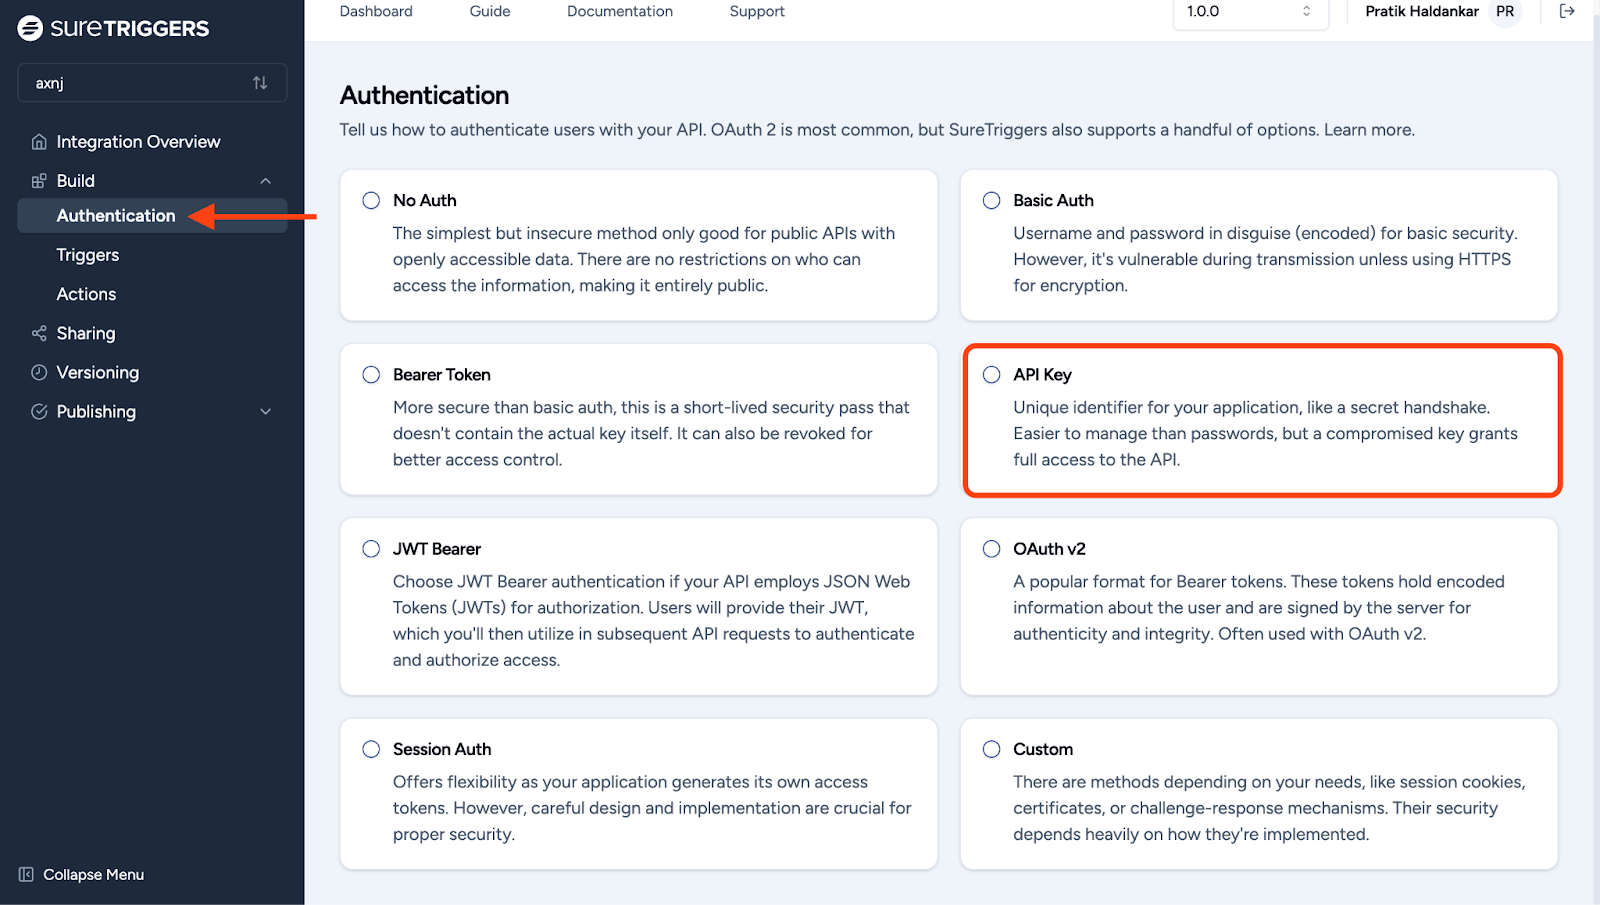
- Ensure that “API Key” is selected under Connection Authentication Type.
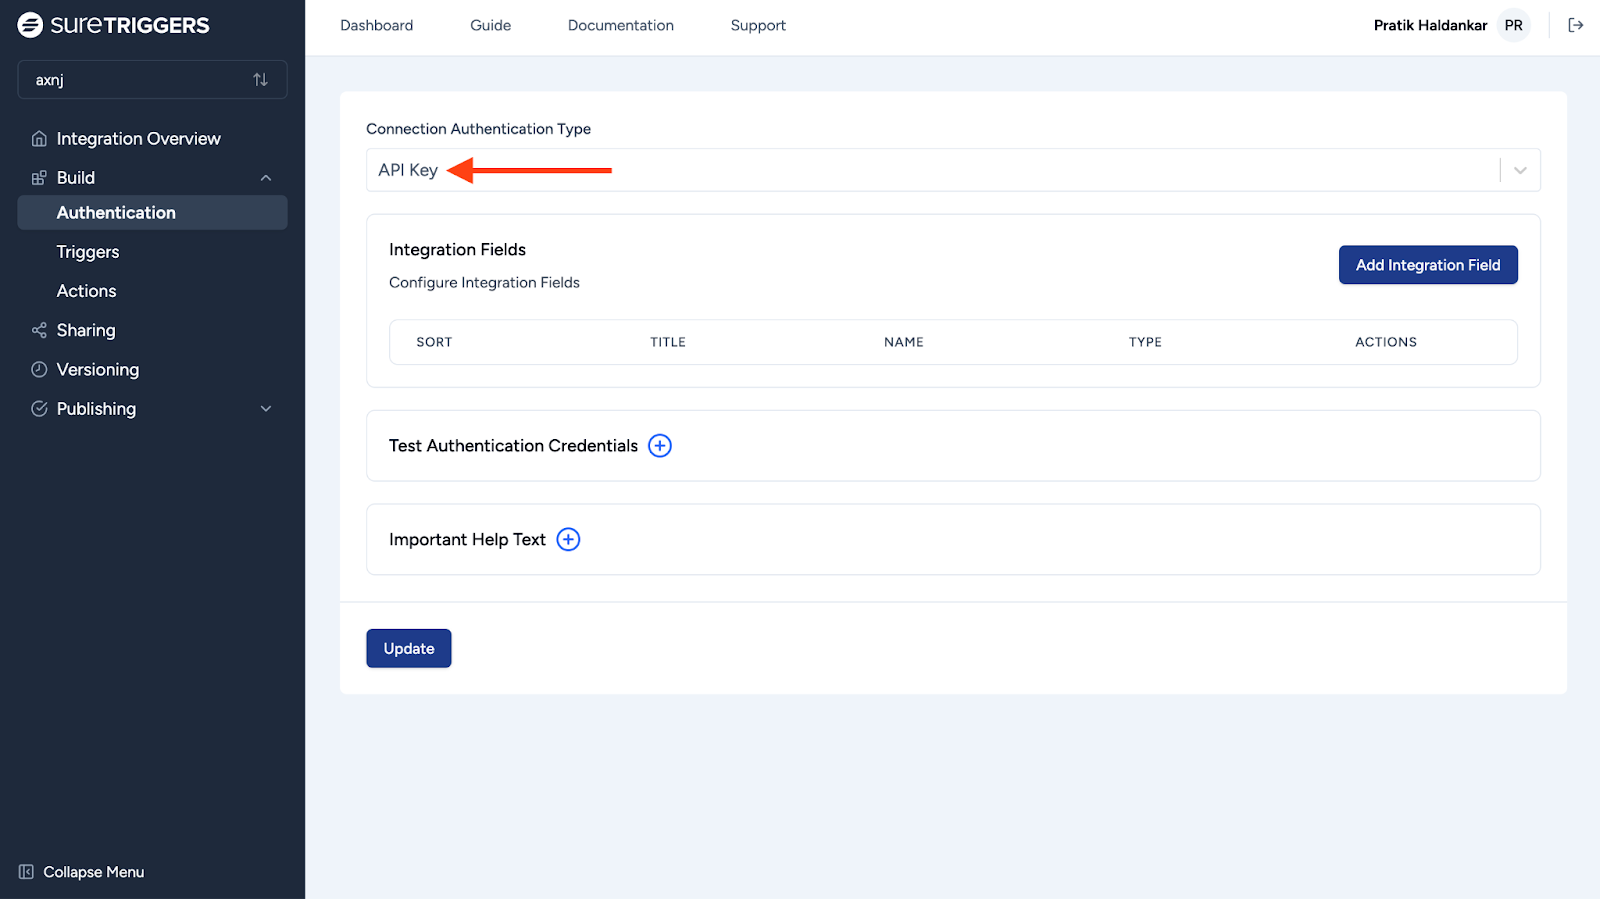
- Set up fields where users can enter their API key and any other required details for authentication. Refer to your company’s API documentation to see what fields are needed to create a connection between OttoKit and your app using the authentication method.
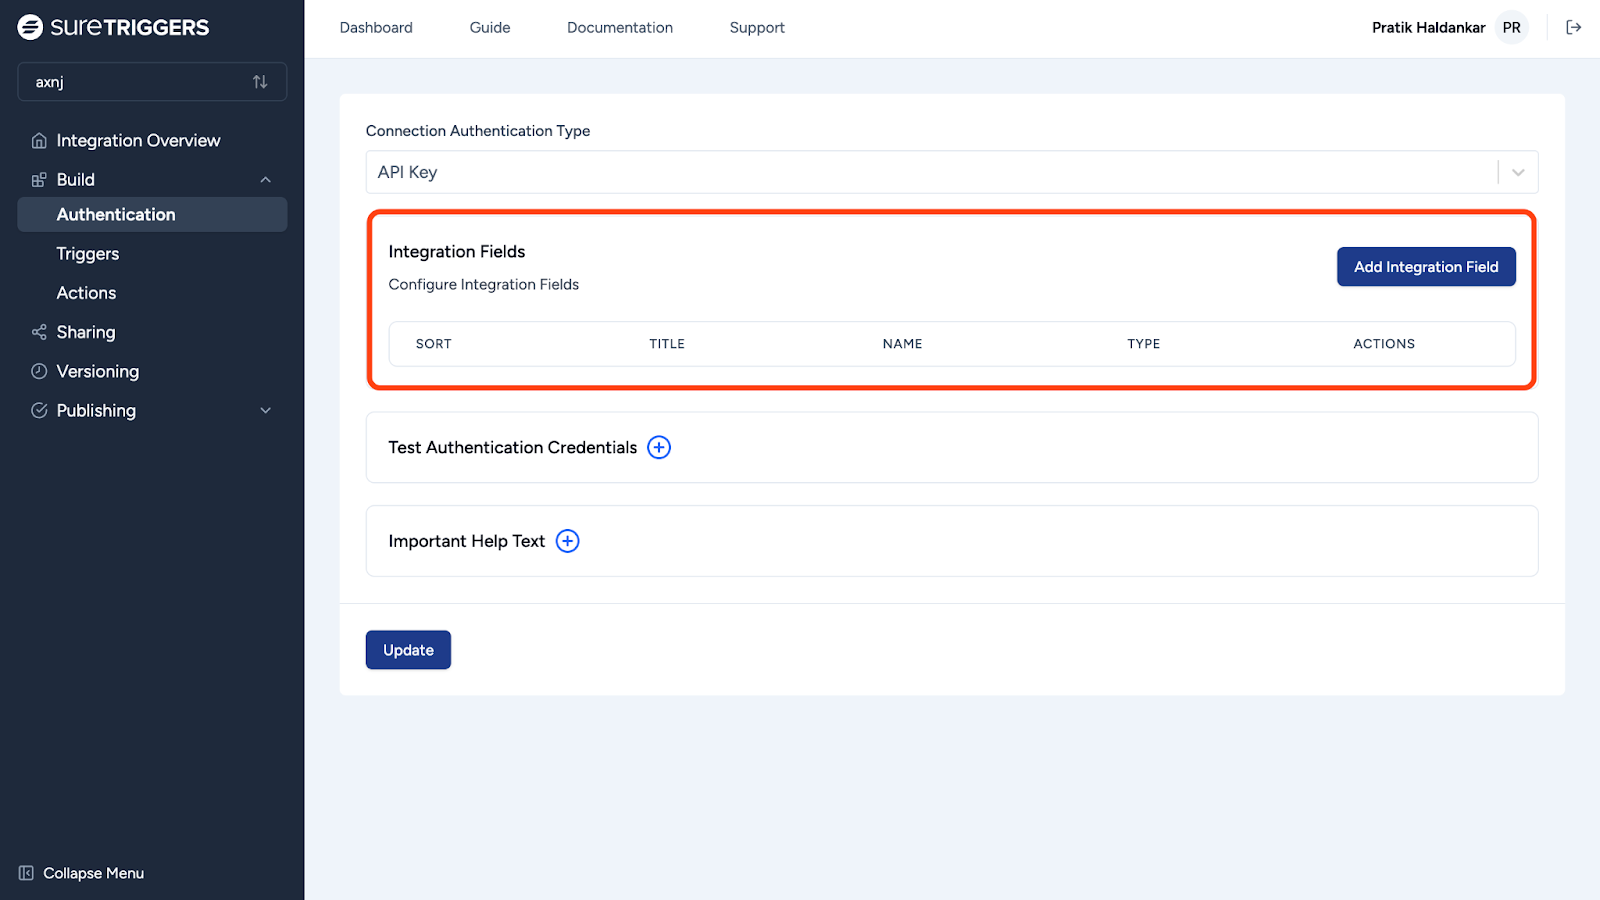
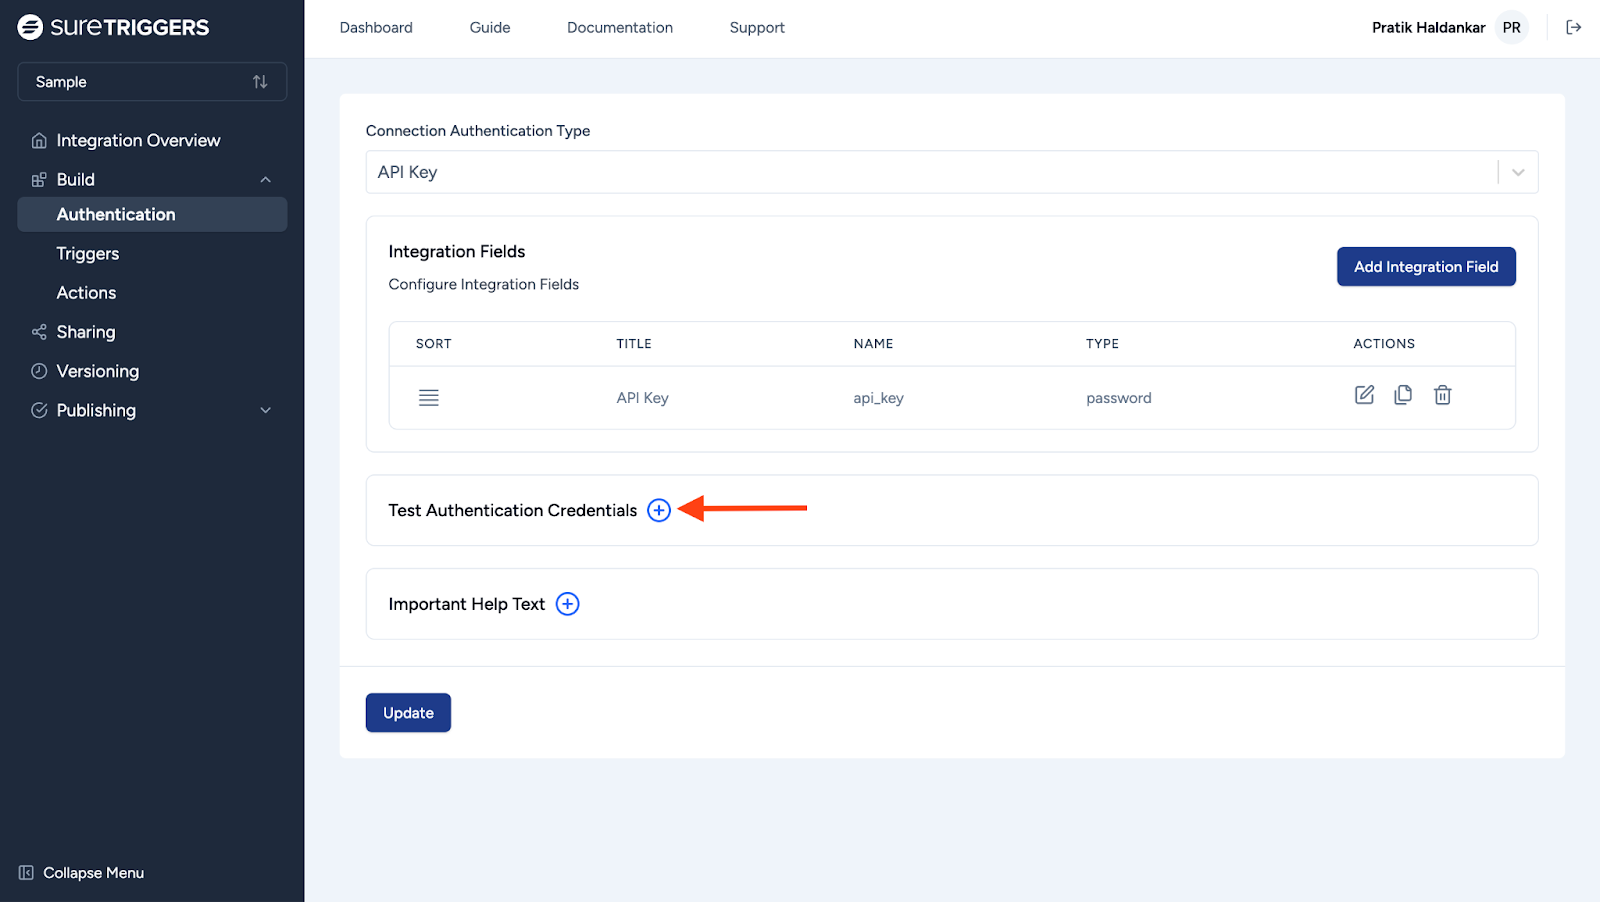
Click the Add Integration Field button to create the following fields.
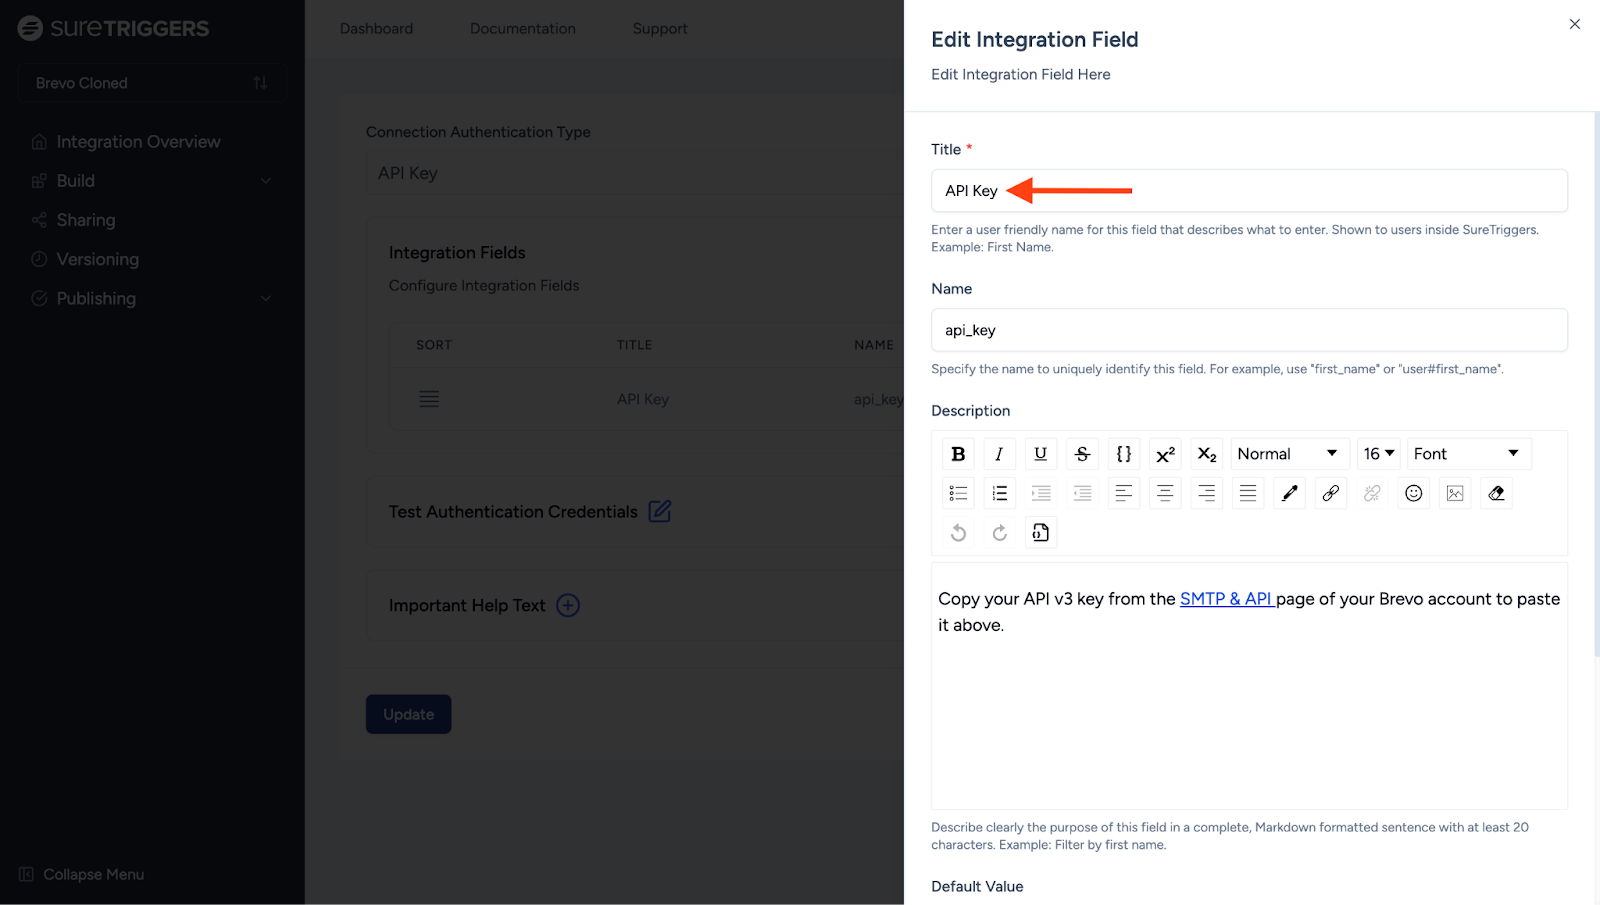
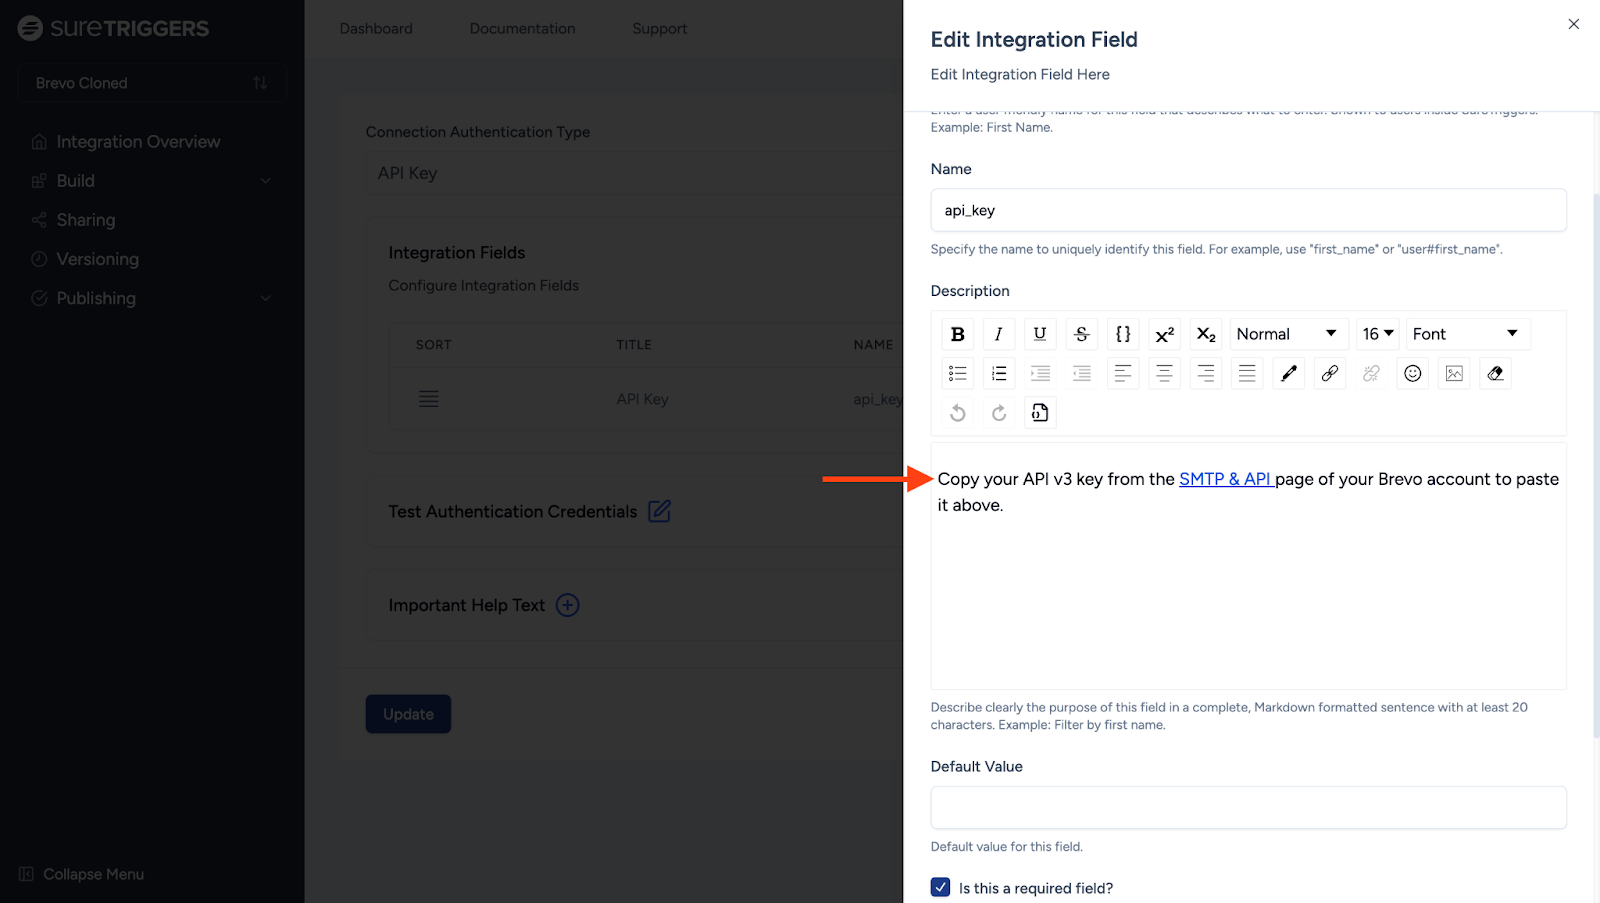
- Title: A user-friendly name for this field that will be displayed to users inside their OttoKit account.
- Name: Specify the name to uniquely identify this field. For example, use “first_name” or “user#first_name”. If a user maps their data and selects first_name, it will automatically show up in subsequent steps like triggers or actions, ensuring consistency throughout the integration.
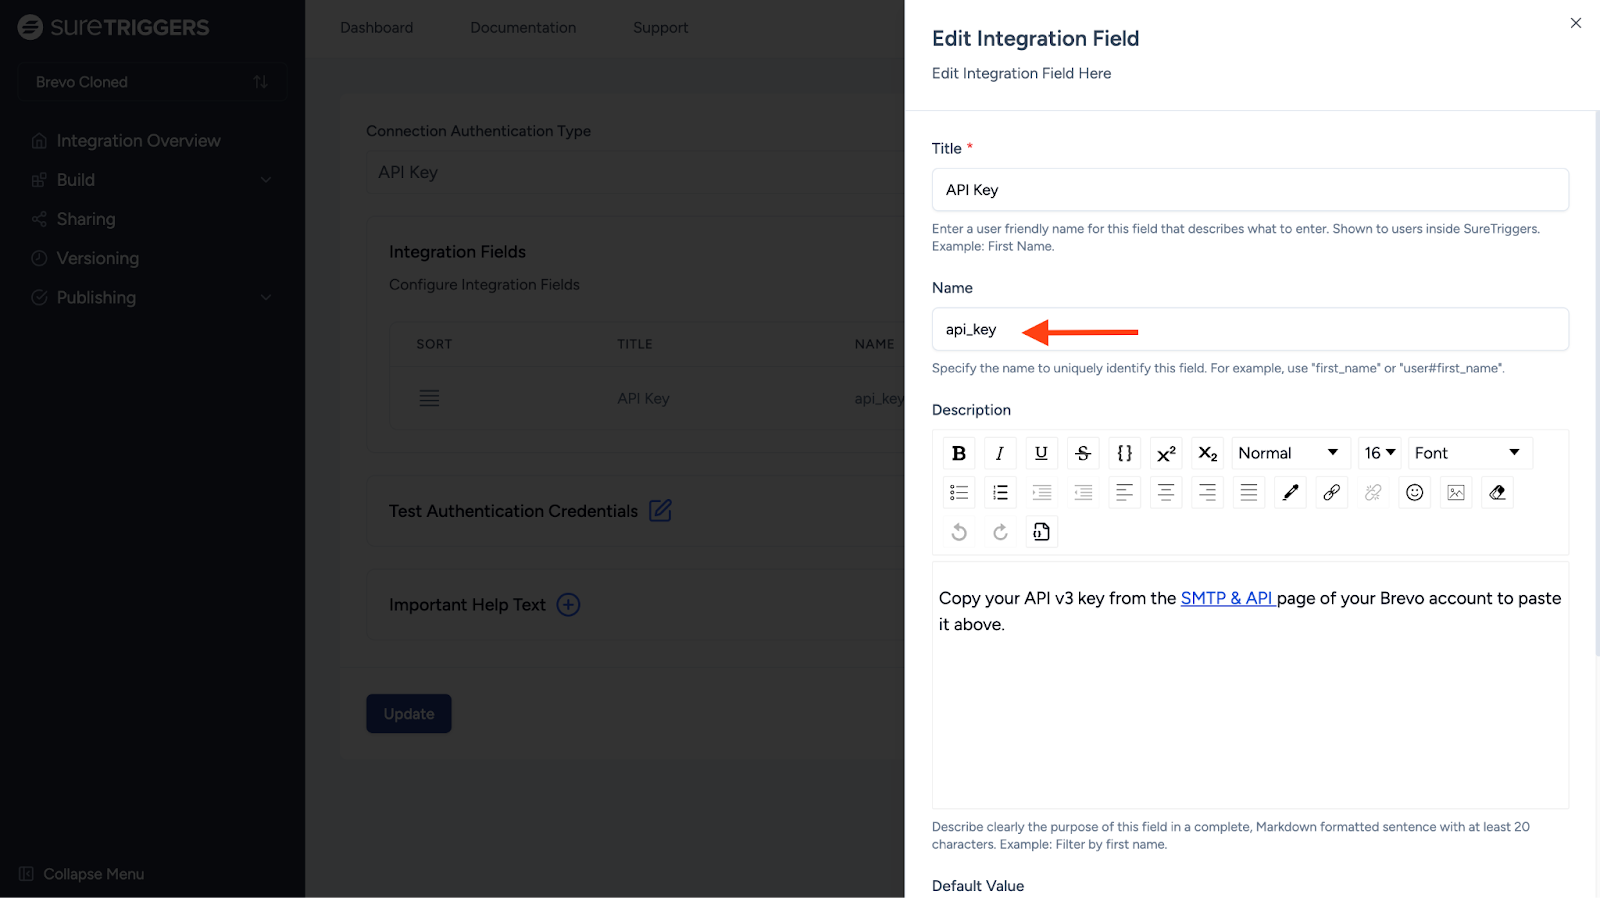
When users map data, this field appears instead of a hardcoded value, making it easier to identify and use in different contexts. For example:
We’ll learn more about the above value in the testing your authentication section.
- Description: Describe clearly the purpose of this field in a complete, Markdown-formatted sentence with at least 20 characters. Example: Filter by first name. Users will see this description to understand the field’s purpose.
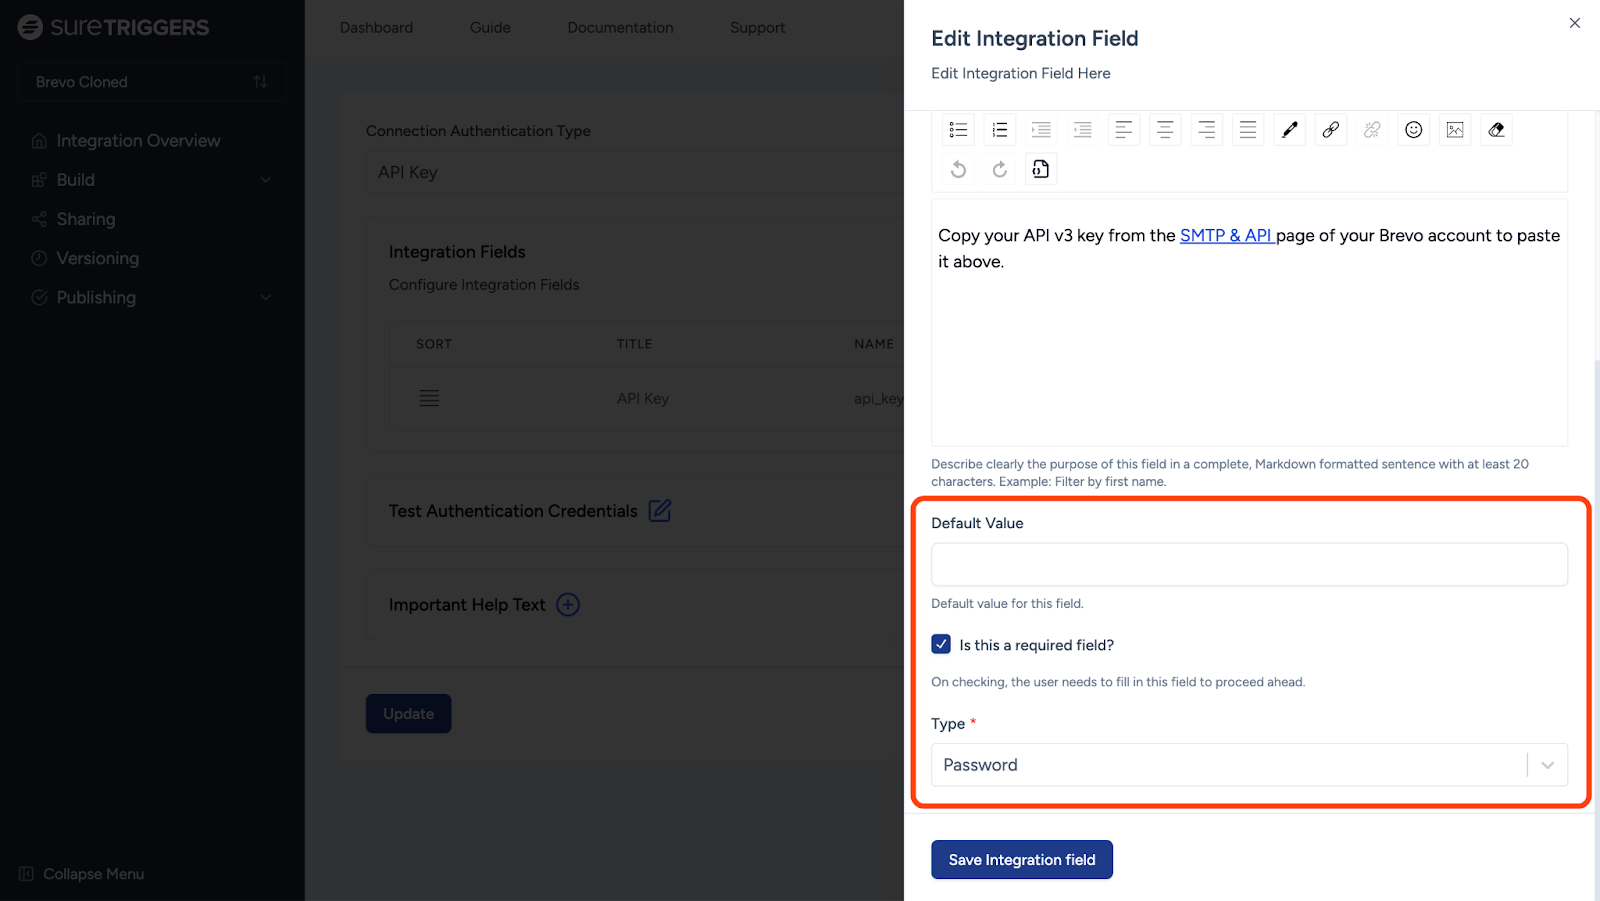
- Default Value: Include a value for this field to be used as a fallback. You can leave it empty if there’s no default value.
- Required Field: Check if this field is required for successful authentication. This will make that particular field mandatory to fill for OttoKit users.
- Type: Select the field type. All input fields use the string text field by default; select password instead if you would like to obscure the data as users enter it.
Click the Save Integration Field button after you’ve added all the input fields to your authentication form.
The process varies but is very similar to every other authentication method.
Step 2: Testing Your Authentication
Testing an authentication is important, as it’s used to test the related triggers and action steps when built.
We’ll be testing the app as a user. For example, with Brevo, we’ll perform an API call to ensure it functions correctly.
This is what we mean by testing.
The App Builder will test an API endpoint by making a call to it and return a success message that’ll verify that our connection is successful.
Note: If you notice that the authentication fails, please review your API documentation and make the necessary adjustments.
We’ll test the above authentication as an example.
We will make a call to {api endpoint} to see if our authentication is successful.
- Access the Test Authentication Credentials tab.
- Choose between API Mode and Code Mode depending on your preference. API Mode provides a user-friendly interface, while Code Mode allows for more customization using the Javascript code editor.
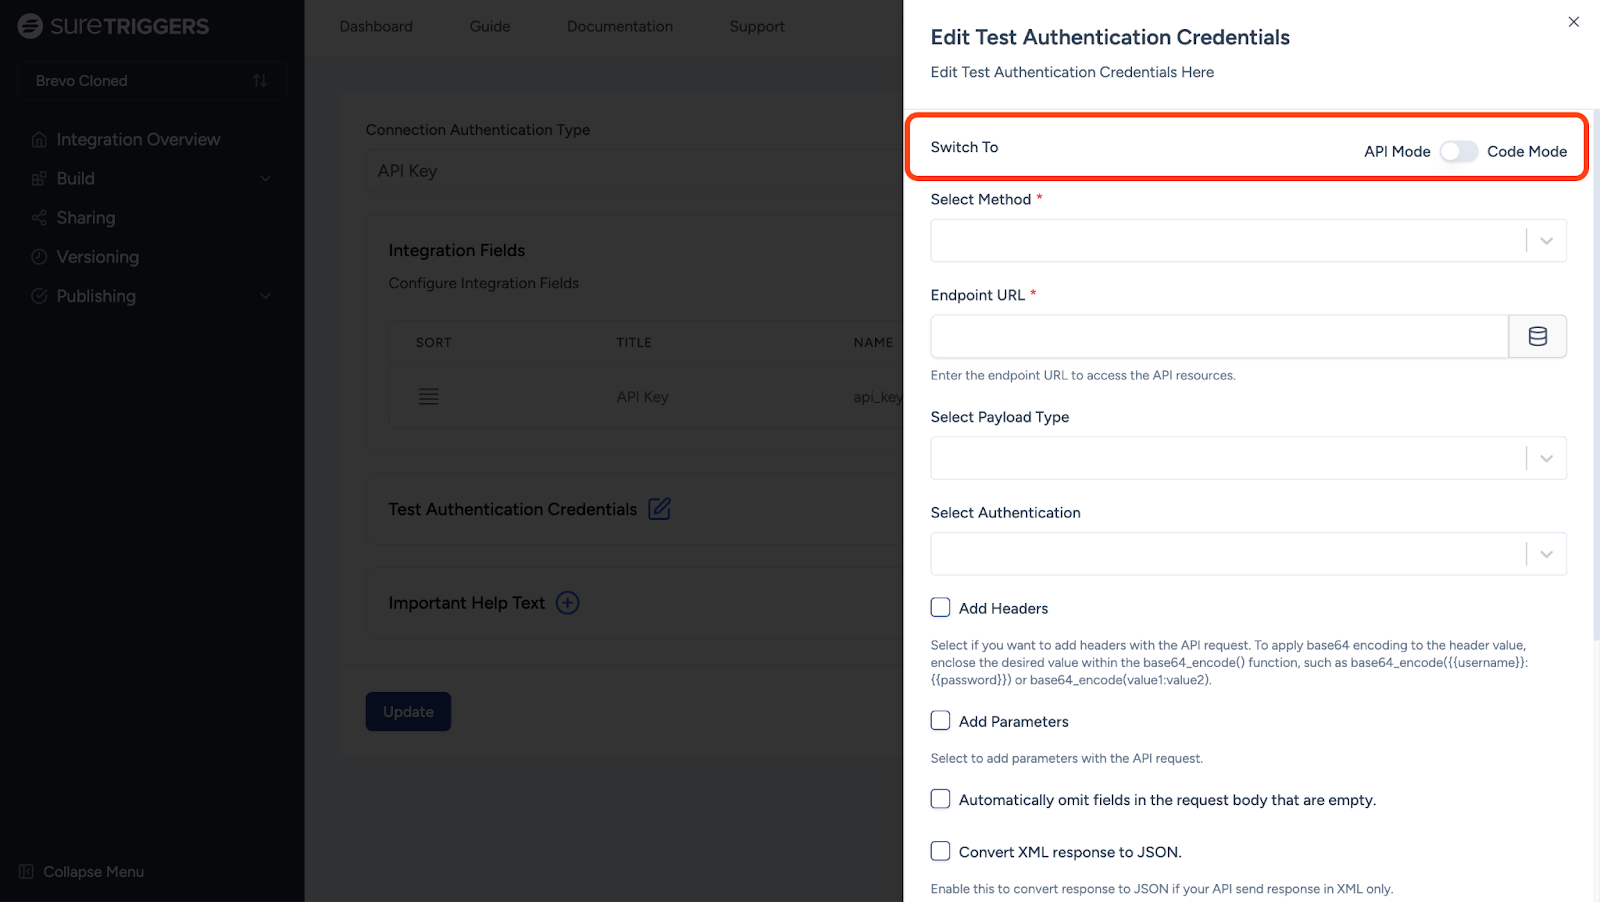
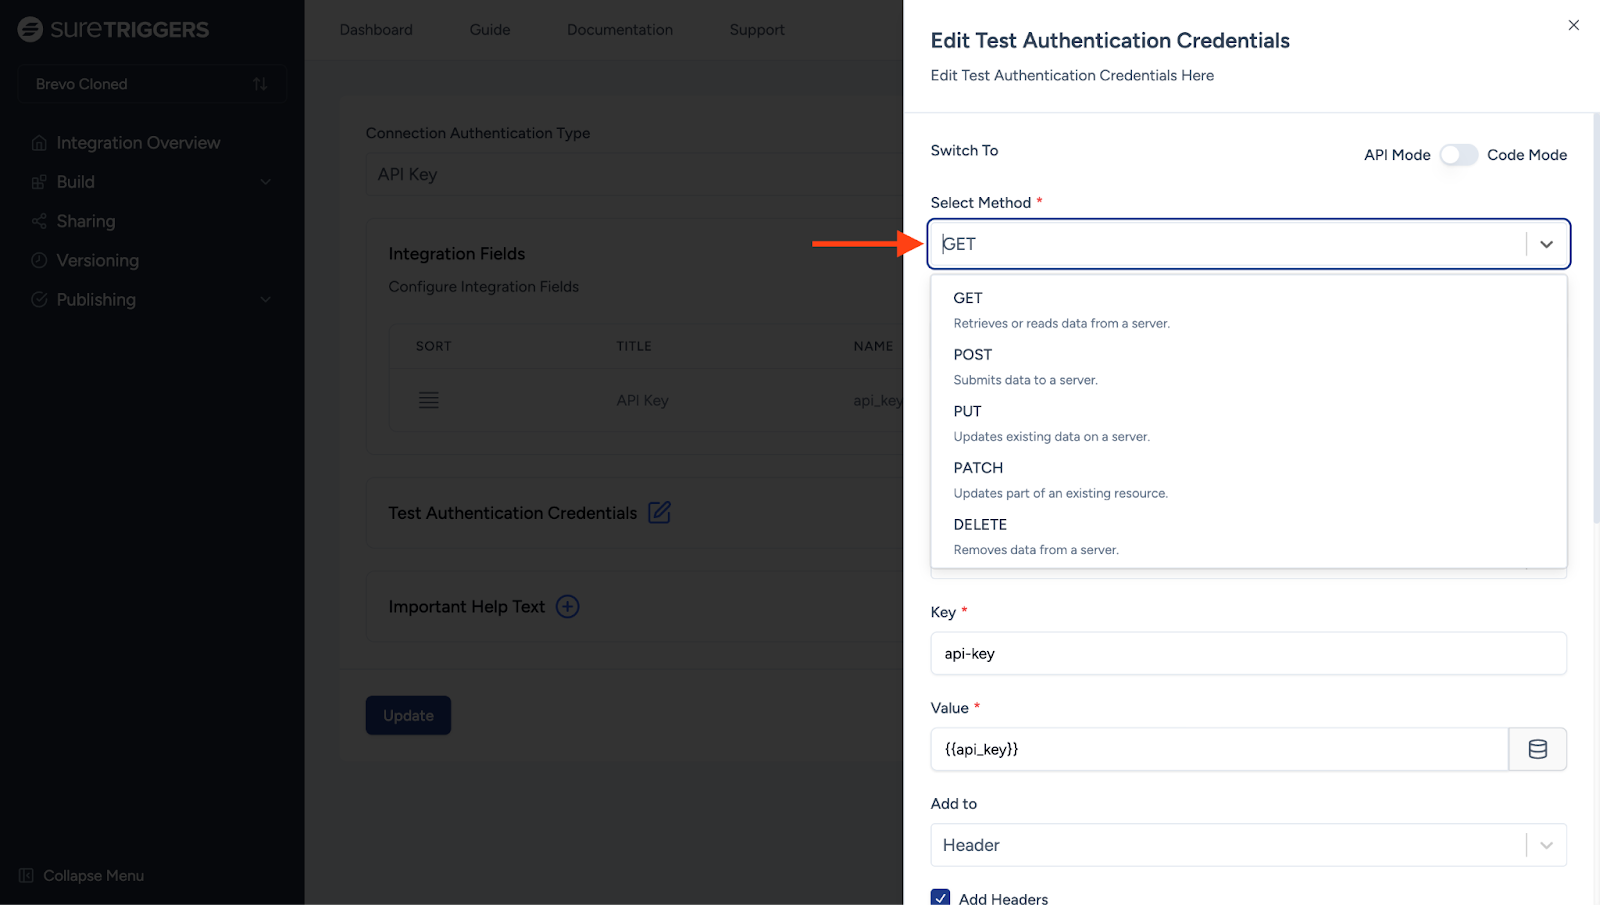
- Select Method: Determines the type of HTTP request you want to send to the API. For example, “GET”. You can select the appropriate method for their API request.
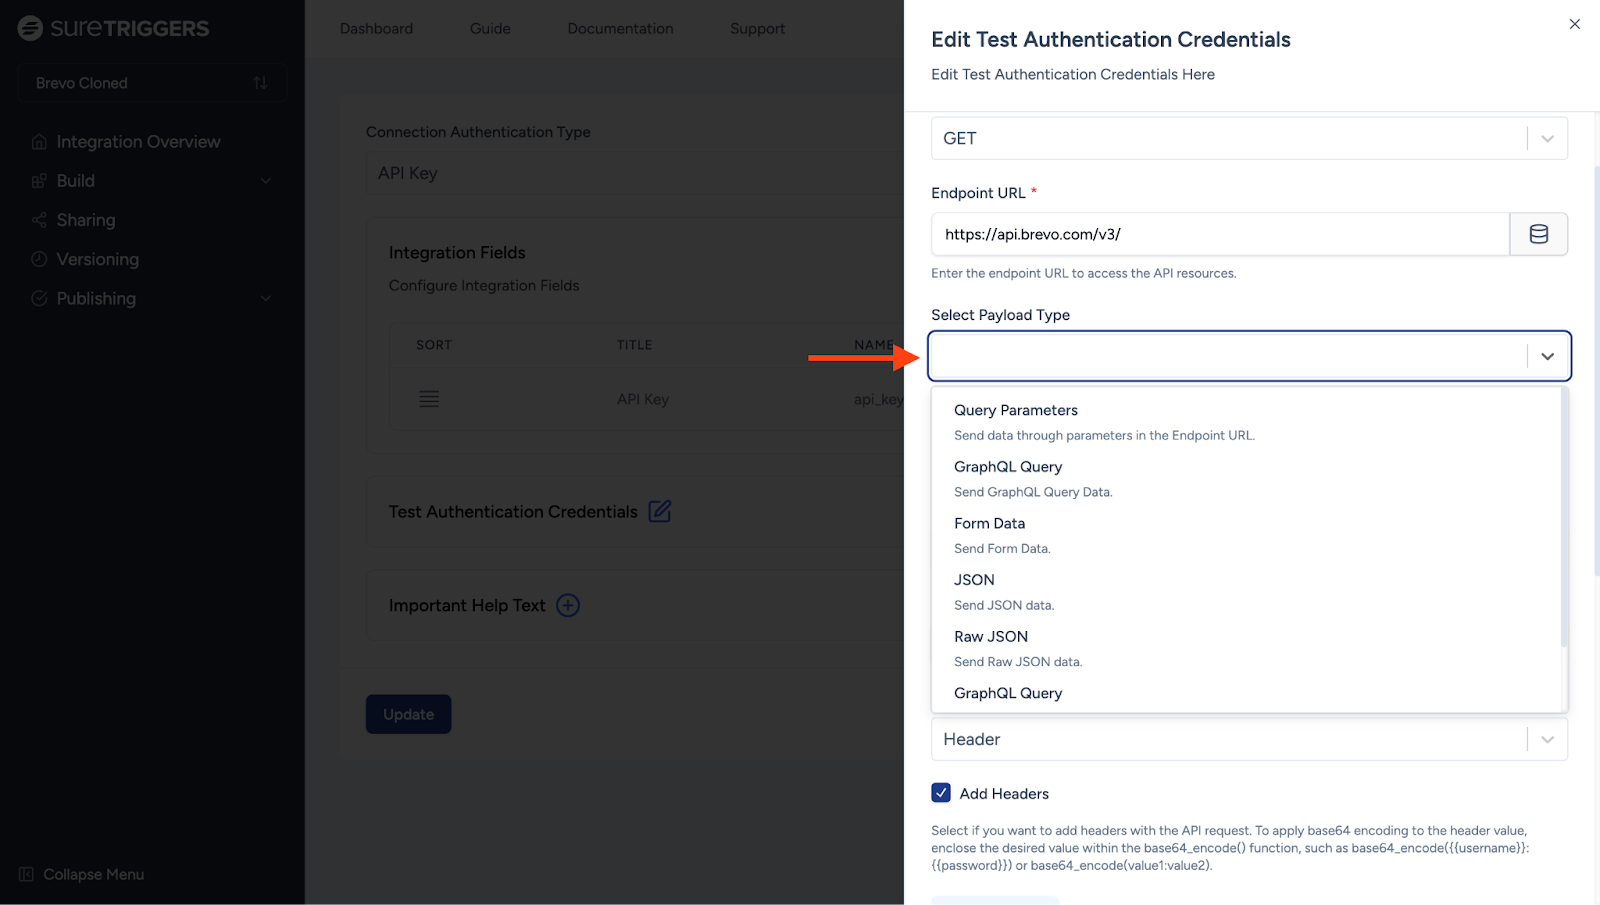
- Endpoint URL: Enter the URL of the API endpoint you want to access. You can use any sample endpoint from your API documentation to make this connection. For example, we’ll use an endpoint from Brevo’s official API documentation: https://api.brevo.com/v3/

- Select Payload Type: The format of the data being sent with the request. For example, JSON, GraphQL Query, Raw JSON, and more. You can select the Payload type that matches your API’s requirements.
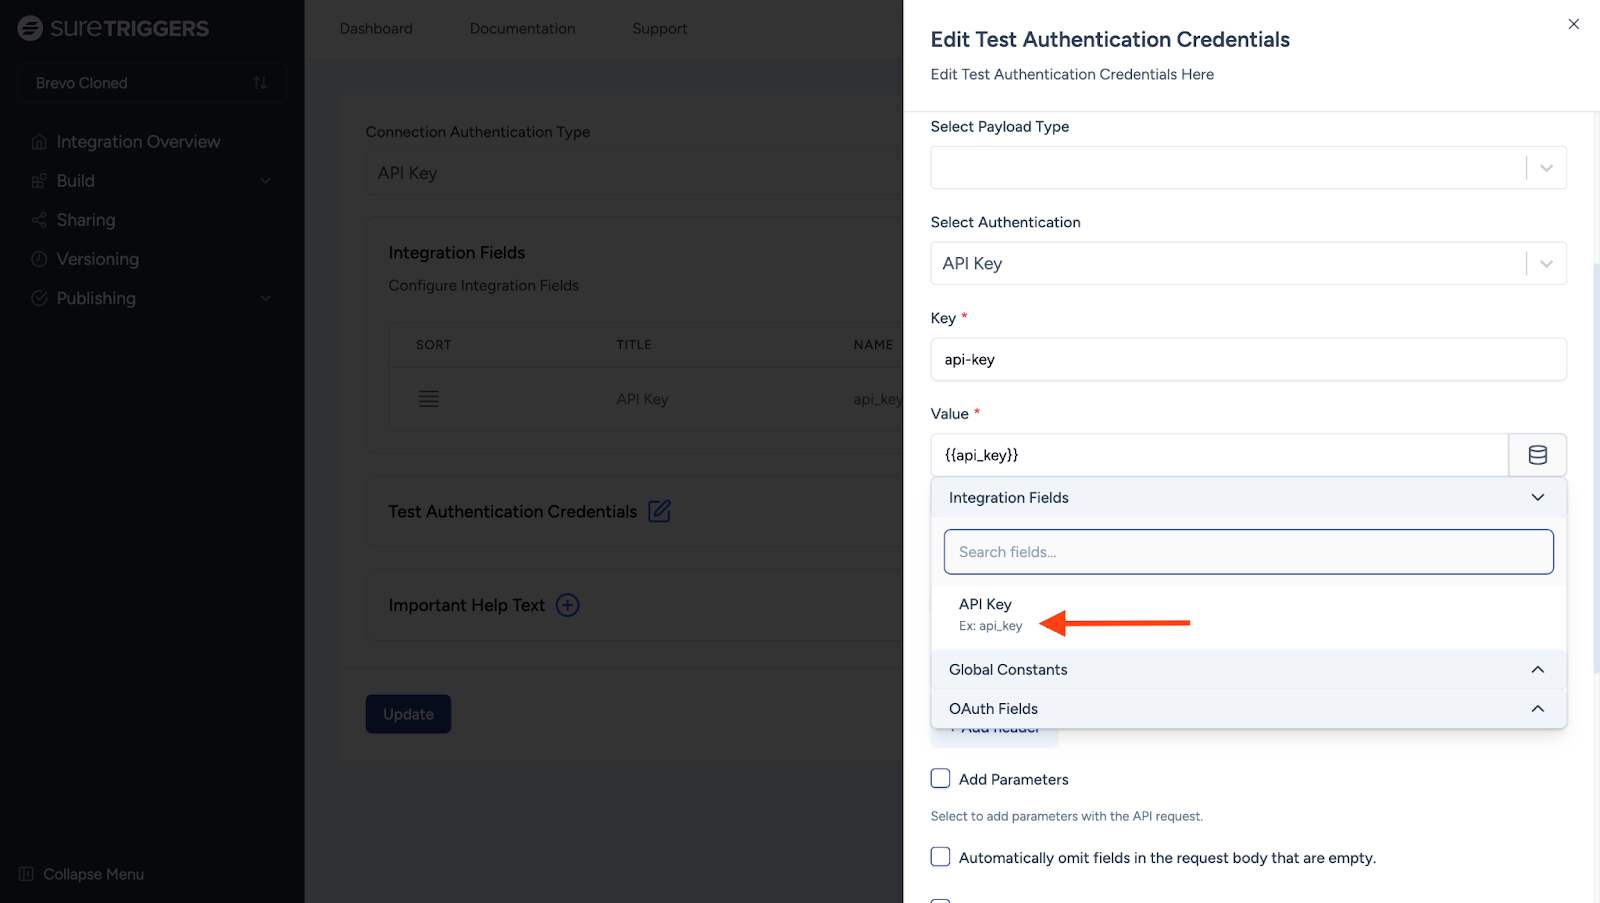
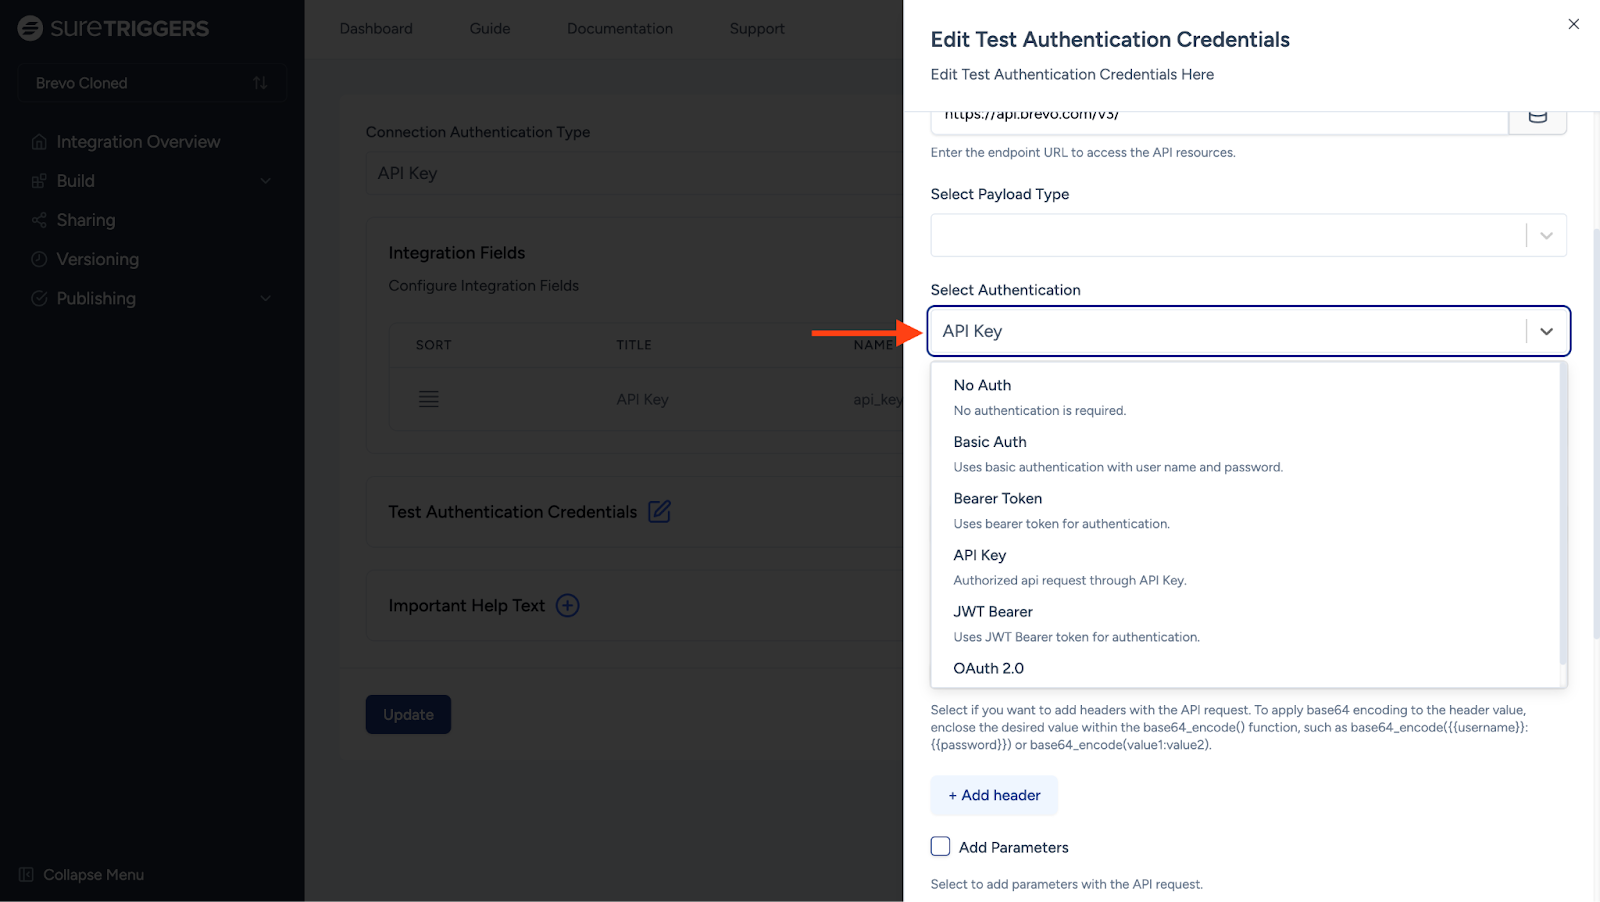
- Select Authentication: The method used to authenticate the request with the API. Ensures that the request is authenticated according to the API’s requirements.
- Select Key & Value:
- Key: The name of the key used for API authentication. Identifies the type of authentication being used.
- Value: The value for this field will be fetched dynamically.
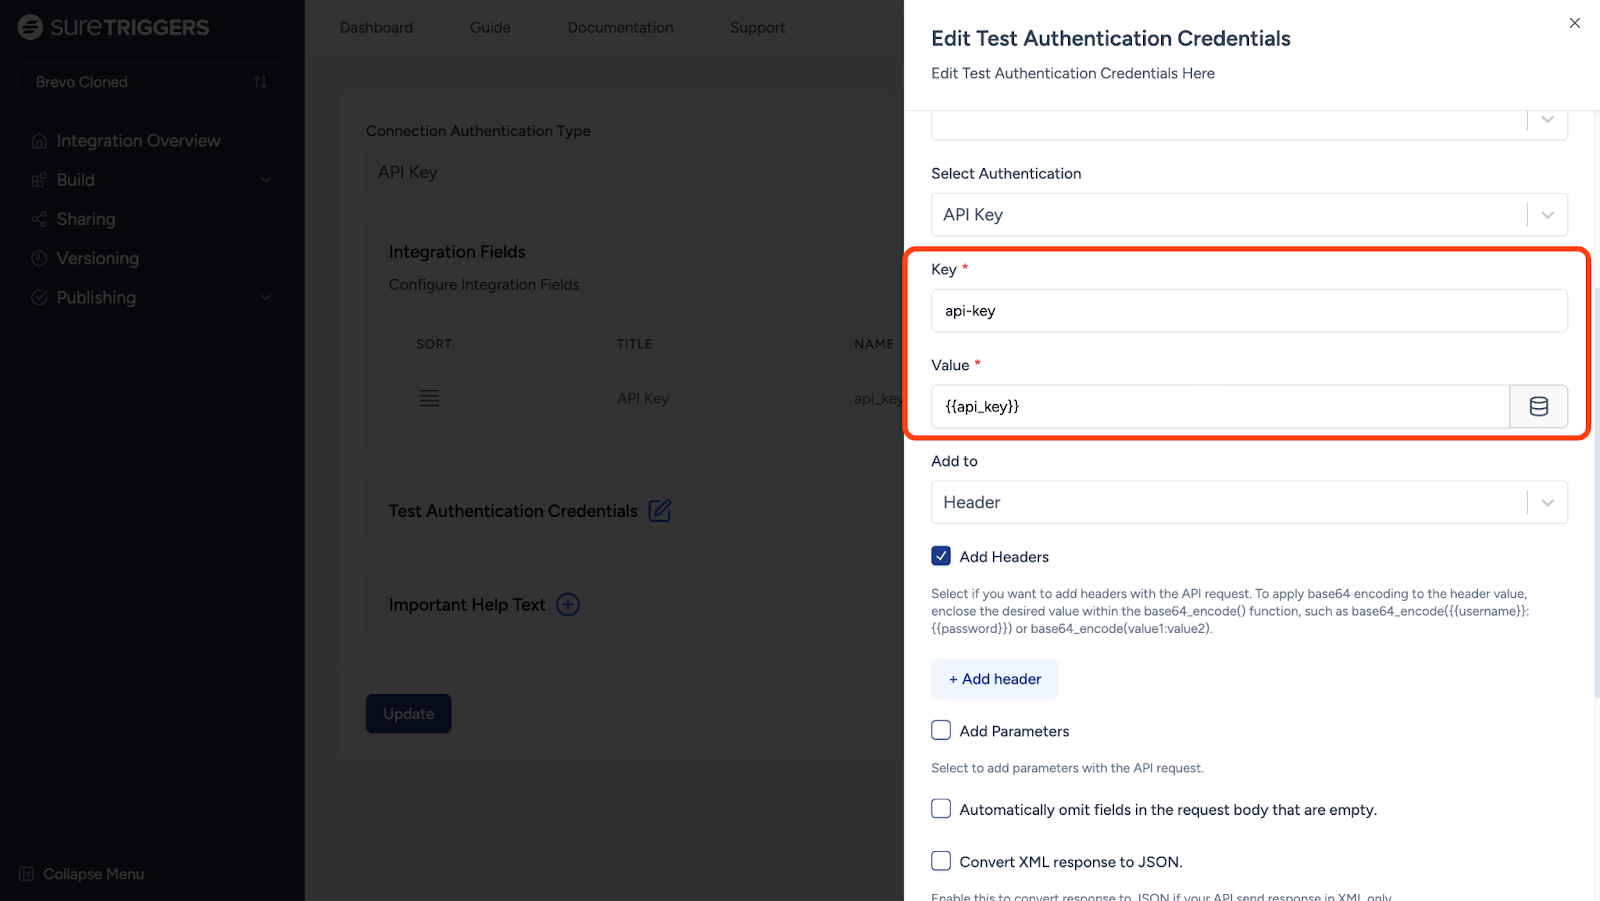
- Add Headers Checkbox: Select this checkbox to include any additional headers in the API request as per the headers defined in your API documentation.
- Add Header button: Click to add more headers if needed.
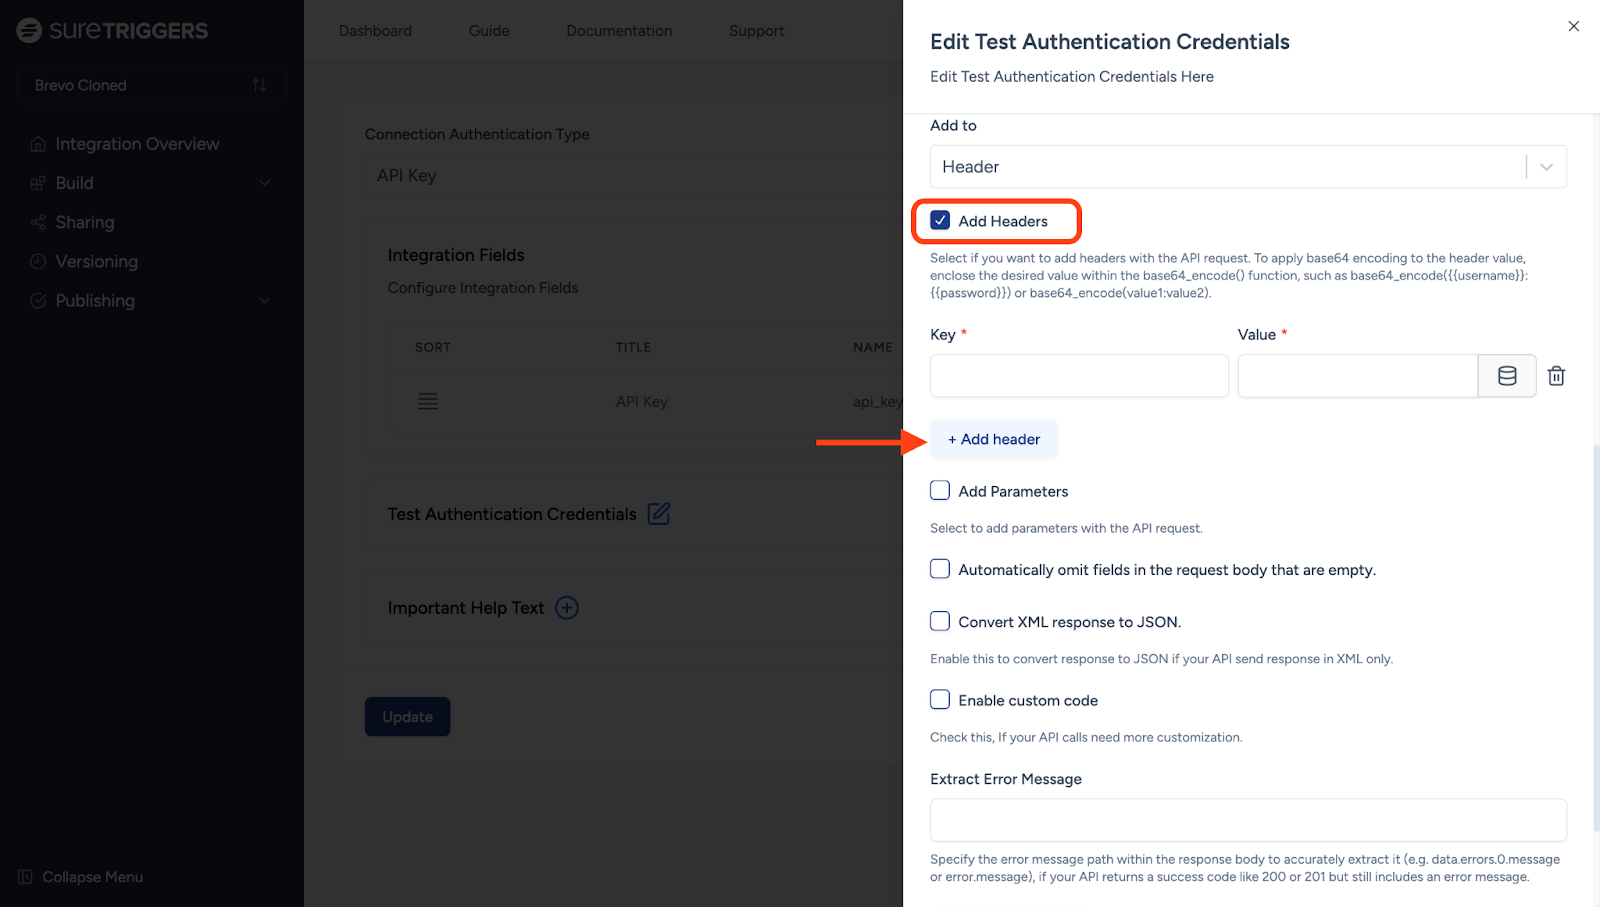
Configure the following fields according to what your API docs require:
- Add Parameter: What additional parameters you would like to add according to your API docs.
- Automatically Omit Fields: Option to omit empty fields in the request body automatically. Simplifies the request by excluding unnecessary empty fields, preventing potential errors.
- Convert XML Response to JSON: Converts the XML responses from the API to JSON format. Makes it easier to work with response data if your integration expects JSON format.
- Enable Custom Code: Allows for custom code to be included in the API call. Provides flexibility to include custom logic in the API request.
- Extract Error Message: Specify the error message path within the response body to accurately extract it (e.g. data.errors.0.message or error.message), if your API returns a success code like 200 or 201 but still includes an error message.
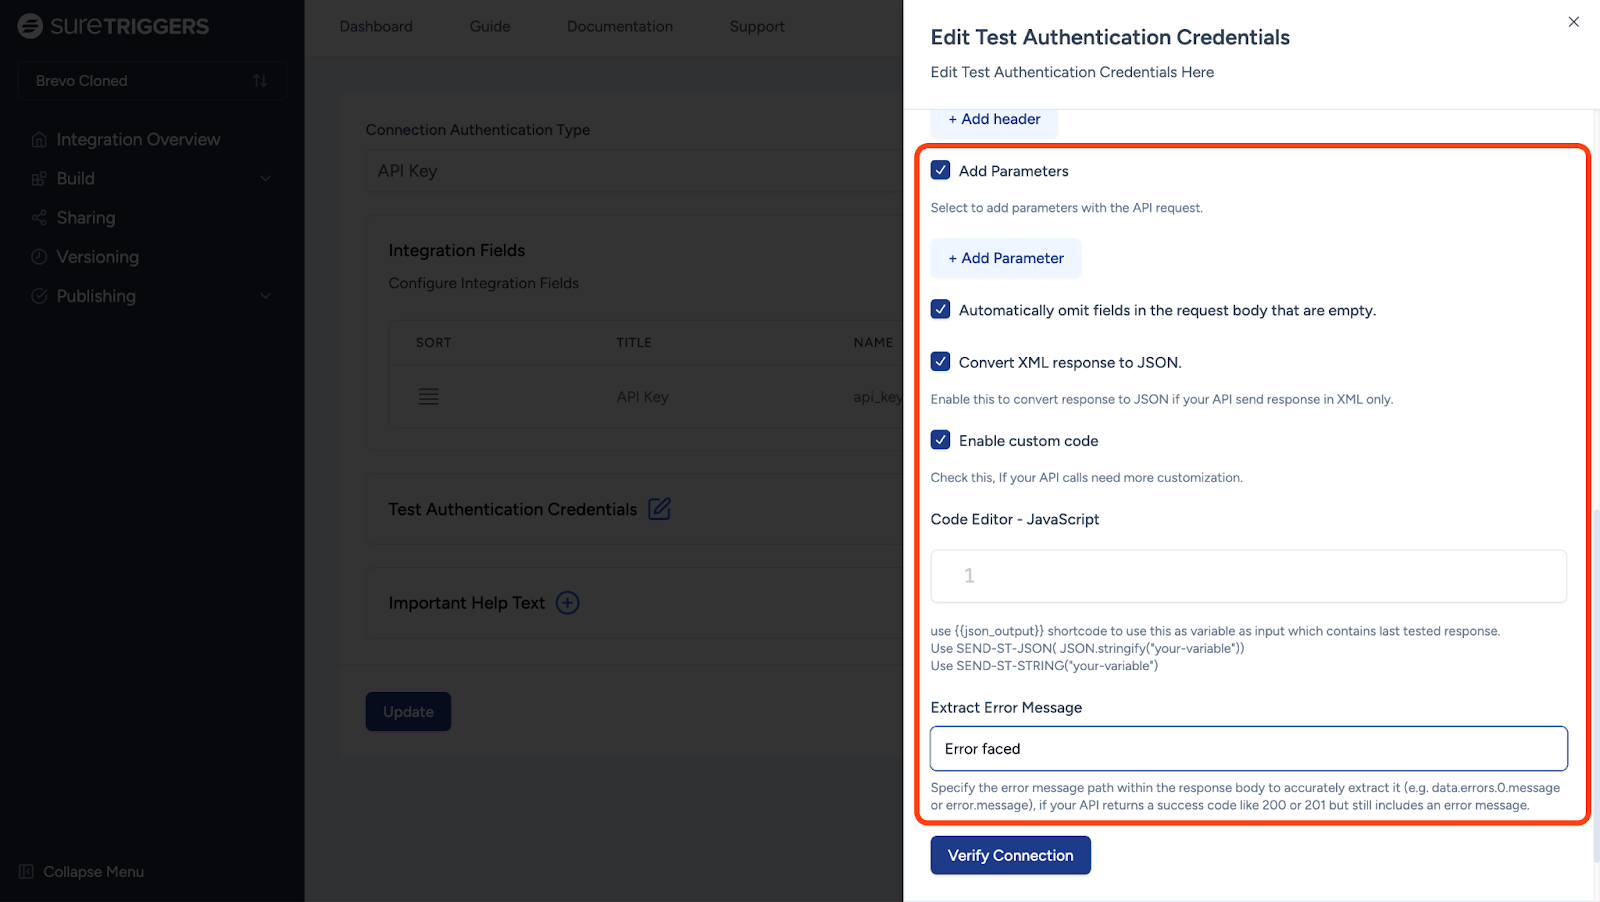
Click Verify Connection to test the setup.
Based on your authentication method, a new prompt will appear. For the “API Key” authentication method, you’ll need to provide a title and a unique API key for your connection.
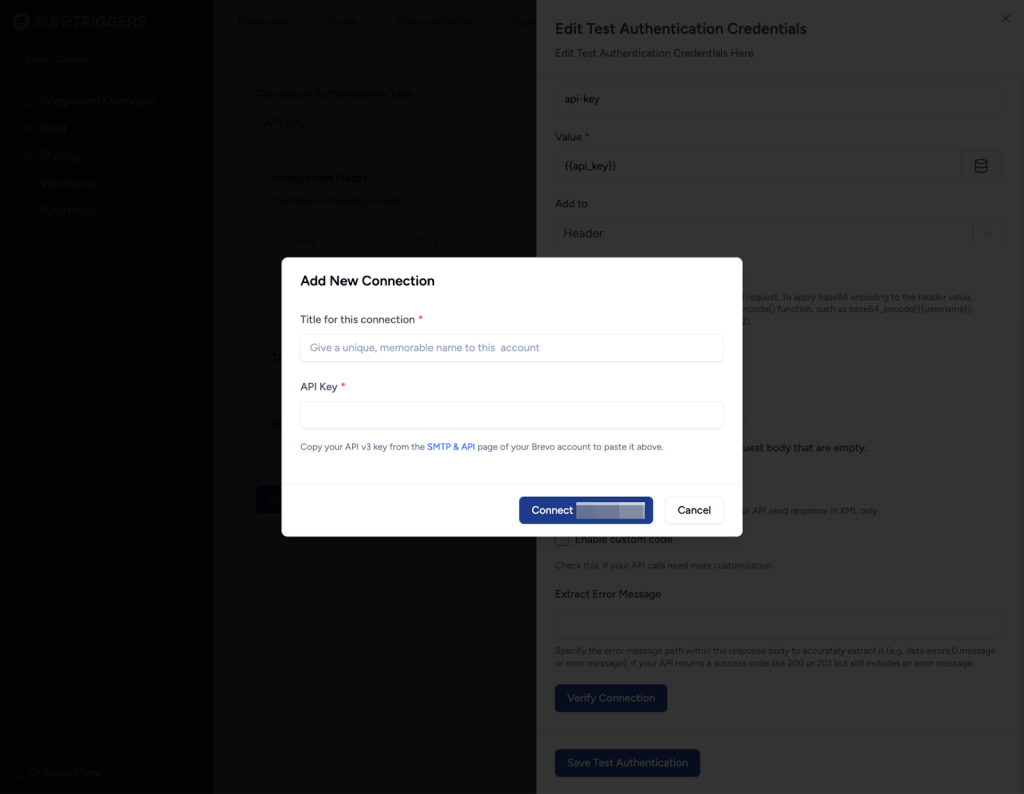
This is what the end-user will see on their OttoKit account while authenticating their workflow.
Once you enter the API key from your Brevo account, it will ask you to authorize the new IP address via email.
You can click on the email or go to the Security > Authorized IP within Brevo and allow the new IP address to authorize the API connection.
Once you enter the unique API key, click the “Connect Your App name” button.
Upon successful verification, you will get a success message telling you that App Builder successfully connected with OttoKit.
That’s it! You can now start setting up actions and triggers for your app.
If you have any questions, feel free to contact us. We’re always here to help!
We don't respond to the article feedback, we use it to improve our support content.