- Prerequisites
- Building an Integration
- Setting Up Authentication
- Setting Up Triggers & Actions
- Publishing Integration
- How To Authenticate Your Application Using The API Key Method
- How to Set-Up the Integration Based on Auth Type Bearer Token
- How To Authenticate Your Application Using OAuth 2.0
- How To Authenticate Your Application Using Basic Auth
- How To Authenticate Your Application Using The JWT Bearer Method
- How to Set-Up the Integration Based on Auth Type Session Auth
- How To Authenticate Your Application Using Custom Auth
How to Set-Up the Integration Based on Auth Type Bearer Token
This guide provides a comprehensive, step-by-step walkthrough to help you authenticate your application in OttoKit using a Bearer Token. In this document, we’ll be focusing on Todoist as the application we are integrating.
When setting up authentication in OttoKit App Builder, you’re building a screen where users will enter their connection details (like a Bearer Token) to connect their app with OttoKit.
Let’s get started!
How Does Bearer Token Authentication Work?
Authentication plays a major role in securely connecting two apps. It’s like logging into a website with a password, but in this case, we use a Bearer Token. This unique token is what tells Todoist, “This is the right person connecting the app,” and it enables secure communication between OttoKit and Todoist.
Here’s how the Bearer Token authentication process works step-by-step:
- Enter the Bearer Token in OttoKit: When setting up the authentication, you’ll be asked to input your Todoist Bearer Token.
- Retrieve Your Bearer Token from Todoist: Log in to your Todoist account, and you’ll find your Bearer Token in your account settings under the API section.
- OttoKit Confirms the Connection: OttoKit sends the Bearer Token to Todoist, which verifies if the token matches. Once confirmed, the connection is established, and OttoKit can then interact with Todoist.
Once authenticated, OttoKit can pull data from Todoist or send information to it without needing you to log in again. The Bearer Token acts as the “proof” that it’s authorized.
How Do You Retrieve the Bearer Token from Todoist?
To integrate Todoist with OttoKit, the first step is obtaining your Bearer Token, which allows the apps to communicate securely. Here’s how you do it:
- Open the Todoist website and log in with your credentials.
- Navigate to Settings > Integrations > Developer, where your Bearer Token is listed.
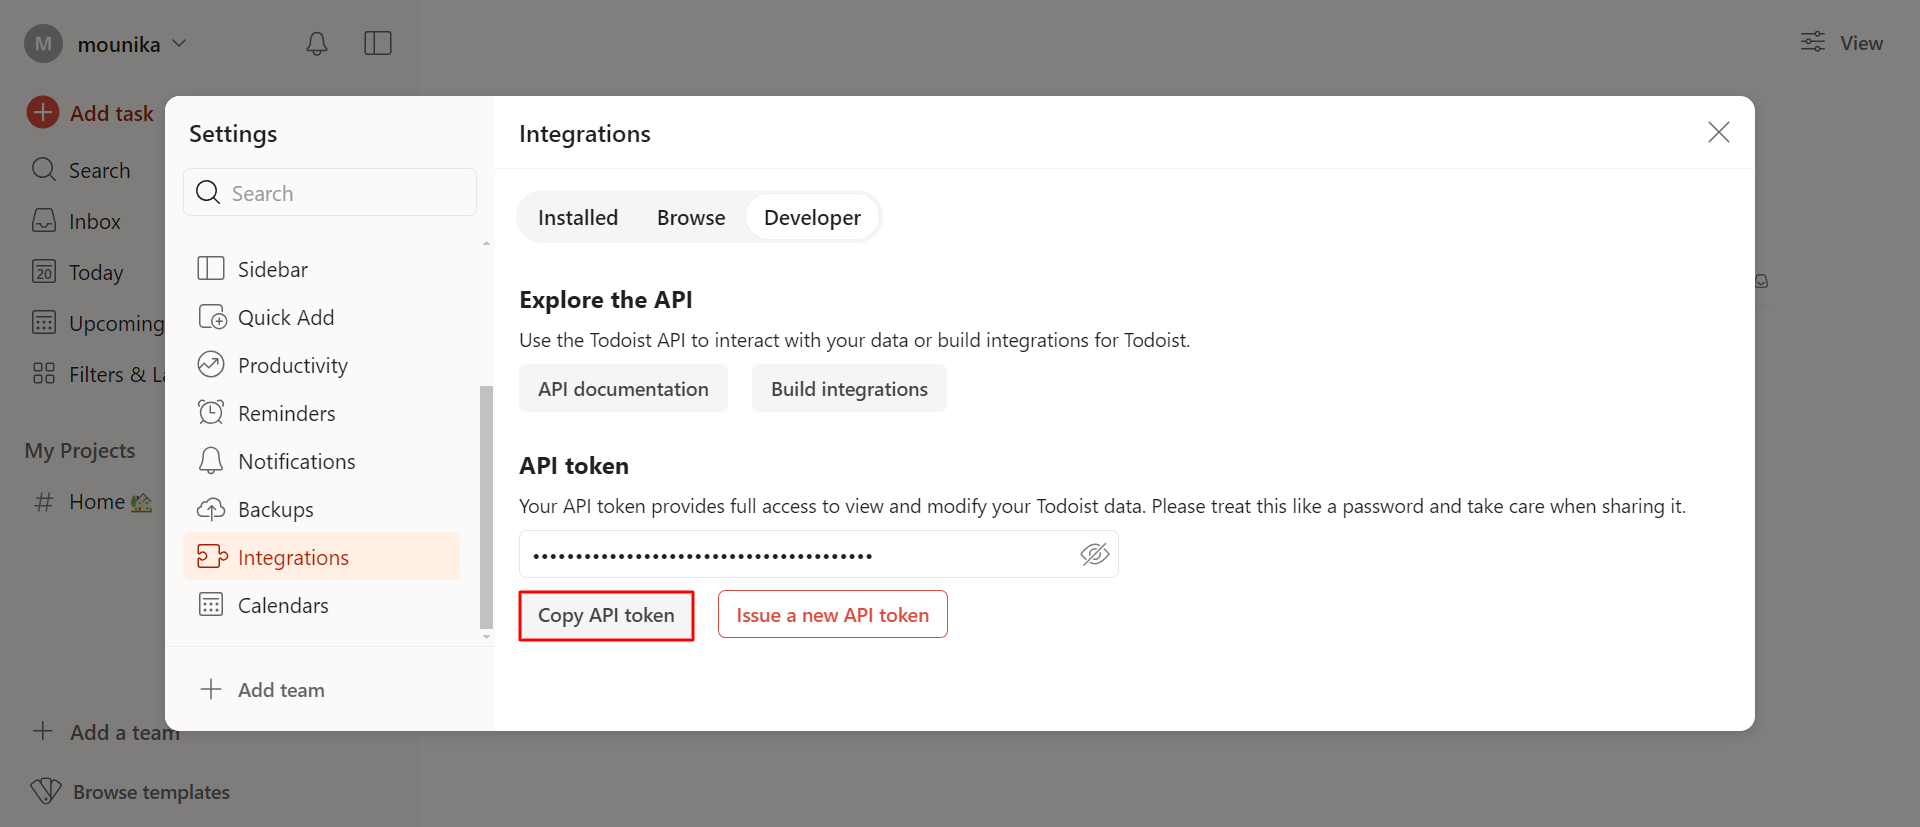
This token will be used in OttoKit to authenticate your Todoist account.
Make sure you keep this token secure, as it grants access to your Todoist account for automations.
How Do You Authenticate Your App Using the Bearer Token?
Now that you have your Bearer Token, it’s time to set up the integration within OttoKit. You can follow these simple steps:
- First, go to your OttoKit dashboard and log in with your credentials.
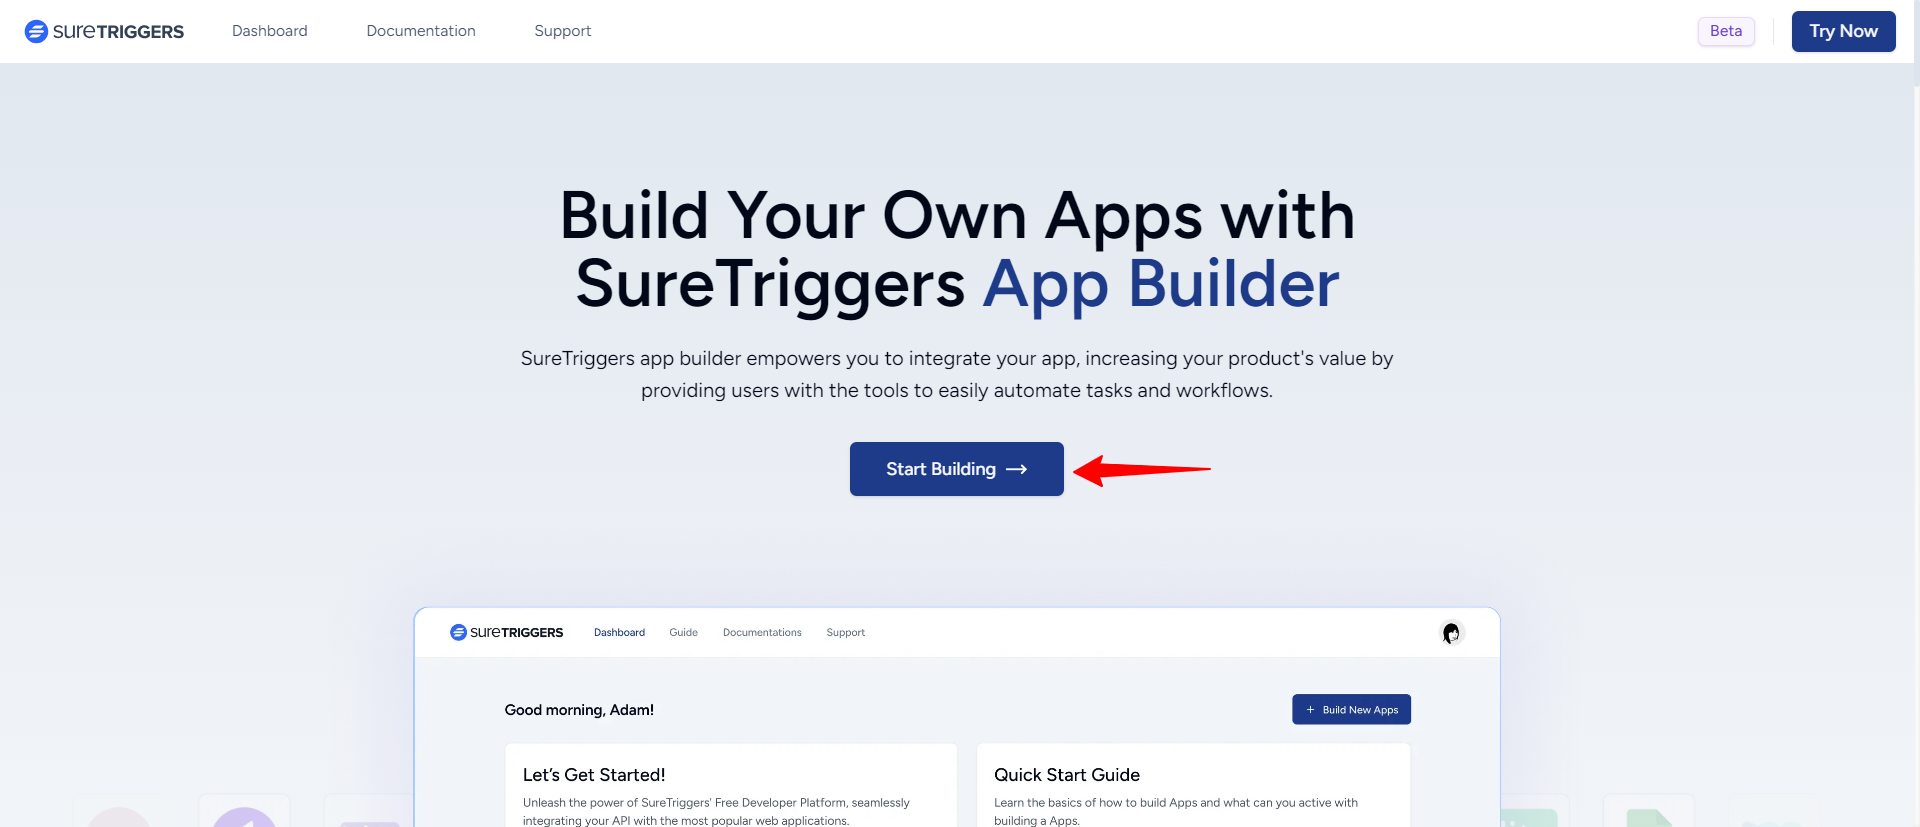
- On the main dashboard, locate and click on the Start Building option.
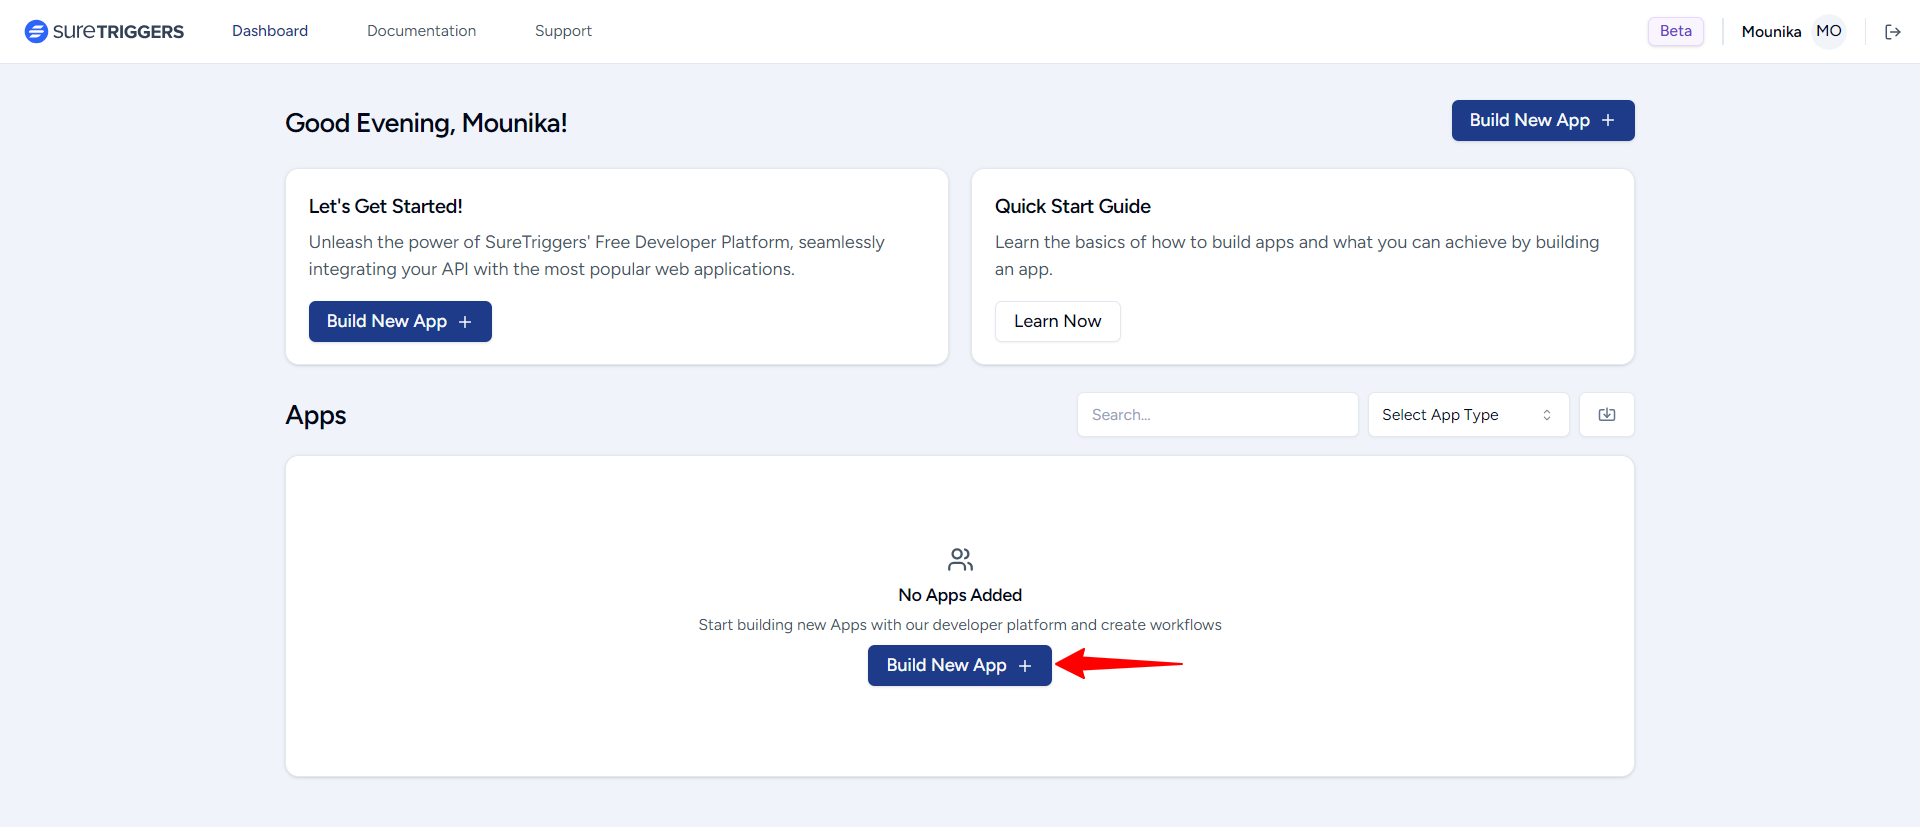
- Then, click on the Build New App button. Fill in all the details of your app in the flyout, and then click on the “Create” button to create the app. Check out this article to learn more about this.
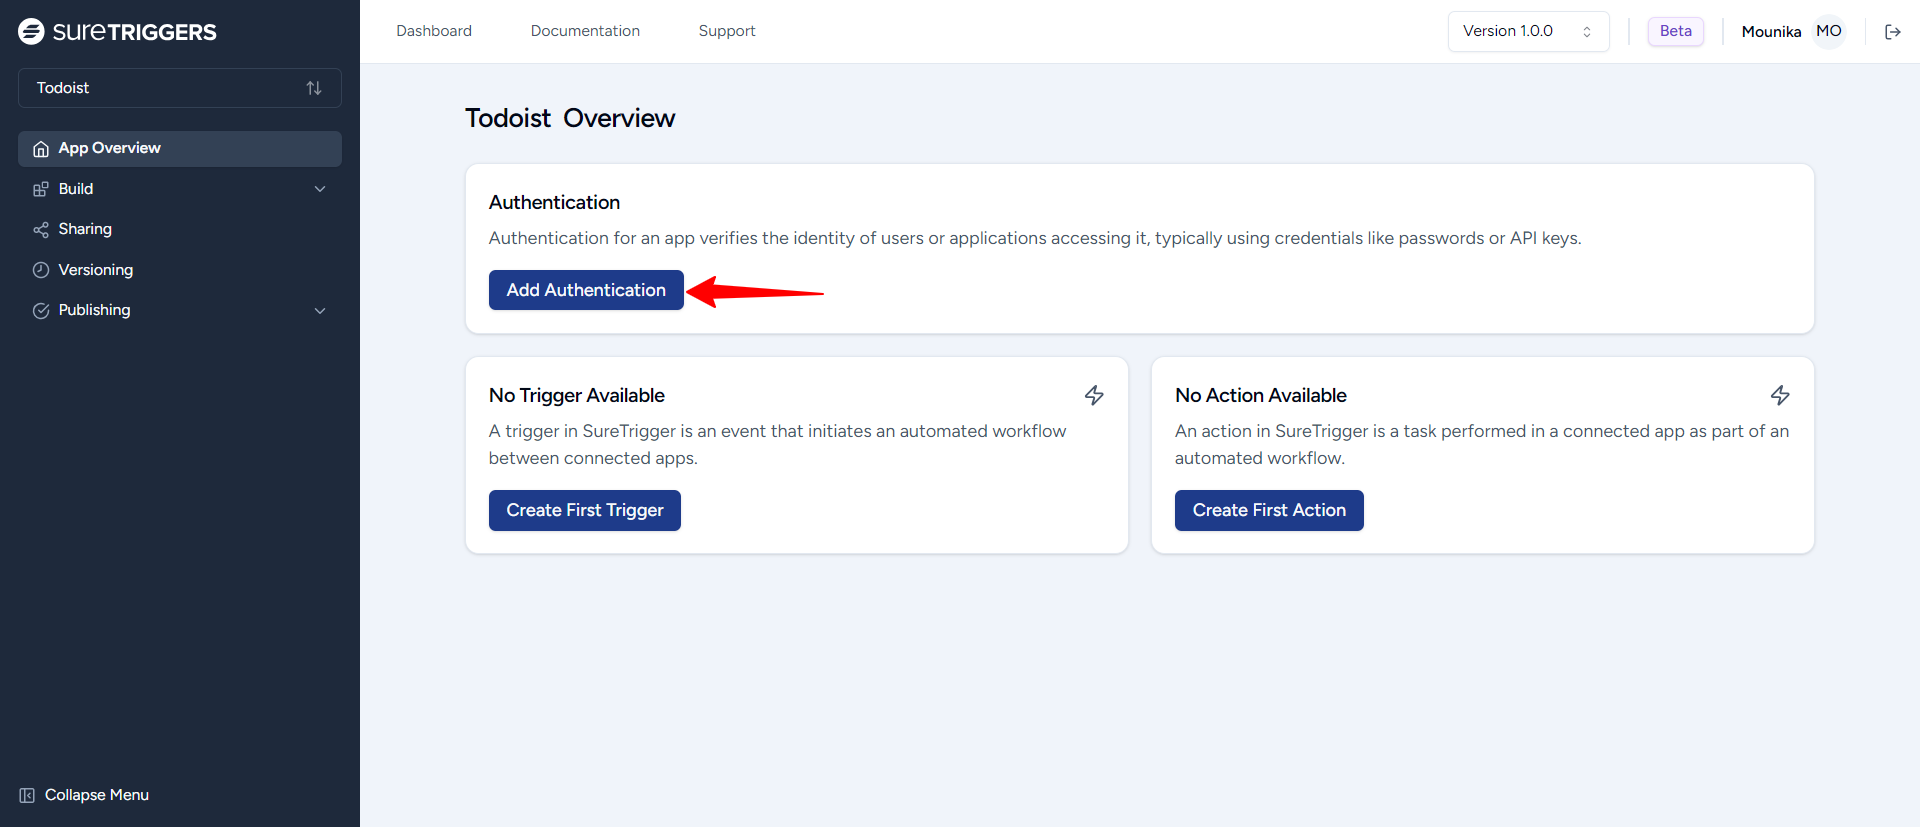
- You’ll be automatically redirected to the “App Overview” page. Here, click the Add Authentication button to proceed.
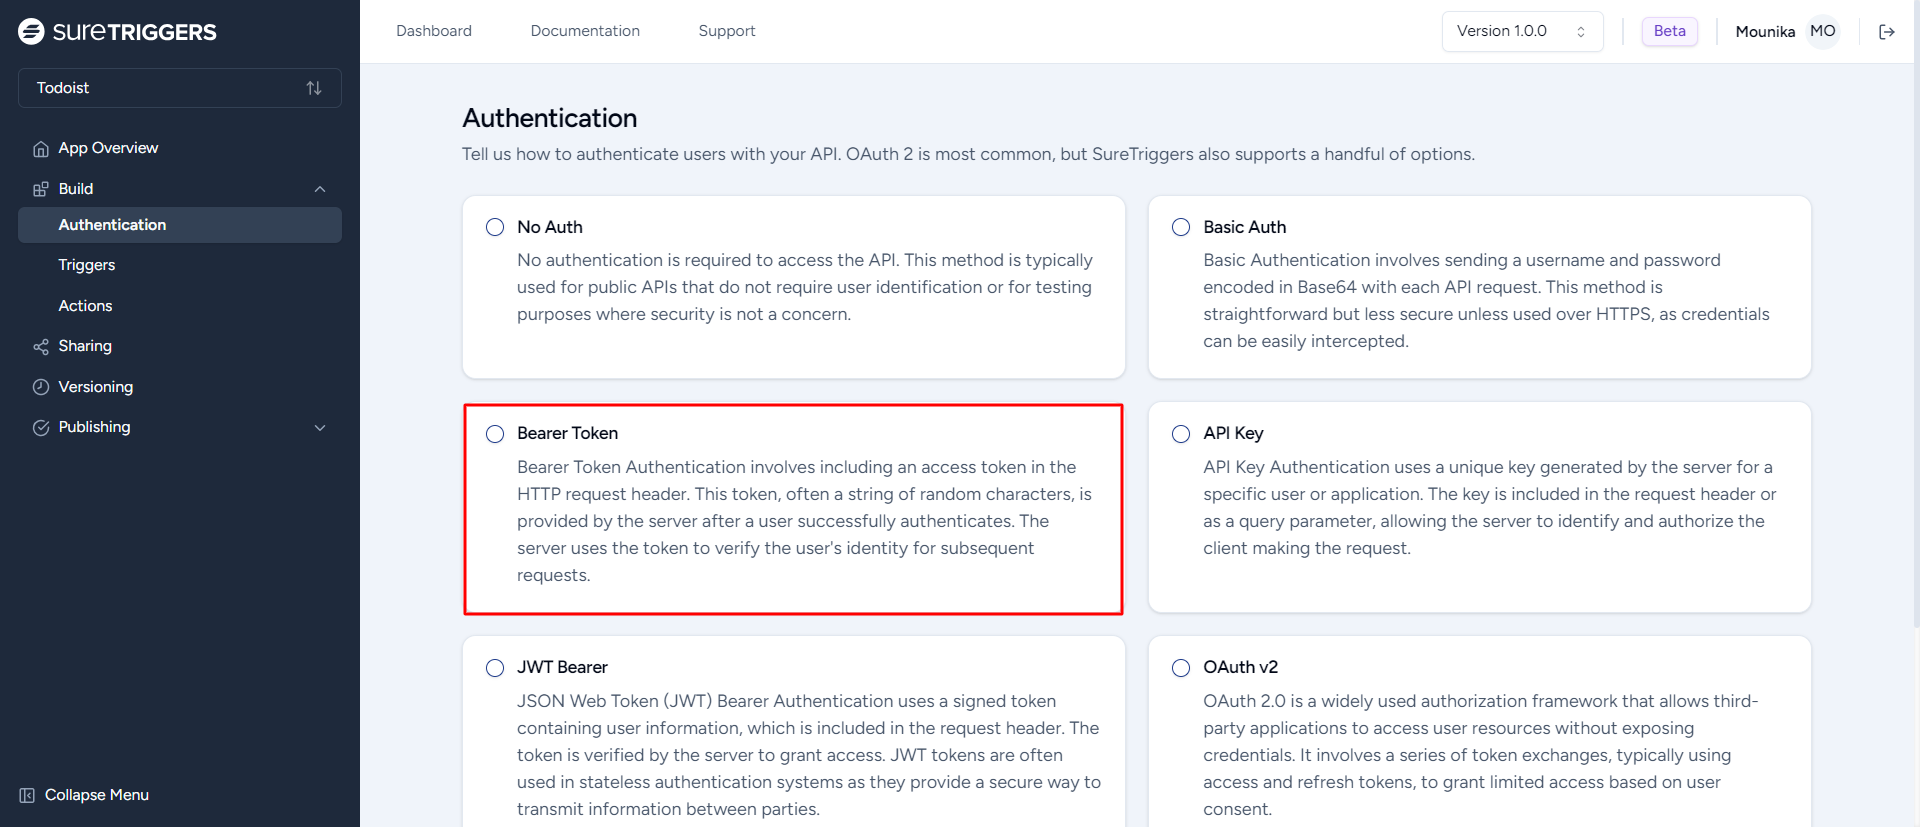
- On the Authentication page, select “Bearer Token”. We followed the Todoist API documentation for selecting the authentication type as the Bearer Token.
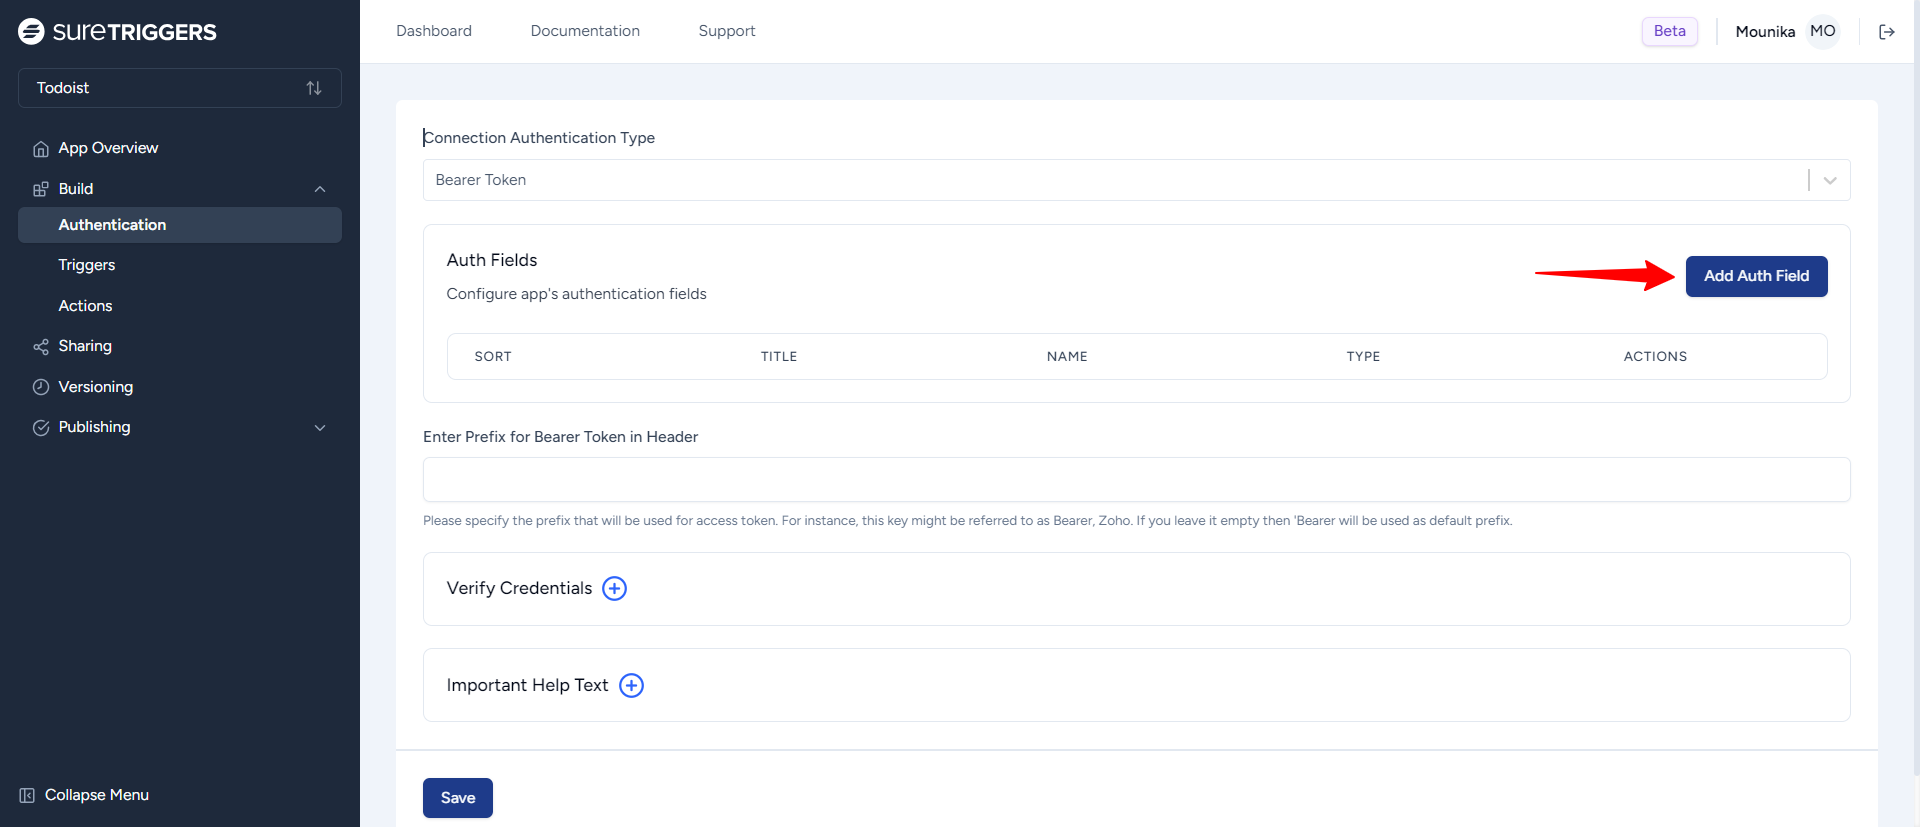
Now, you need to add the input field for the connection. This is required for OttoKit users to pass the Bearer Token while creating the connection between Todoist and the OttoKit platform.
Only then, they will be able to include Todoist (or your app) as a part of their automation workflows.
- To do so, click the Add Auth Field button to create the input field for users to enter their Bearer Token.
- Give the field a user-friendly name, such as “Bearer Token.” This is what users will see when they connect Todoist to OttoKit.
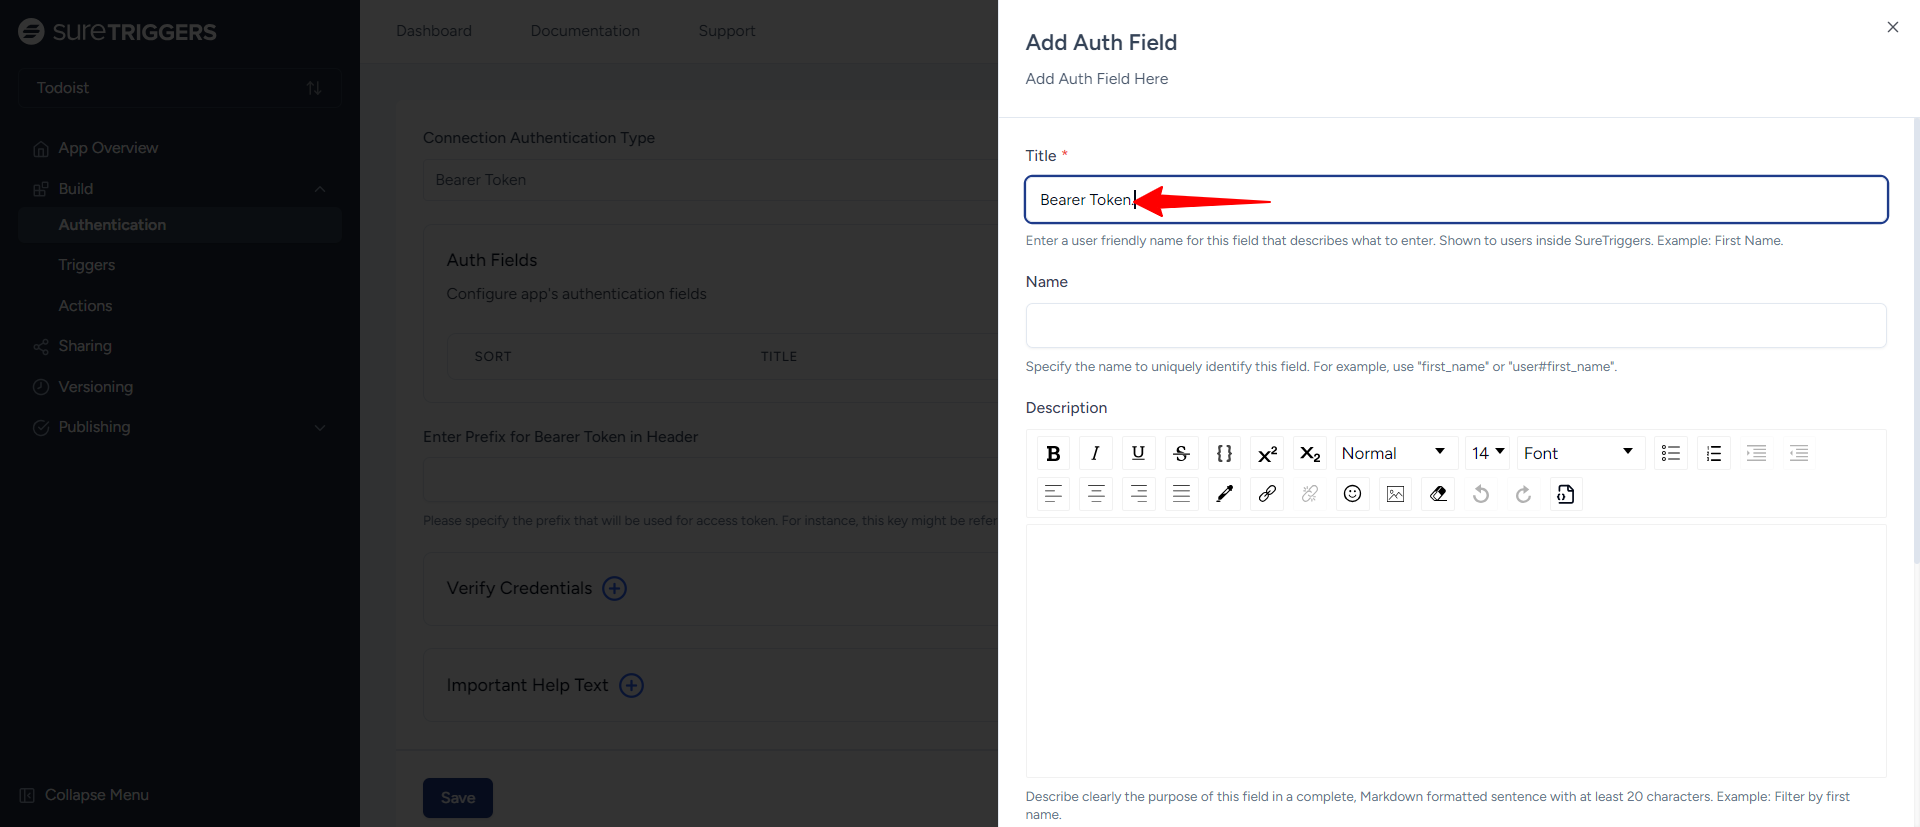
- In the “Name” field, give the API key a unique label, like “bearer_token” This label helps OttoKit know what data is being sent. (internal label)
Later, when users set up automation, OttoKit can use this label to make sure the right information (like the Bearer Token) is sent at the right time, without needing to set it up again.
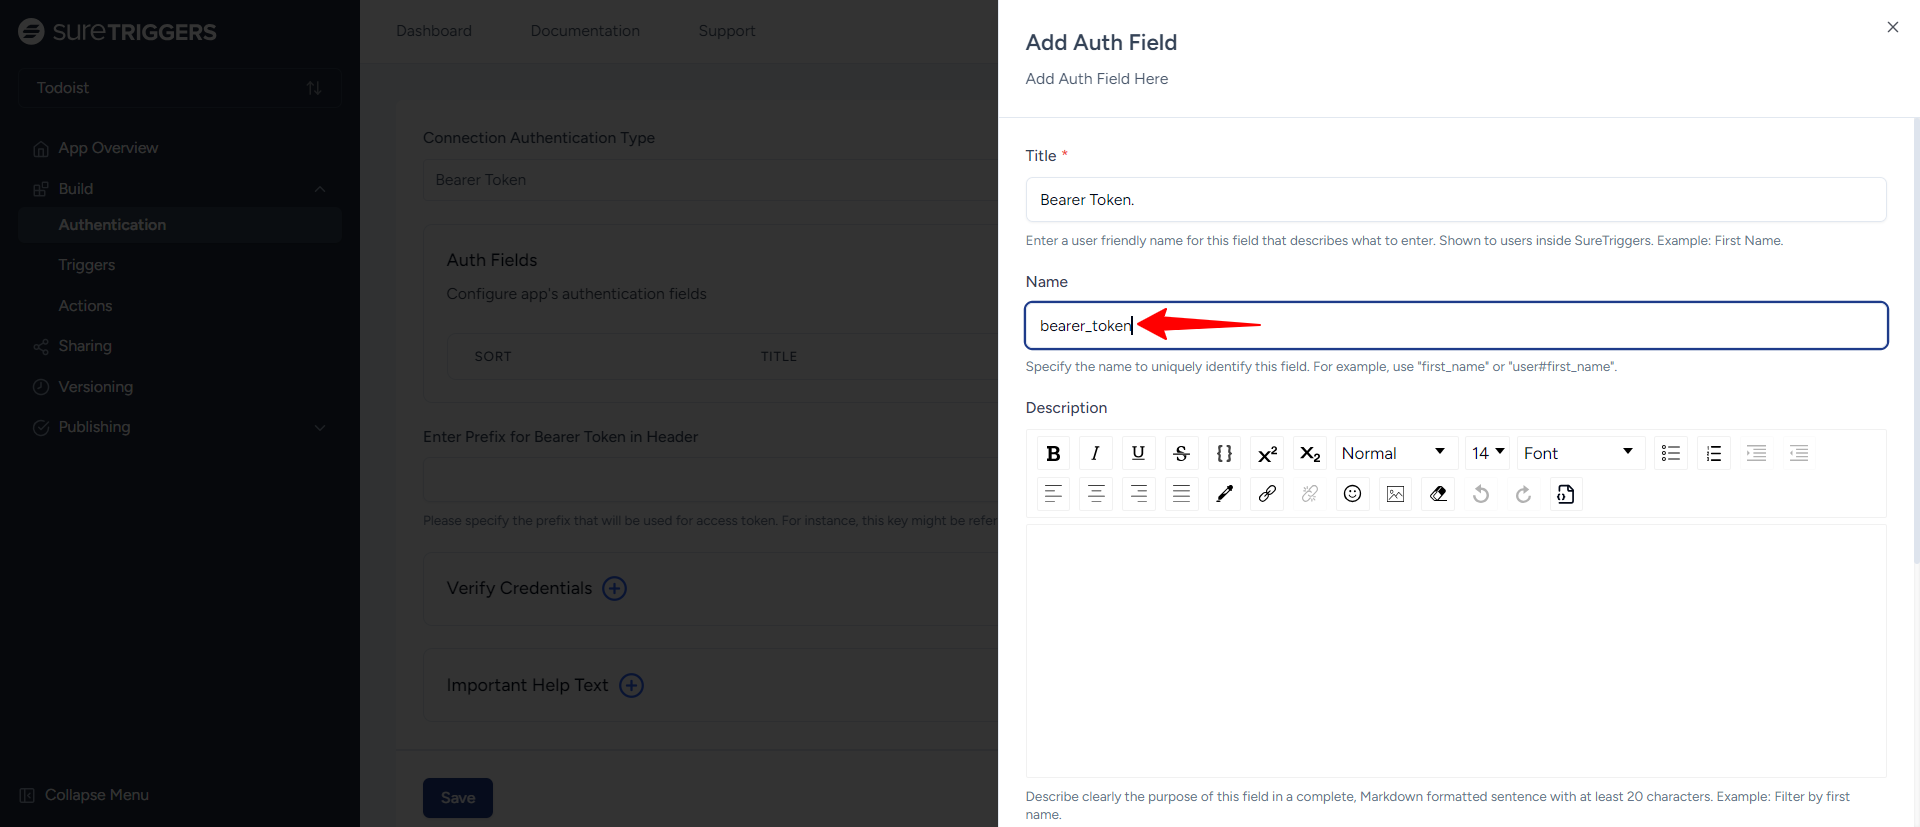
- Add a Description that explains where users can find their Bearer Token in their Todoist account, such as: “You can find your Bearer Token in the API section of your Todoist account settings.”
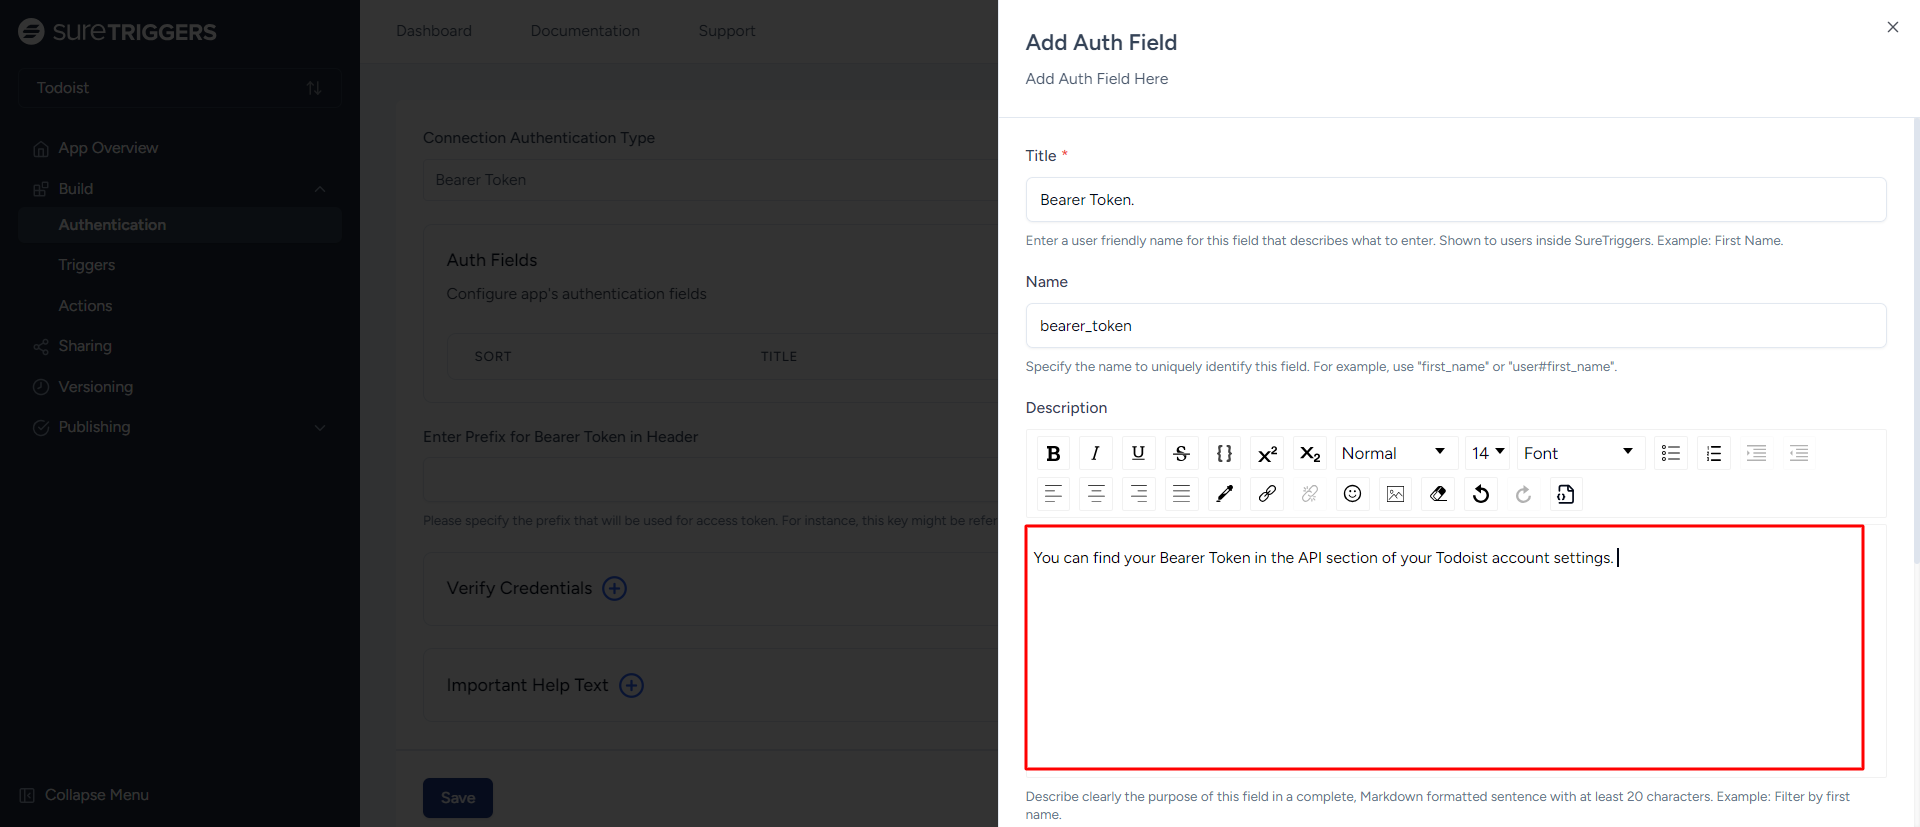
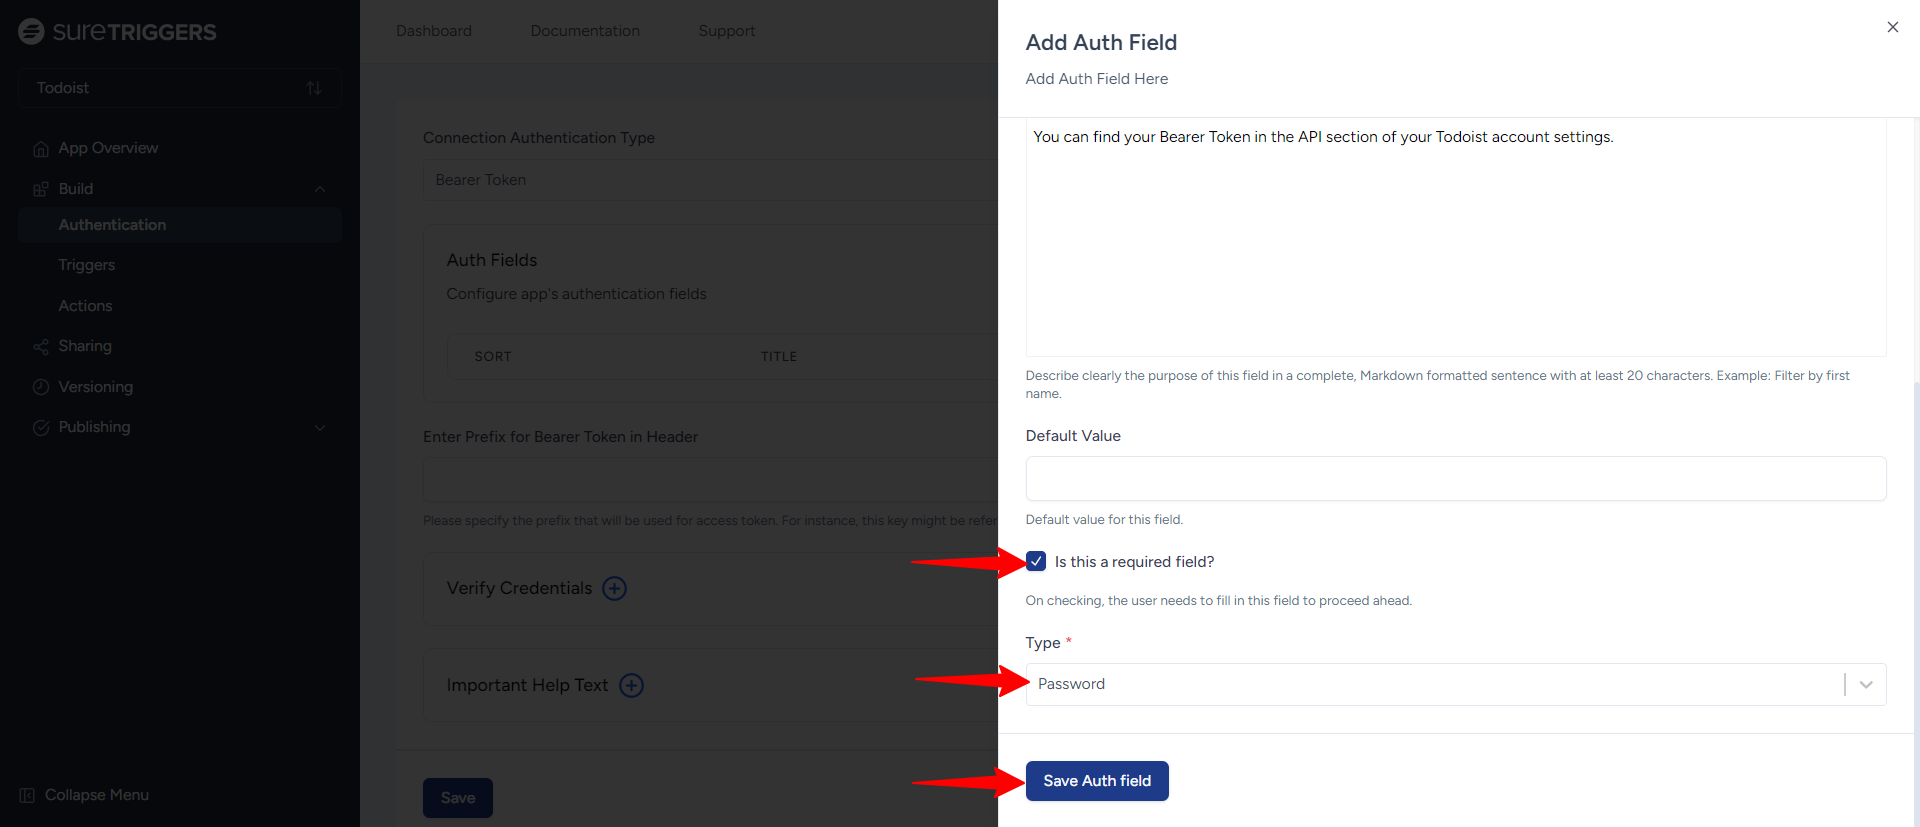
- Check the box to make this field required since users must provide the token to authenticate.
- For security, select the field type as Password to hide the token when entered.
- Finally, click the Save Auth field button to save your authentication.
How to Test Your Bearer Token Authentication?
After setting up the authentication, it’s important to test the connection to ensure everything is working correctly. Here’s how to test it:
- Verify the Credentials: Once you’ve set up the authentication, click on the plus icon next to the “Verify Credentials” tab in App Builder.

2. Make a Test API Call:
- App Builder will send a test request to Todoist to ensure that the Bearer Token is valid.
- Use the easiest available endpoint for the test call. For example, use a GET method with an endpoint URL from Todoist’s API documentation (e.g., https://api.todoist.com/rest/v2/projects).
- Select “Bearer Token” as the authentication type.
- Set the Key to “Authorization” and the Value to the Bearer Token you entered earlier.
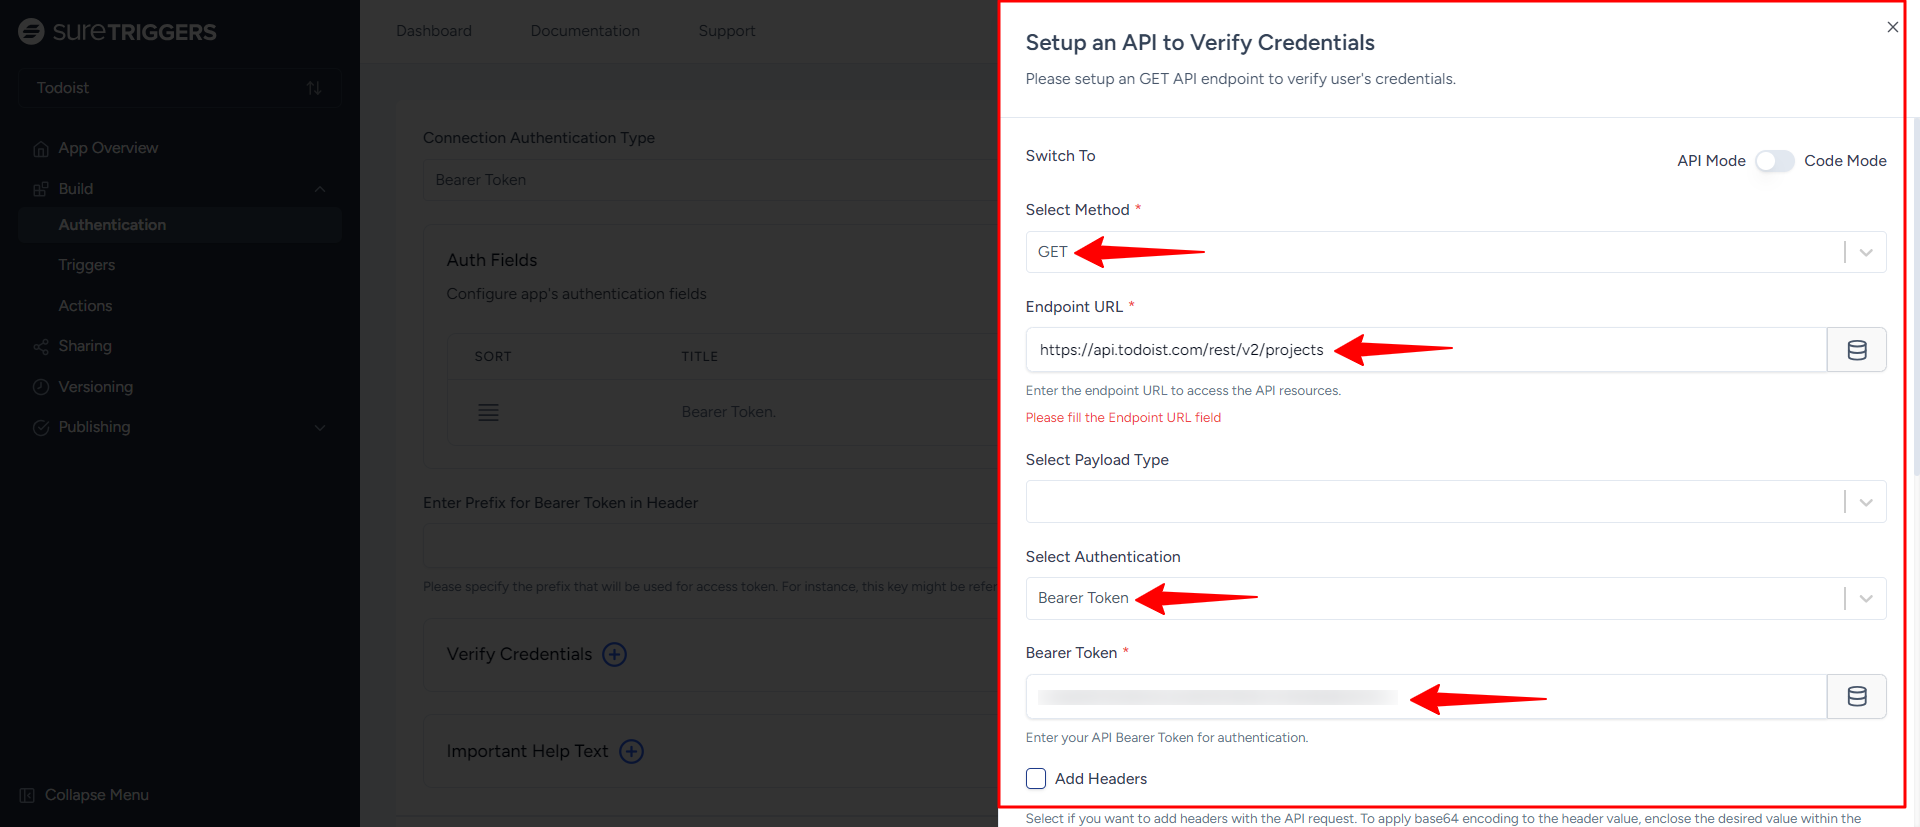
Note: You may need to manually enter the Bearer Token for the first time during this test to verify the connection.
- After filling out the required fields, click the Verify Connection button. If the connection is successful, you’ll receive a notification.
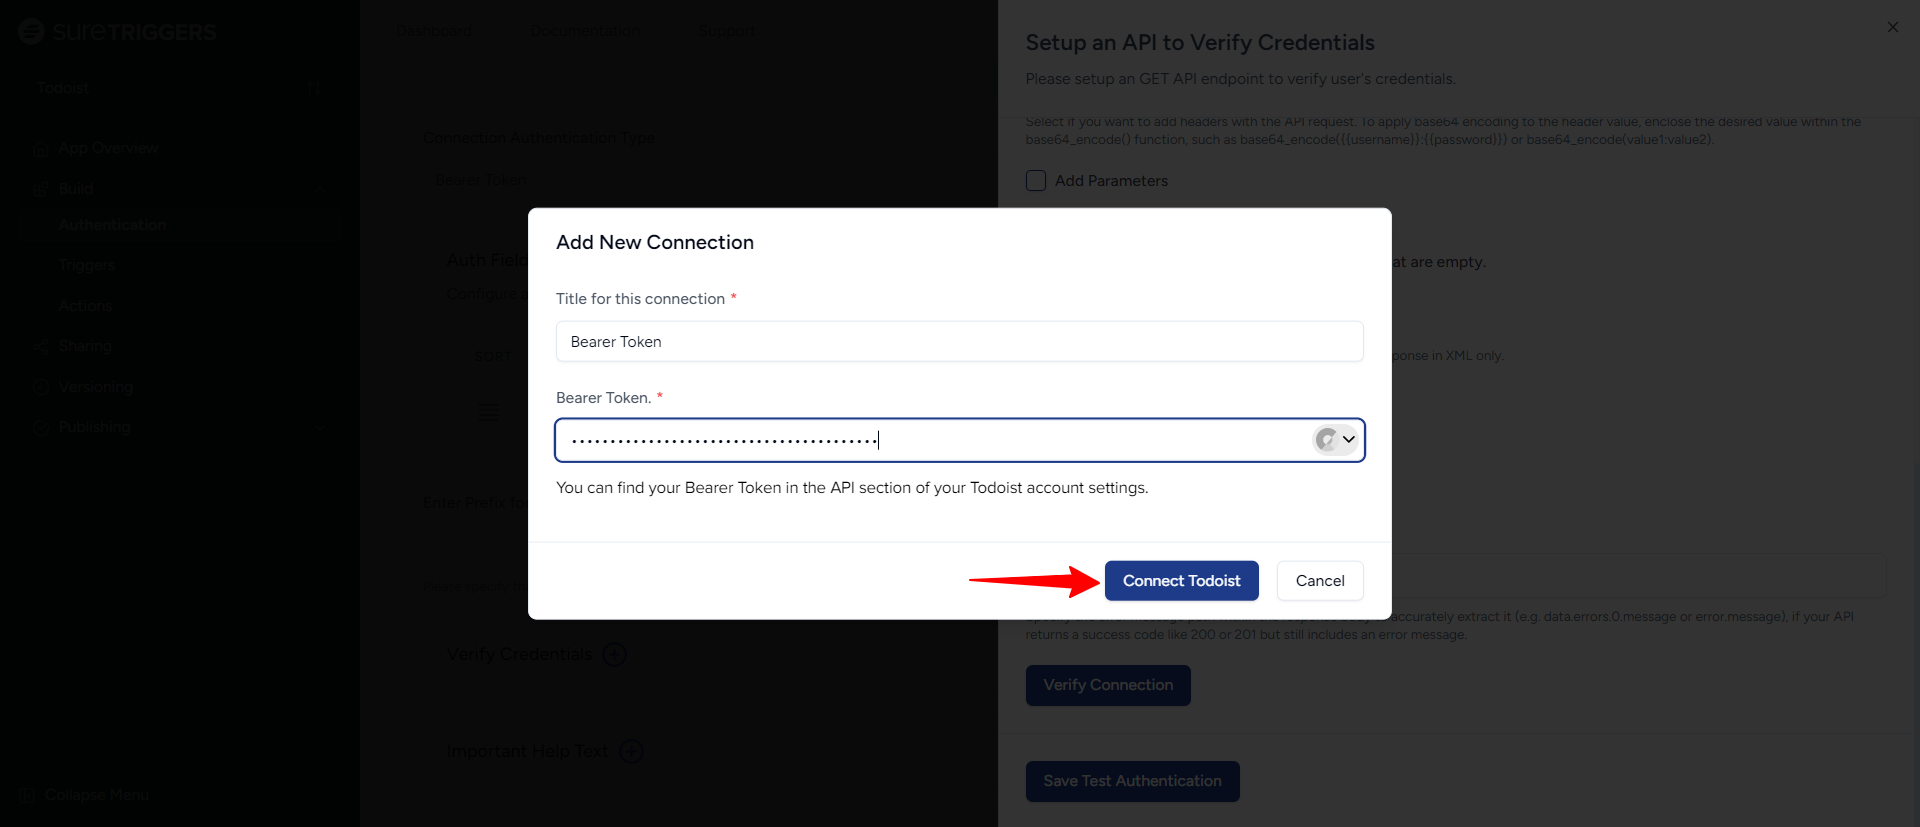
- A new Add New Connection pop-up will appear. Enter your connection name, API Token, and click on the Connect Todoist button. (specify which api token)
- You will receive a successful connection notification afterward.
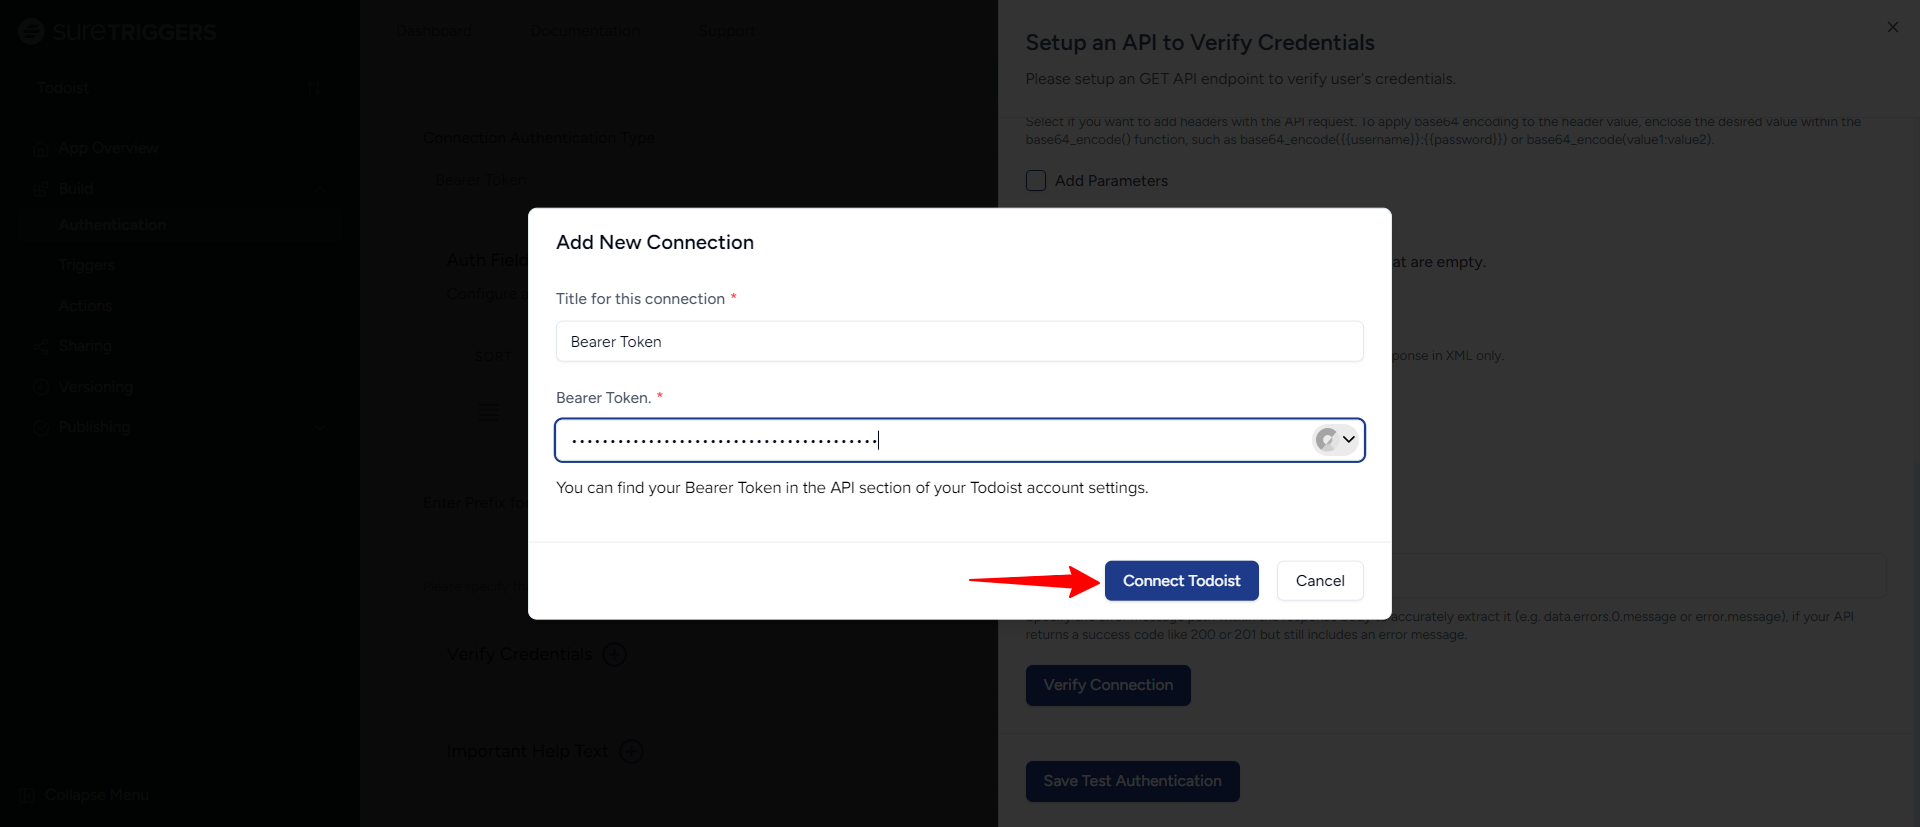
Upon successful verification, you will get a success message telling you that App Builder successfully connected with OttoKit.
You can now click on the Save Test Authentication button at the bottom of the flyout form.
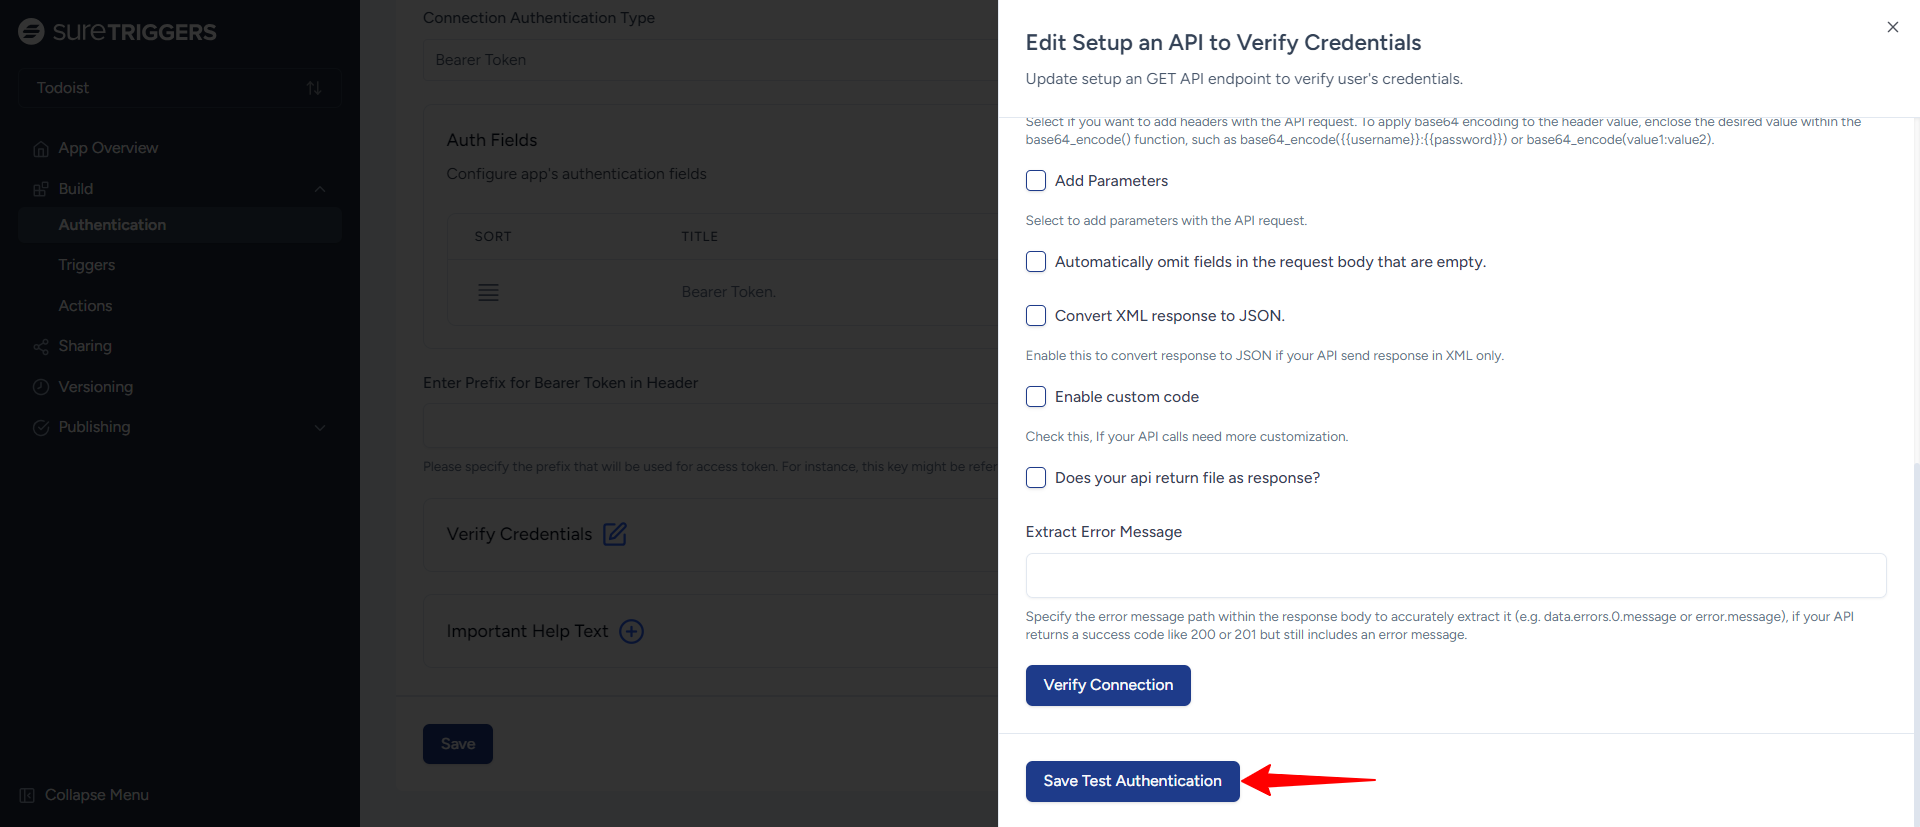
That’s all! You can now start setting up actions and triggers for your app.
What If the Authentication Fails?
If the connection fails during testing, here are some steps to troubleshoot:
- Make sure you’ve entered the correct Bearer Token from Todoist. If it’s incorrect or expired, you won’t be able to authenticate.
- Ensure that the API endpoint and method are correctly set according to Todoist’s API documentation.
If these troubleshooting steps don’t solve the issue, refer to the Todoist API documentation or contact support for further assistance.
By following this guide, you can easily authenticate Todoist with OttoKit using the Bearer Token method. With this secure connection, you can automate your tasks and workflows seamlessly across platforms.
If you have any questions or run into any issues, don’t hesitate to reach out to us. We’re always here to help!
We don't respond to the article feedback, we use it to improve our support content.