- Prerequisites
- Building an Integration
- Setting Up Authentication
- Setting Up Triggers & Actions
- Publishing Integration
- How To Authenticate Your Application Using The API Key Method
- How to Set-Up the Integration Based on Auth Type Bearer Token
- How To Authenticate Your Application Using OAuth 2.0
- How To Authenticate Your Application Using Basic Auth
- How To Authenticate Your Application Using The JWT Bearer Method
- How to Set-Up the Integration Based on Auth Type Session Auth
- How To Authenticate Your Application Using Custom Auth
How To Authenticate Your Application Using OAuth 2.0
This guide provides a comprehensive, step-by-step guide to understanding the OAuth 2.0 authentication process.
For example, we have chosen “Hubspot” as an example application.
Remember, when you’re setting up authentication in OttoKit App Builder, you are building a screen that prompts users to redirect to another page to enter their connection details and link their app with OttoKit.
Let’s get started!
How OAuth 2.0 Works
OAuth 2.0 is a way for apps to ask permission to access your data without needing your password. Instead of sharing your login details, the app will redirect you to a secure page where you can decide what information to share.
For example, you might have signed up for an app, and instead of creating a password, the app redirected you to a secure page where you created an account with only your email address.
In the context of App Builder, OAuth 2.0 allows users to securely authenticate with your app and connect it with other apps on the OttoKit platform.
Instead of providing an API key or password, users grant permission for your app to access their HubSpot data.
Here’s how it works step by step:
- Redirect to HubSpot: When you set up authentication in App Builder, users are redirected to HubSpot’s secure login page.
- Grant Access: Users log in to HubSpot and choose to share their data with your app. They might decide to allow access to their contacts or marketing information.
- Receive Access Token: Once users approve, HubSpot sends an “access token” back to your app. This token is a special key that confirms the connection is valid.
- Data Interaction: With this access token, your app can pull data from HubSpot or send information to it without asking users to log in again. The token acts as proof that your app is allowed to access their information.
You don’t always have to select the OAuth 2.0 method. The authentication method for your app is mentioned in the app’s API documentation.
Authenticating Your App With OAuth 2.0
Here’s how you can authenticate with the App Builder using the OAuth 2.0 authentication method:
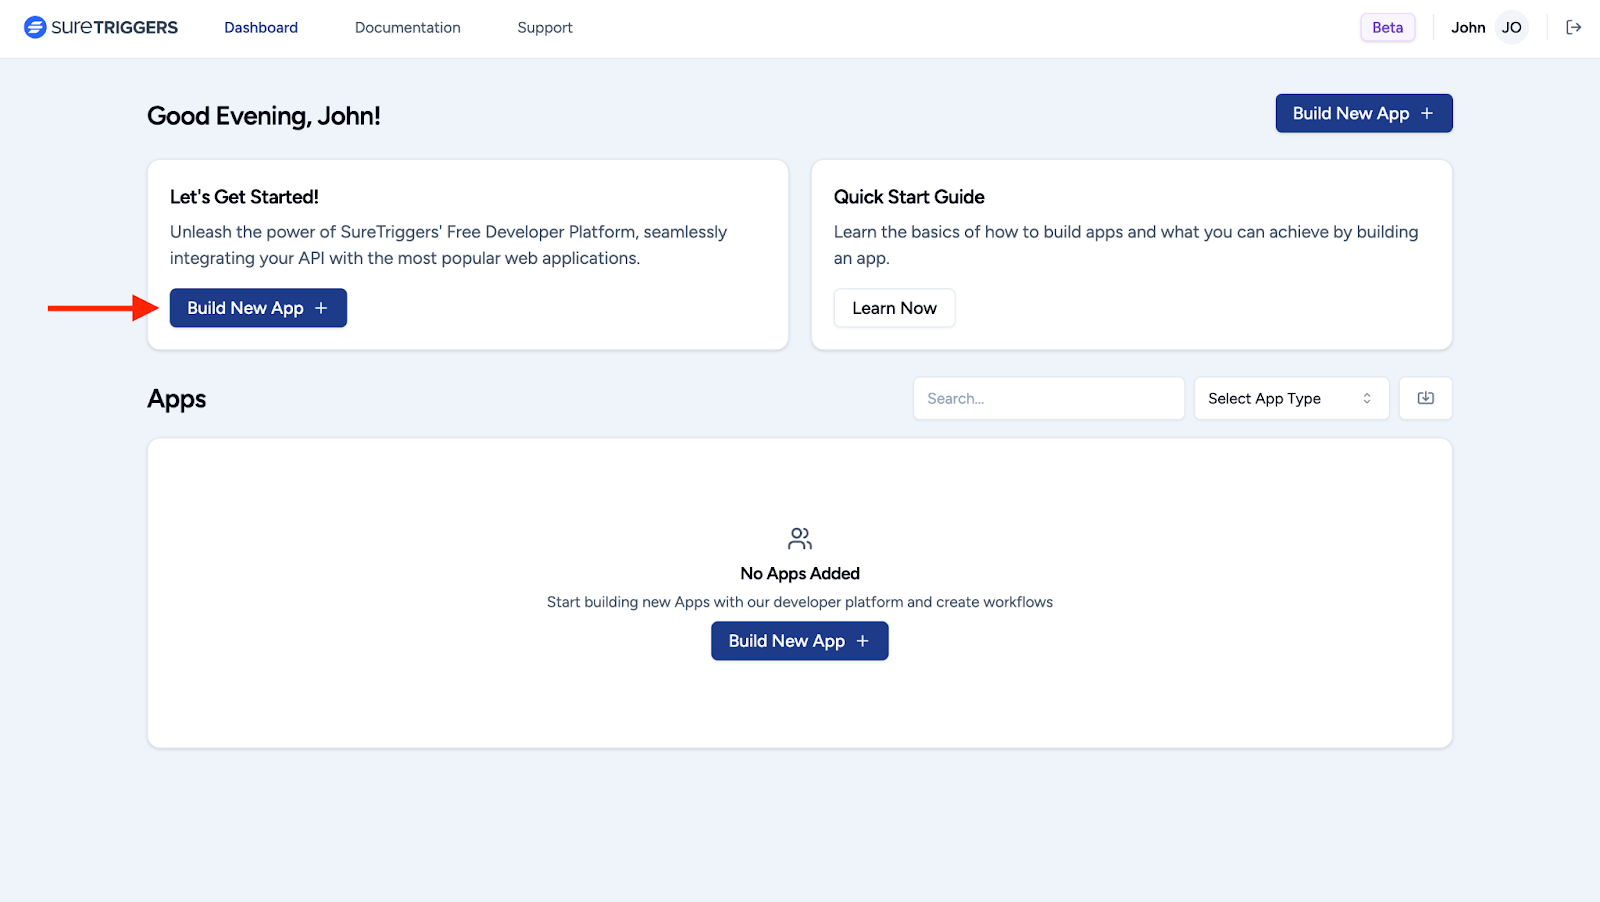
- Login to your App Builder dashboard.
- Here, click on the “Build New App” button. Fill in all the details of your app in the flyout, and then click on the “Create” button to create the app. Check out this article to learn more about this.
- You’ll be automatically redirected to the “App Overview” page. Here, click the “Add Authentication” button to proceed.
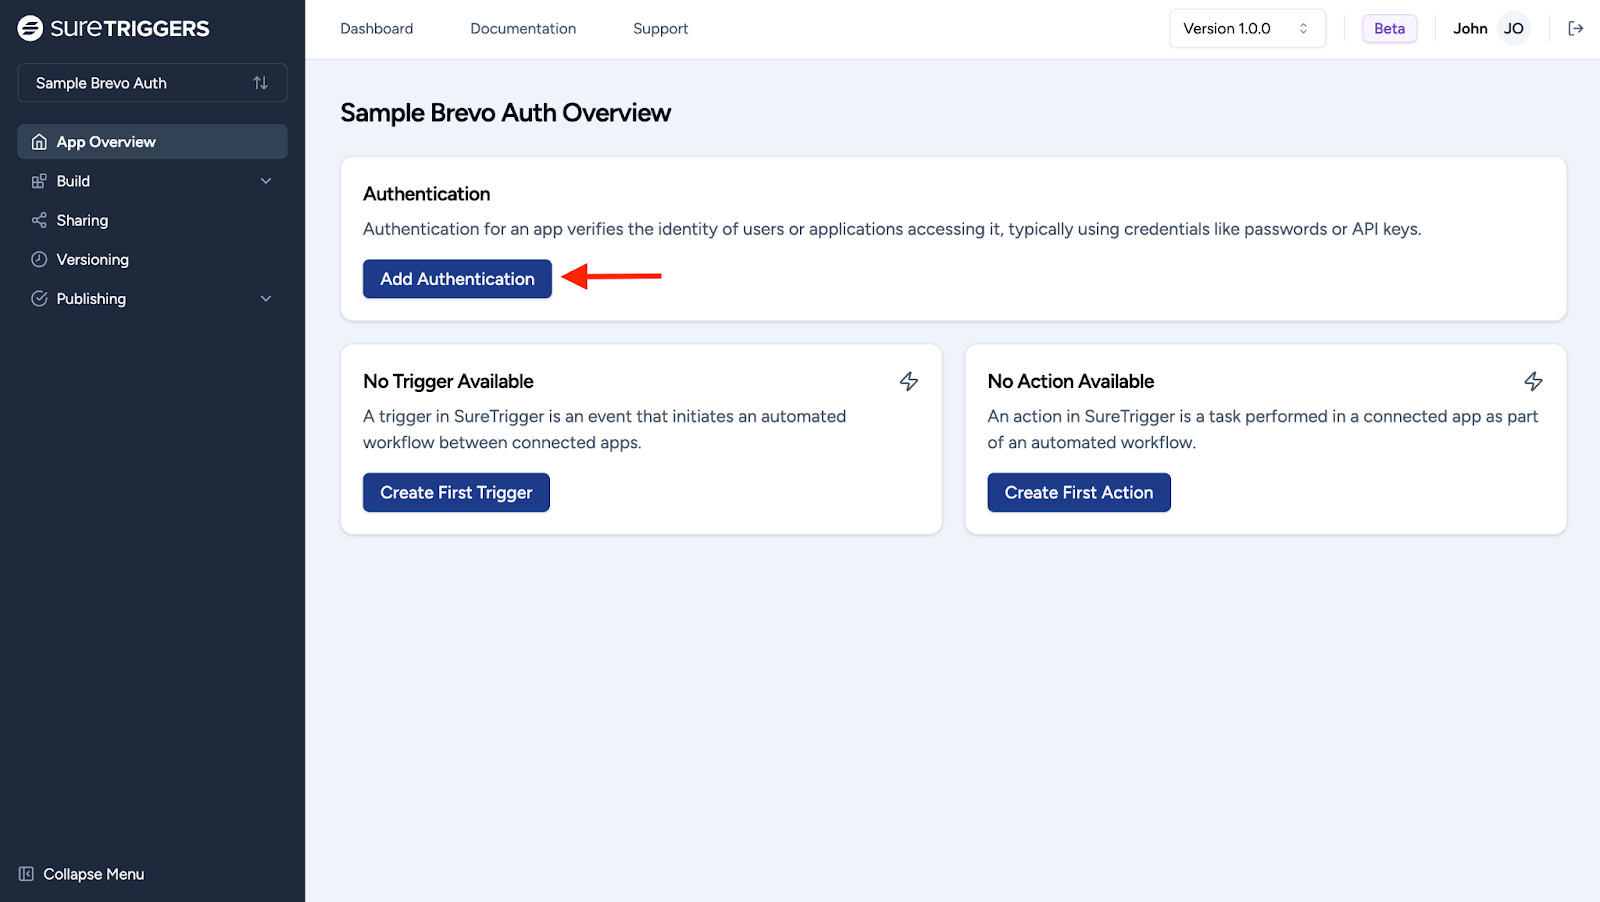
- On the Authentication page, select “OAuth v2”. We followed HubSpot’s API documentation for selecting the authentication type as the OAuth v2 key. You can adjust the method according to your API documentation.

Copying Your OAuth Redirect URL
Note: Before proceeding, you’ll need to create an app in your chosen platform’s developer or admin console (e.g., HubSpot).
In the console, locate the section where you can configure OAuth settings, and make sure to add the generated redirect URL under the list of allowed redirect URIs.
- Copy this URL and add it to the allowed list of redirect URLs in your app’s admin console.
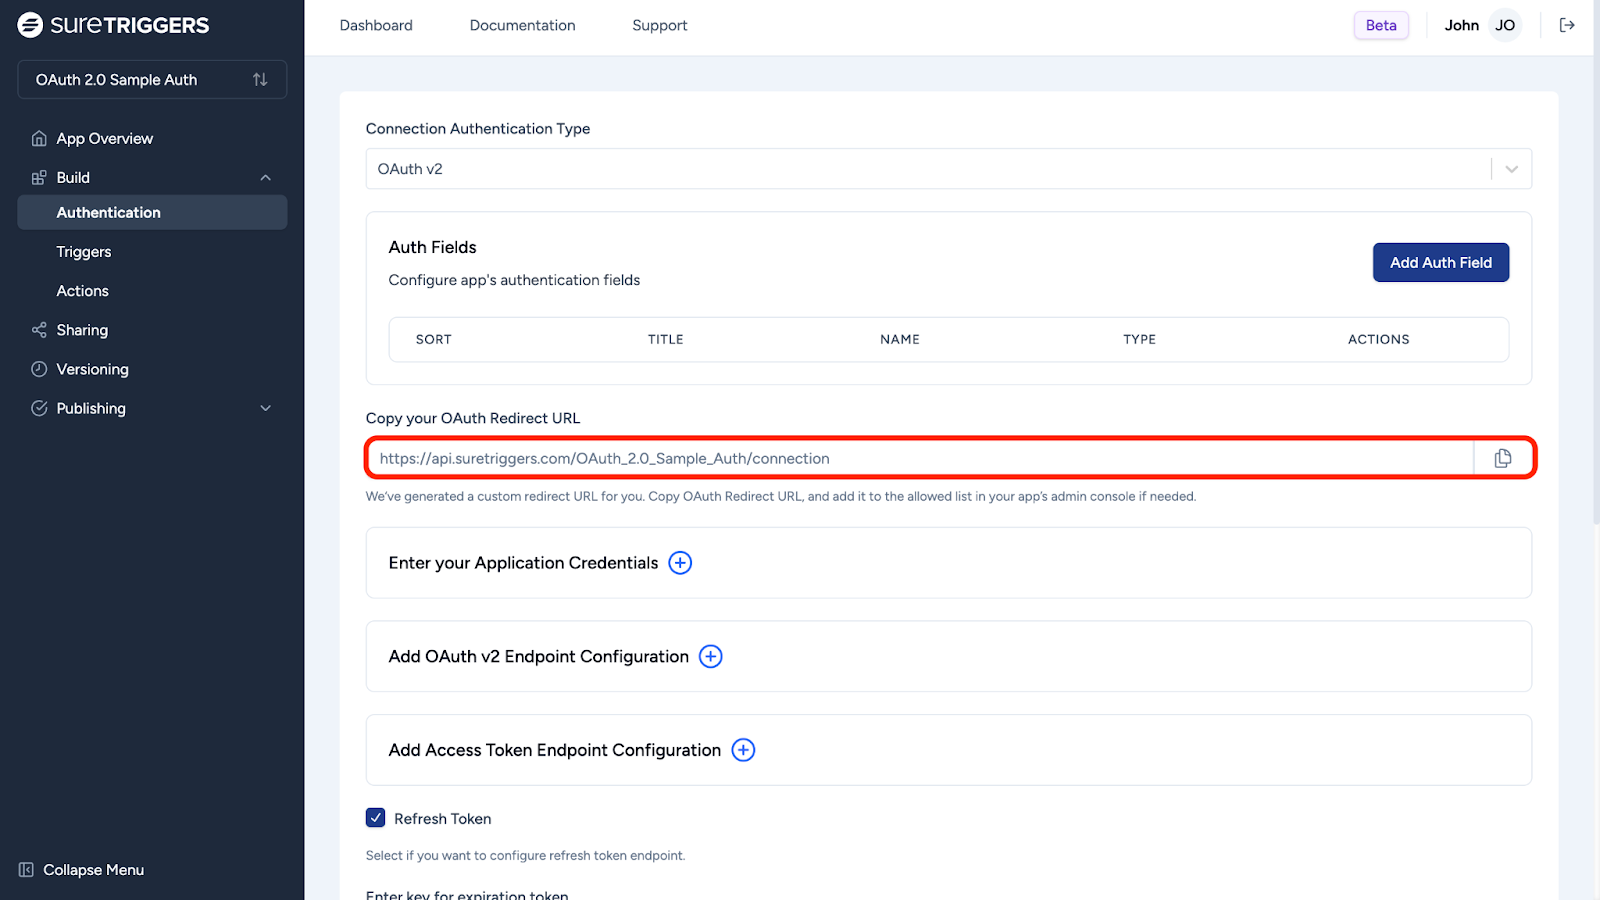
Where you paste the URL in your admin console depends on your app. Check your app’s API documentation for more details.
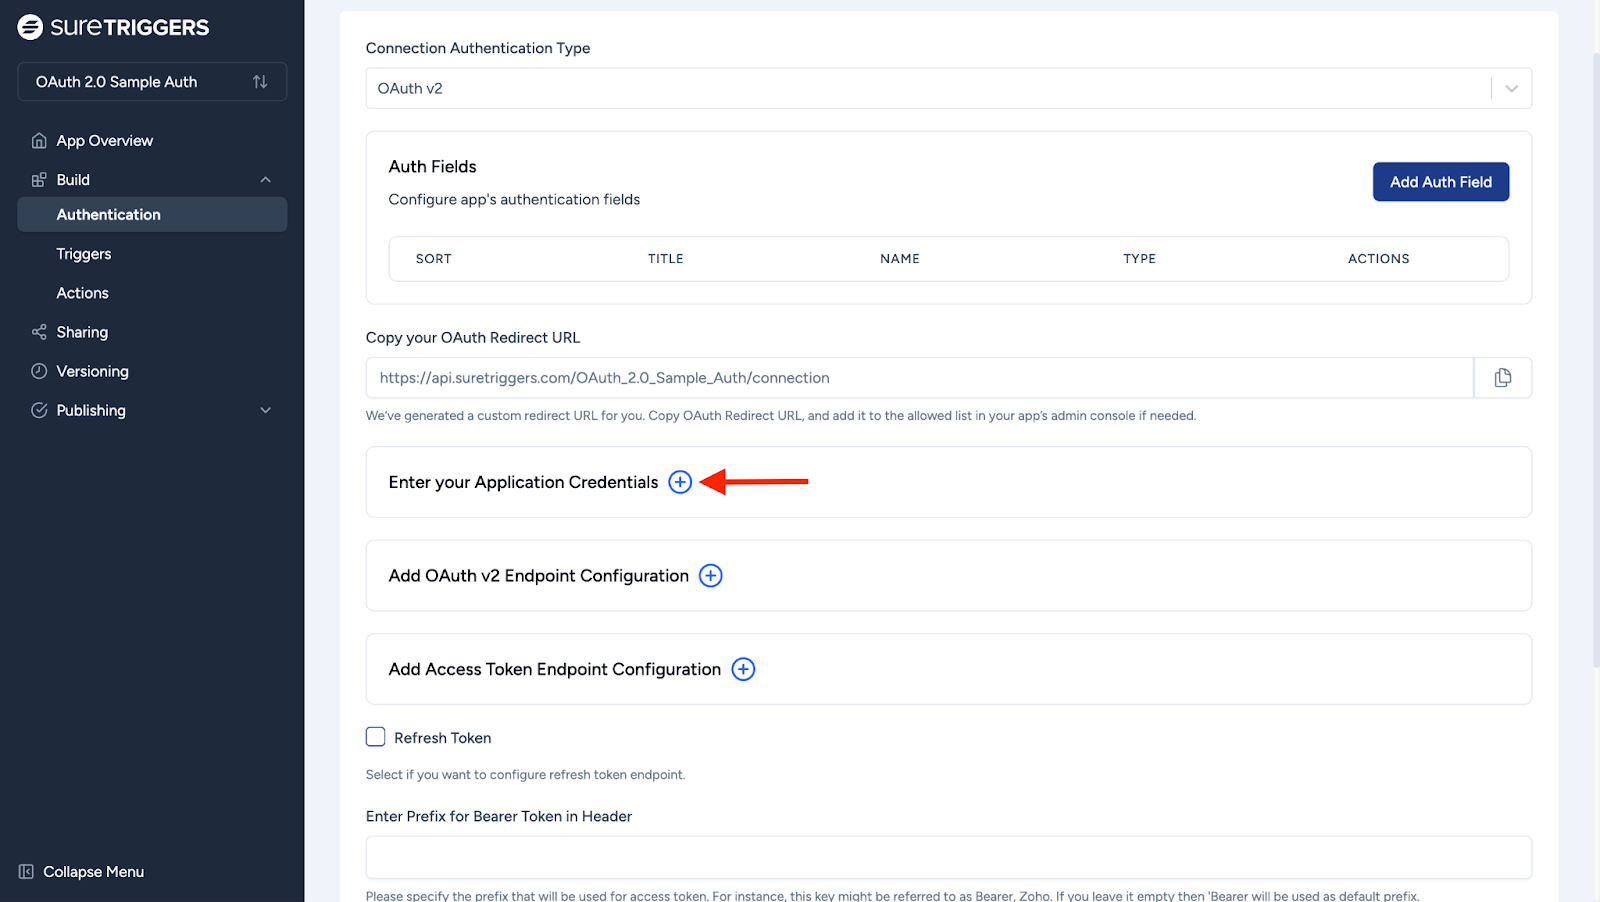
Entering Your Application’s Credentials
Next, you’ll need to enter your app’s credentials.
These credentials are typically called Client ID and Client Secret. They may be named differently depending on your app.
The location of these credentials in your app’s admin console may also vary. Be sure to check your app’s API documentation.
- Click the plus icon next to “Enter your Application Credentials.”
- Copy the Client ID and Client Secret from your app’s settings and paste them into this field.
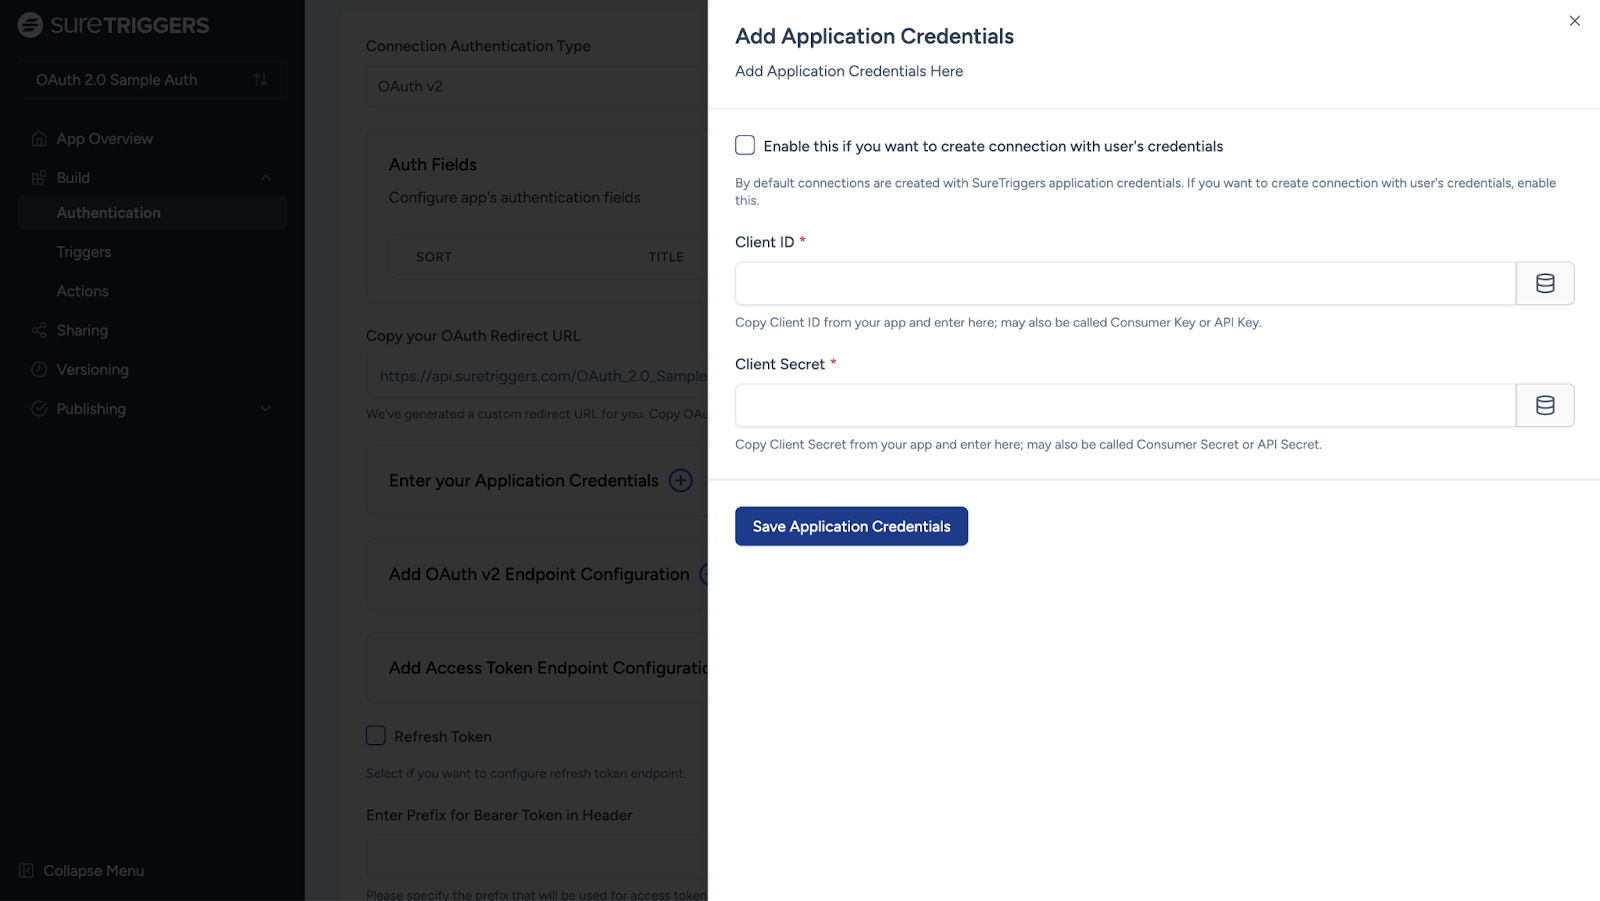
Once you’ve entered these details, click Save Applications Credentials to continue.
OttoKit will use the Client ID and Client Secret to verify your app and generate the necessary access tokens during the OAuth flow for users.
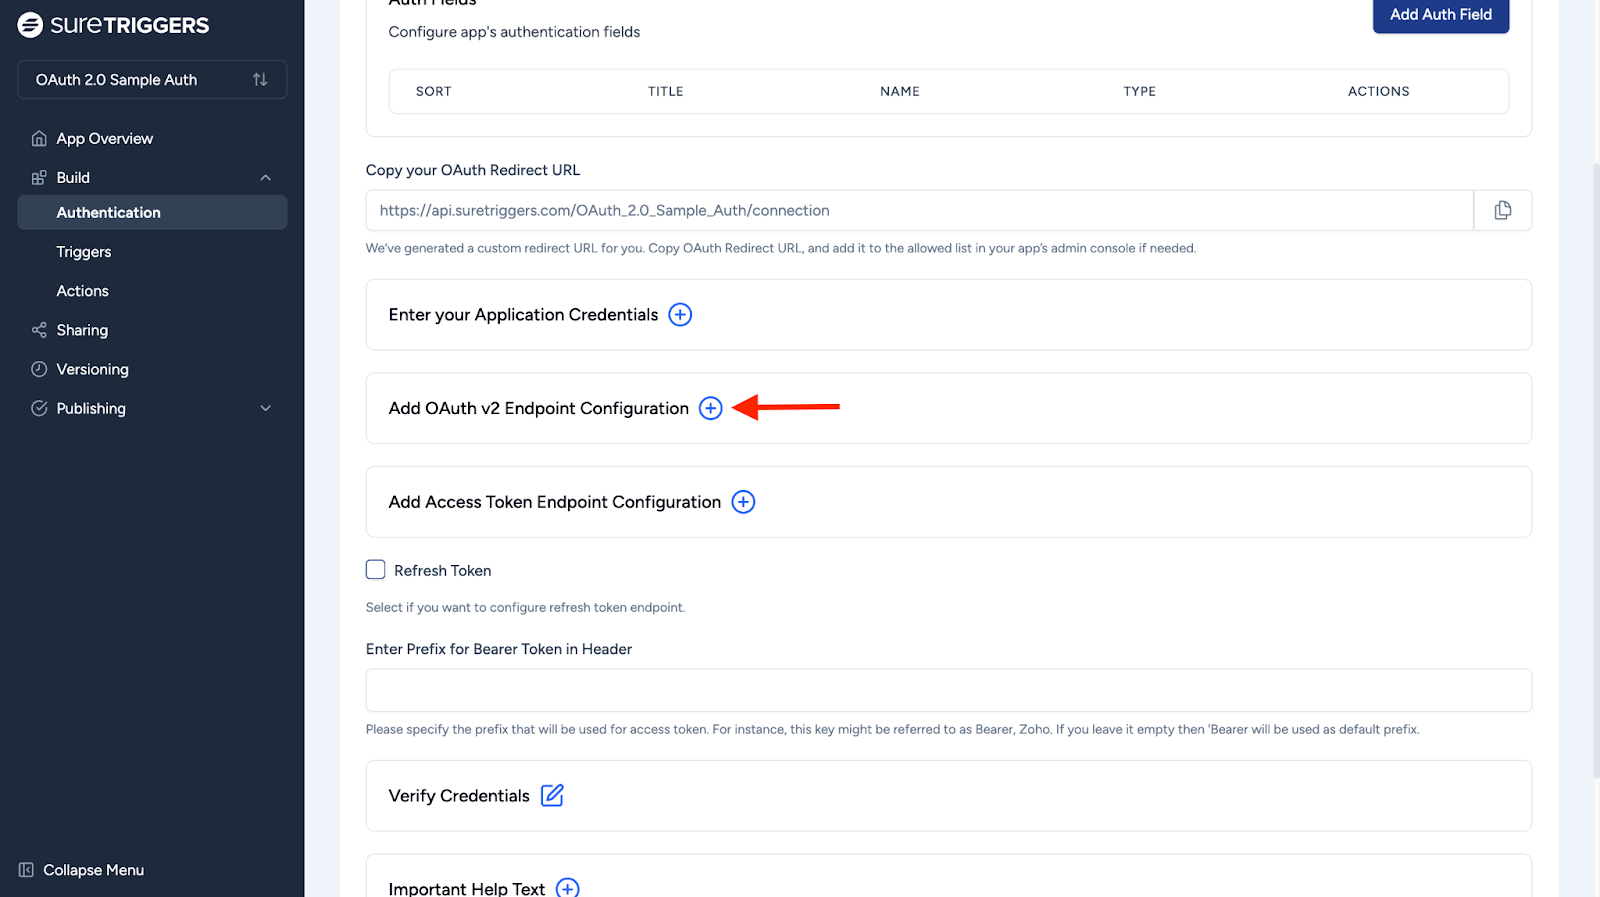
Adding OAuth 2.0 Endpoint Configuration Details
This step sets up the URL where users will go to give OttoKit permission to access their data in your app.
After logging in and approving access, OttoKit will receive an access token. This token allows OttoKit to securely interact with the user’s app data without needing their login credentials. To configure this:
- Click the plus icon next to “Add OAuth v2 Endpoint Configuration”.
- This is the URL where users will be redirected to authorize access. Find this in your app’s API documentation, typically under the OAuth or authorization section.
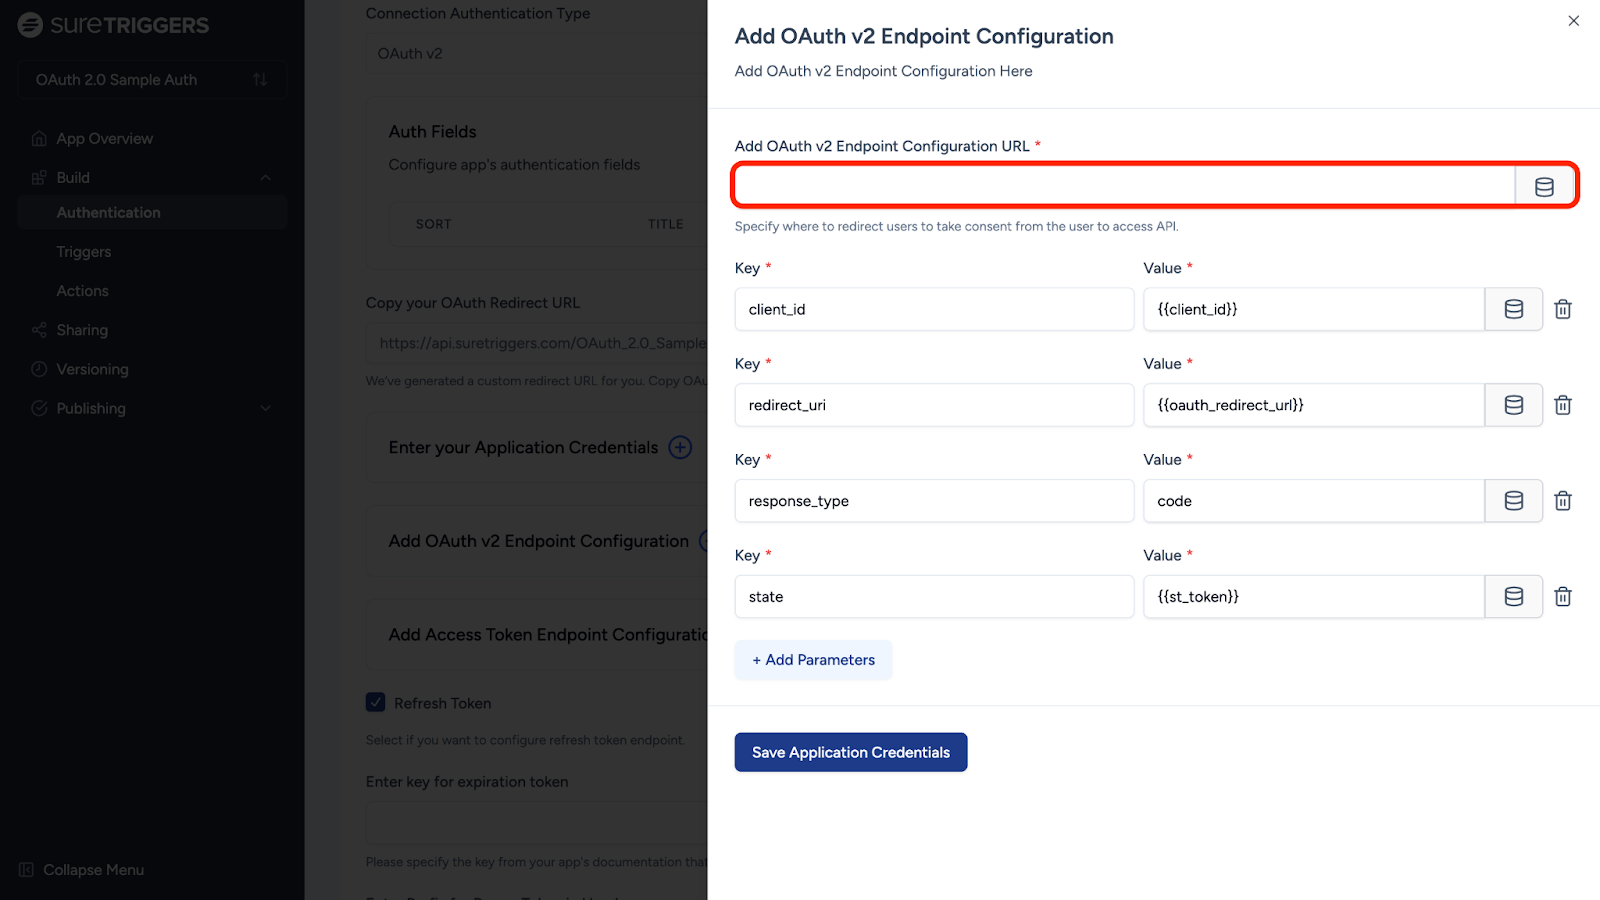
The key-value pairs are crucial for the OAuth 2.0 authentication process. They provide the necessary information for the authorization server to identify your app and the specific permissions being requested:
These key-value pairs appear automatically. If they don’t, enter them manually based on your app’s requirements:
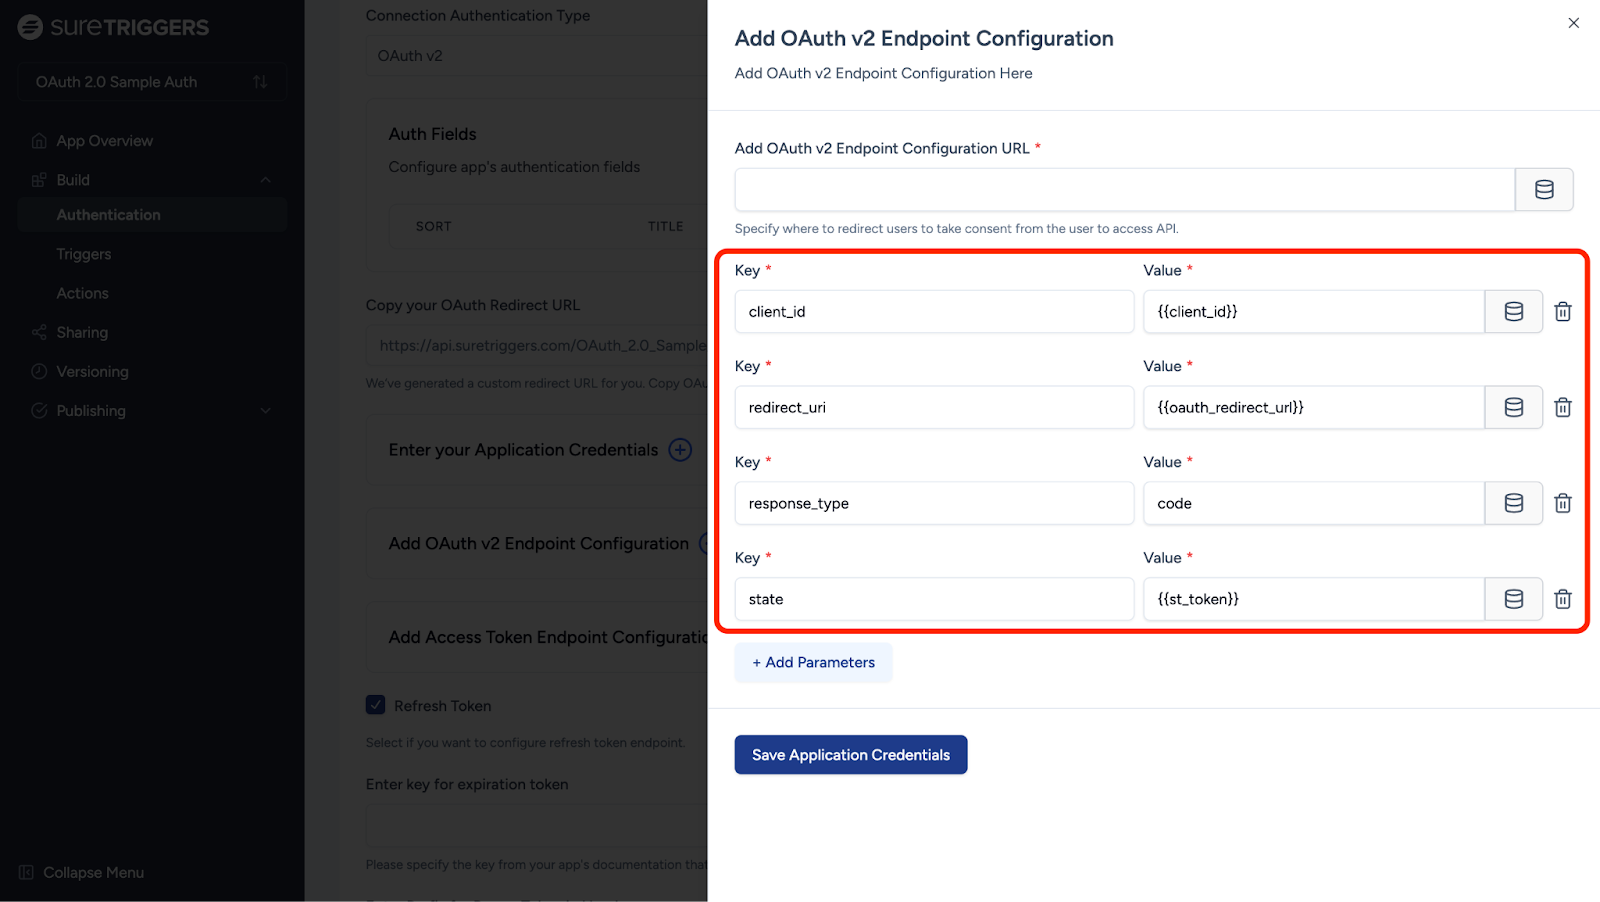
Once you’ve added all the required details, click Save Application Credentials to save the configuration.
Add Access Token Endpoint Configuration
This step sets up where OttoKit will send the authorization code to exchange it for an access token, allowing your users to securely connect and interact with your app in their OttoKit workflows.
The process for adding the access token configuration is very similar to the OAuth v2 Endpoint setup from the previous section.
- Enter the API URL from your app’s documentation where OttoKit will send the authorization code and receive the access token.

- The key-value pairs (such as code, redirect_uri, grant_type, etc.) will appear automatically. If they don’t, you’ll need to fill them in manually based on your app’s requirements.
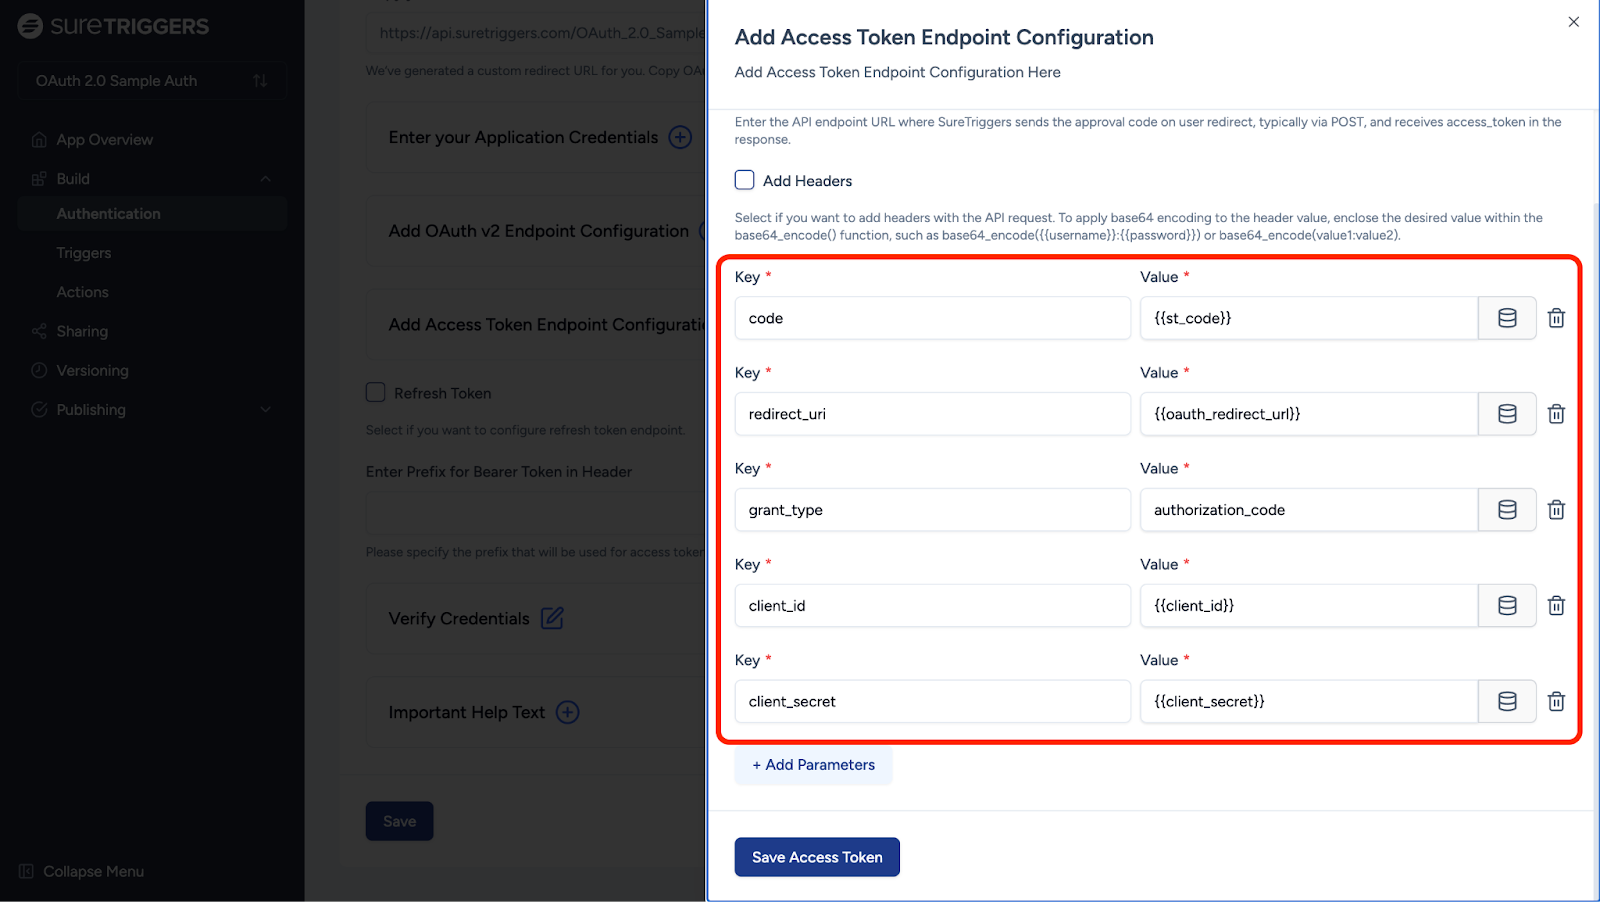
You can add additional parameters by clicking on the Add Parameters button. If not, just click on the Save Access Token to complete the configuration.
The Prefix for Bearer Token in Header defines how your app’s access token is sent in the HTTP headers during API requests.
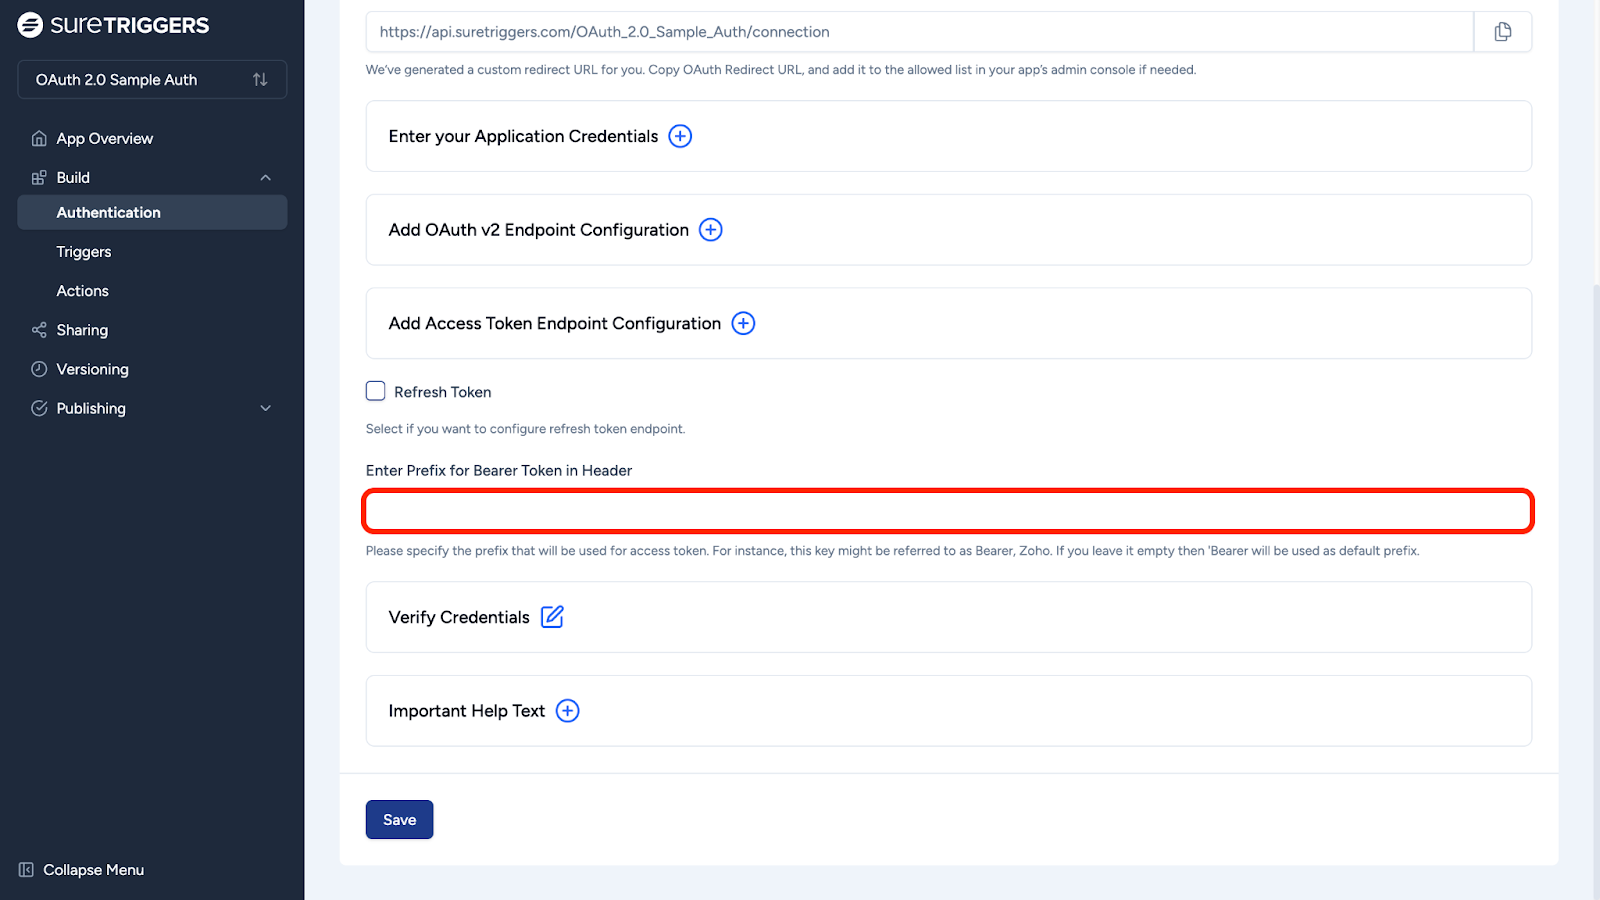
Set this according to your app’s API requirements, or leave it blank to use the default “Bearer” prefix.
Testing Your OAuth 2.0 Authentication
Testing your authentication is important as it’s used to test the related triggers and action steps when built.
As an example, we’ll perform an API call for HubSpot to ensure it functions correctly.
The App Builder will test an API endpoint by making a call to it and return a success message that will verify that our connection is successful.
Note: If you notice that the authentication fails, please review your API documentation and make the necessary adjustments.
Here’s how you can do it:
- Click on the icon next to the “Verify Credentials” tab.
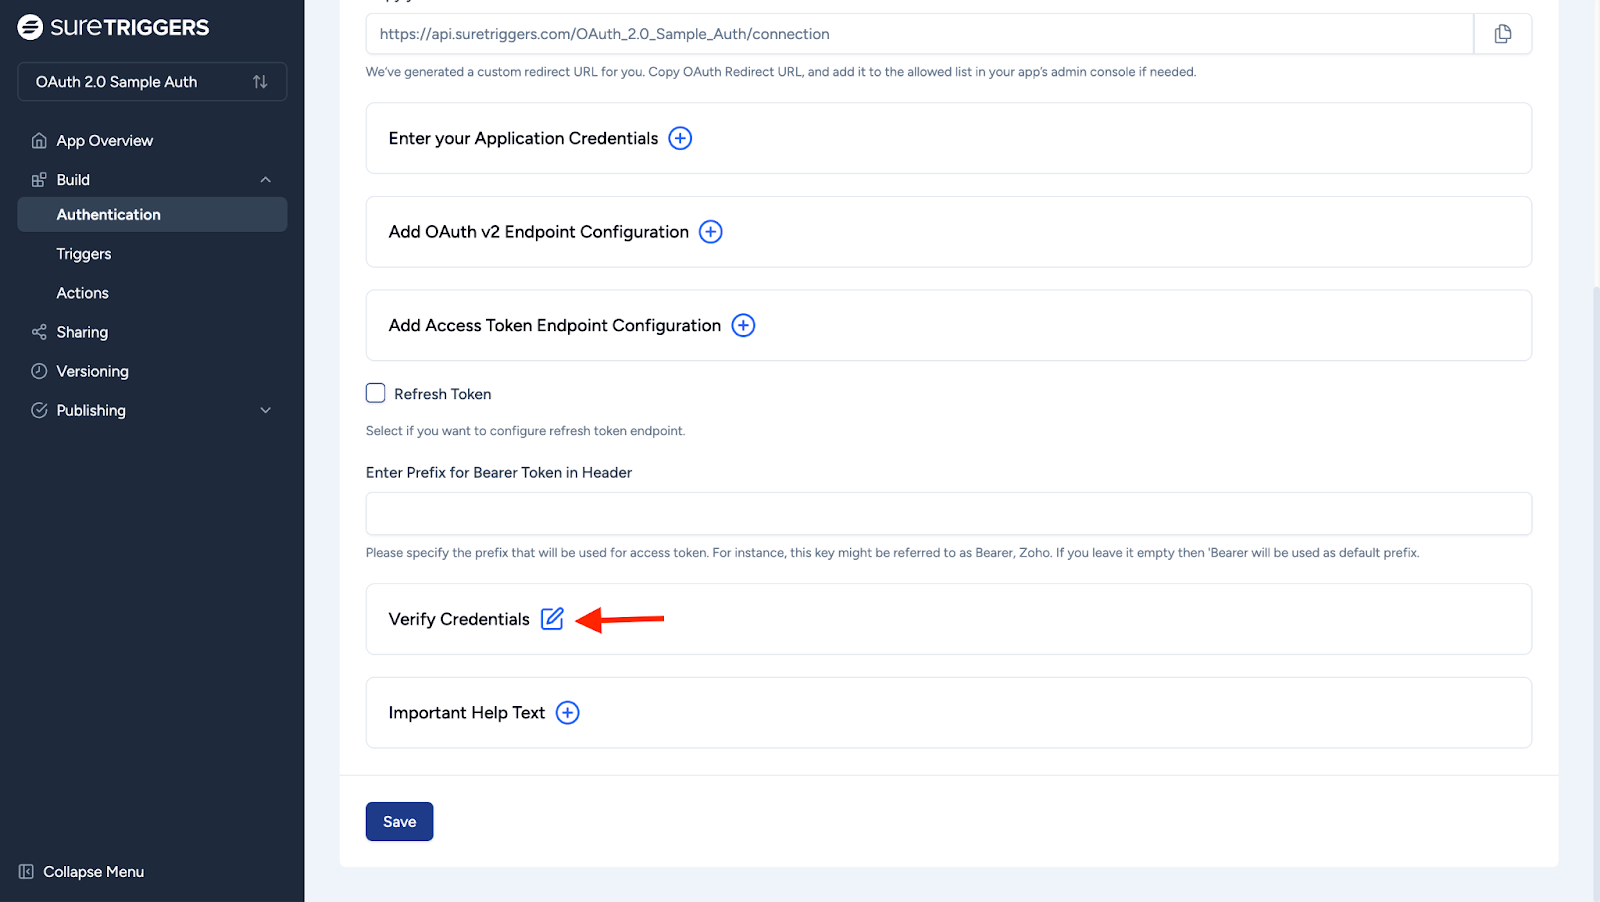
Note: You simply need to instruct OttoKit to make the test call using any available endpoint. It doesn’t need to be complicated.
- Select the method as “GET”.
- Enter the endpoint URL obtained from HubSpot’s (or your app’s) API documentation.

- Select the Authentication type as “OAuth 2.0”.
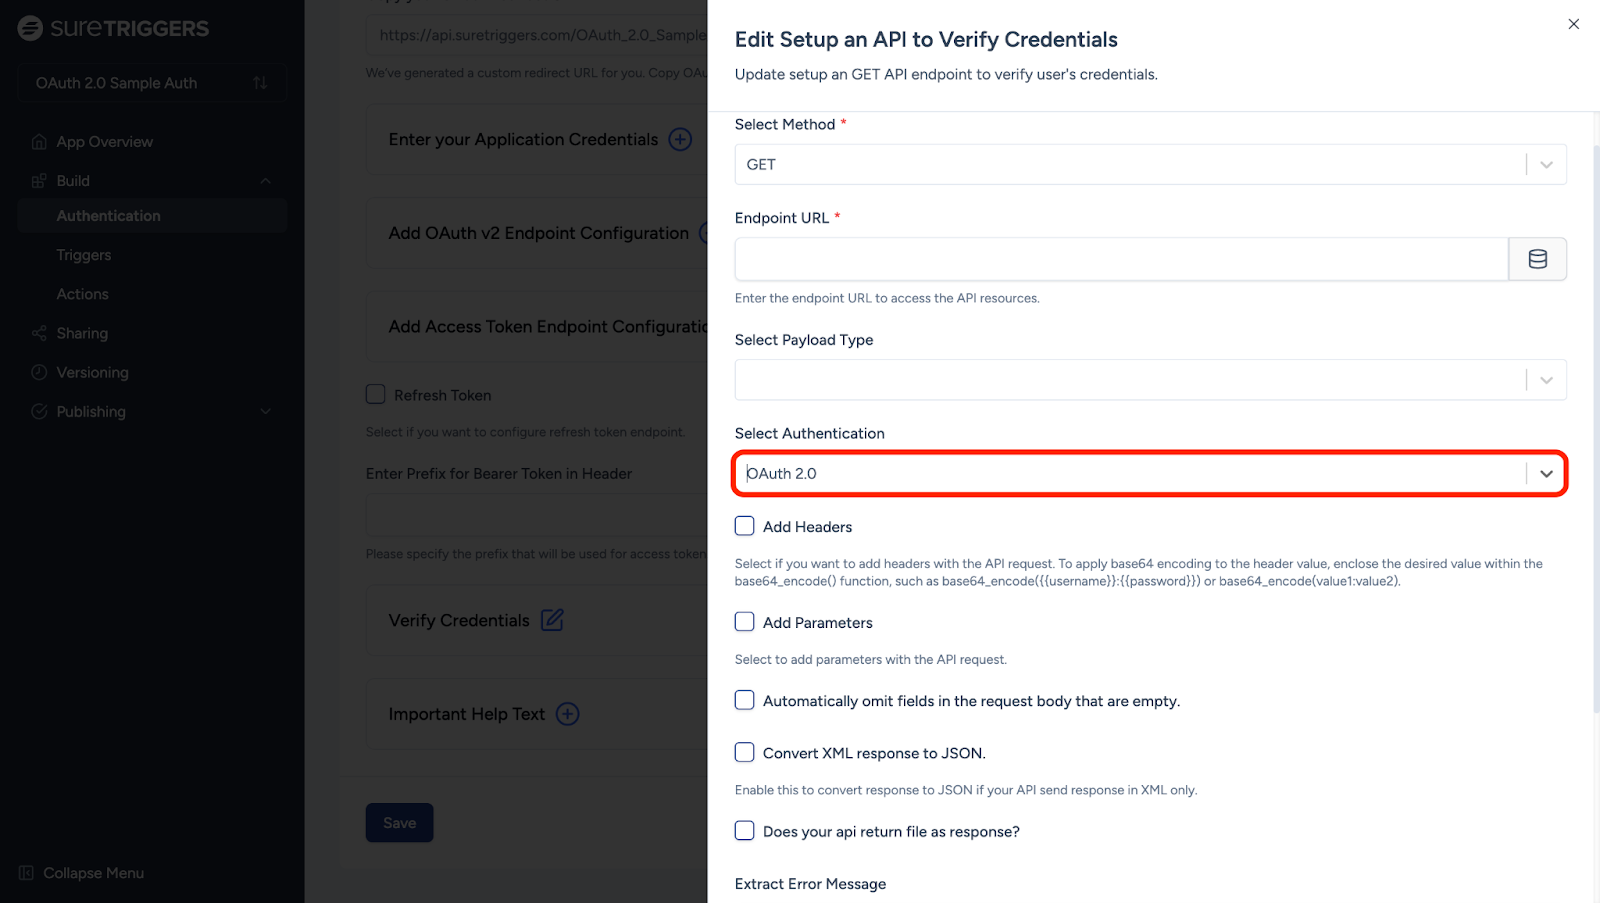
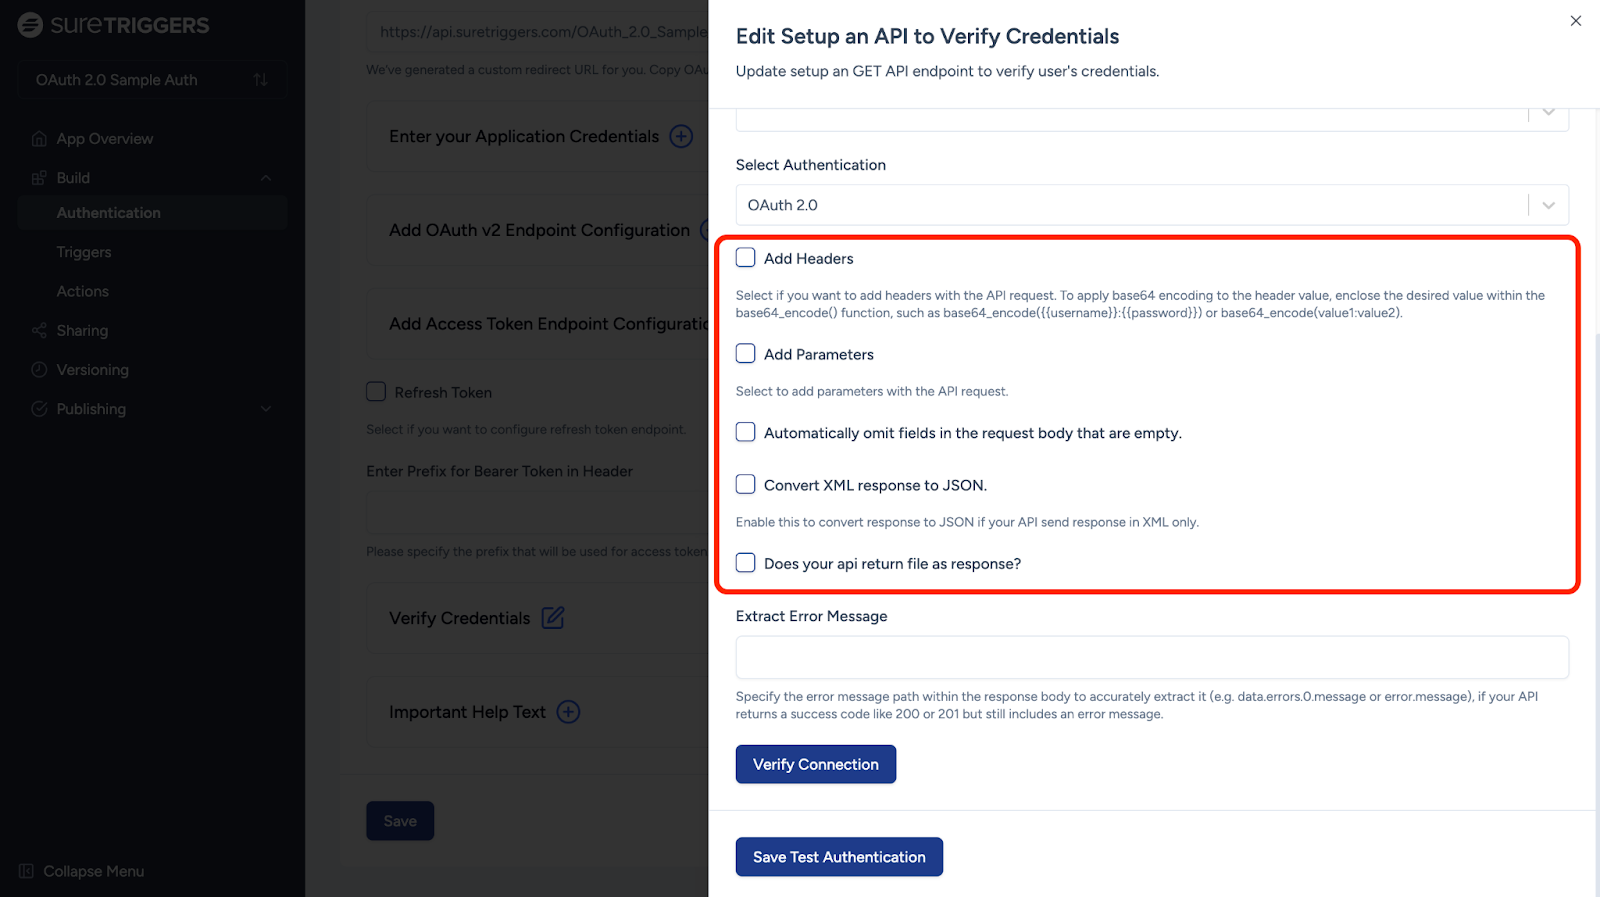
- Configure the following fields according to what your API docs require:
Click the “Verify Connection” button after filling in all the required fields.
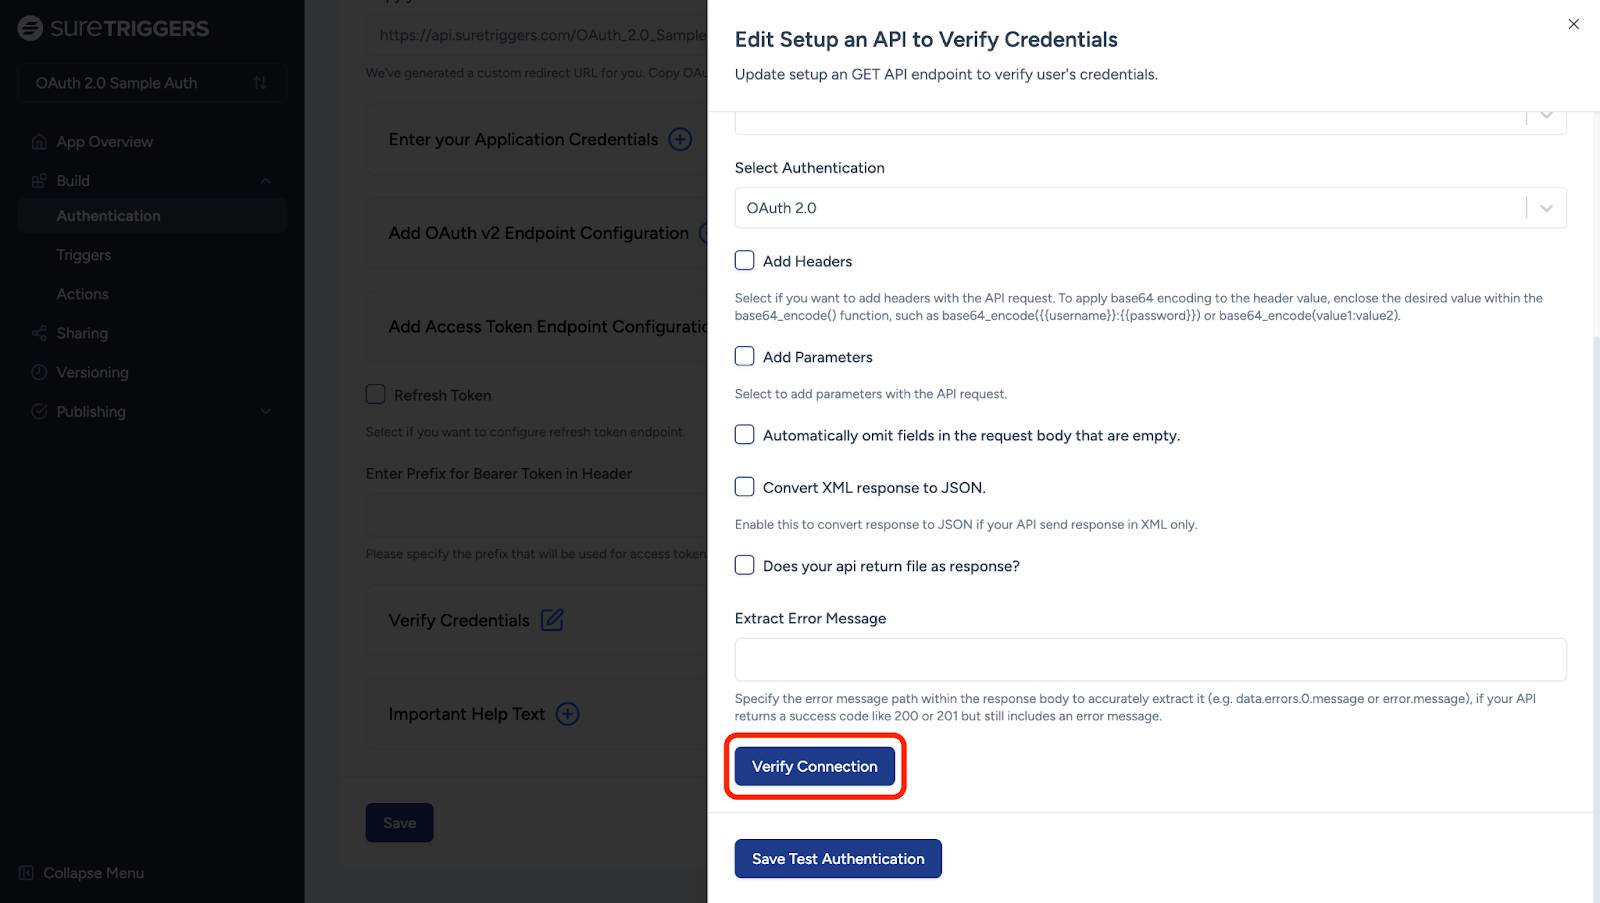
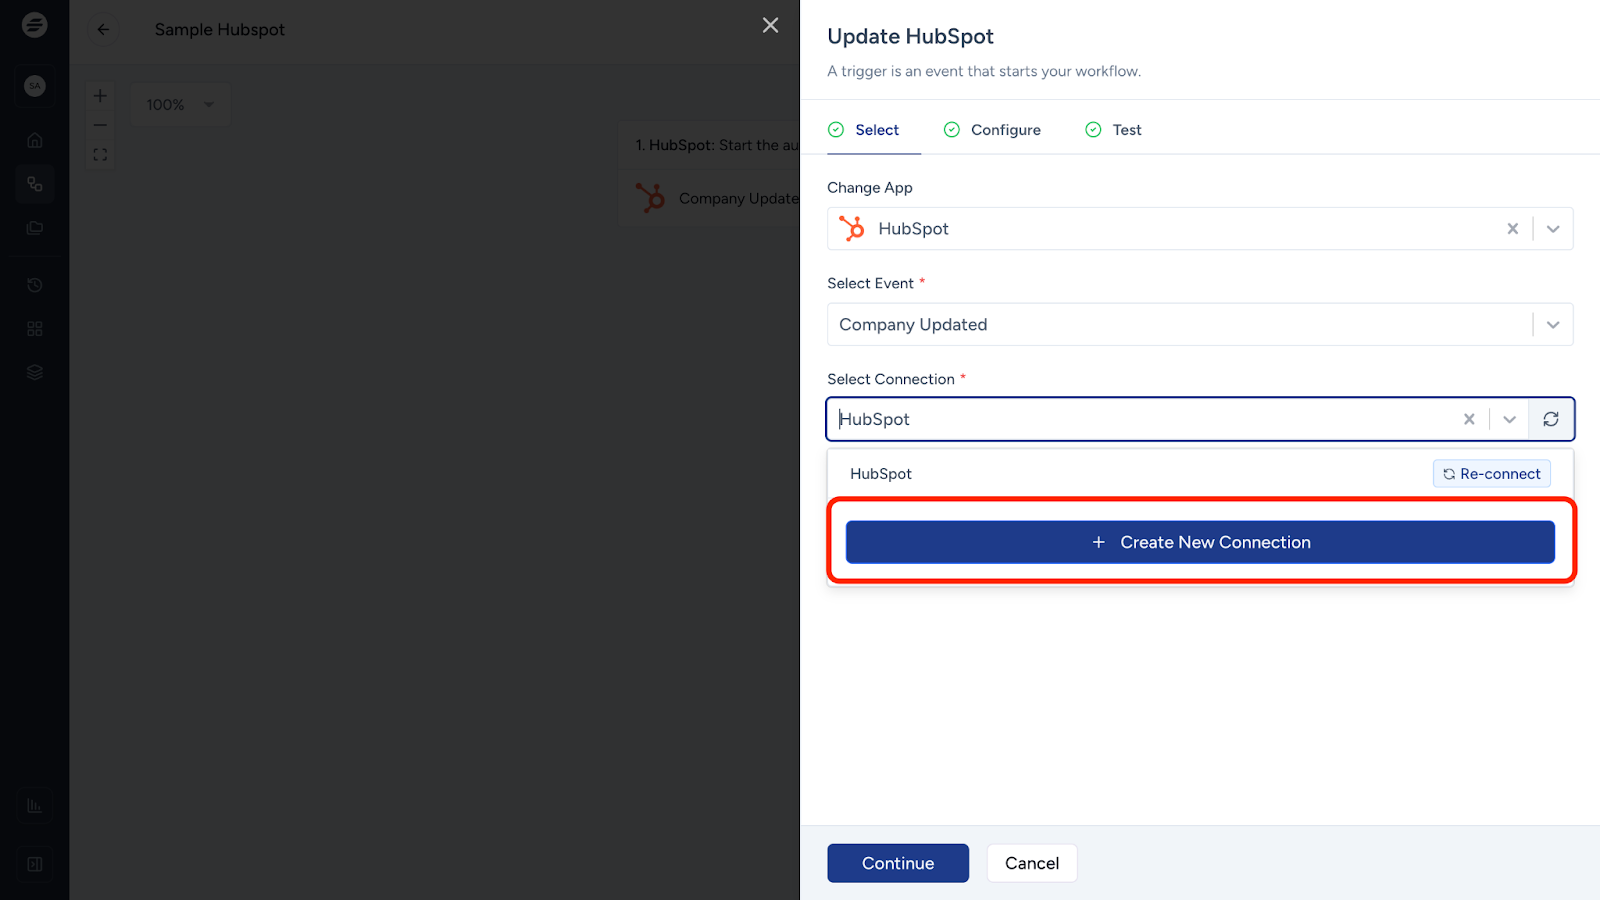
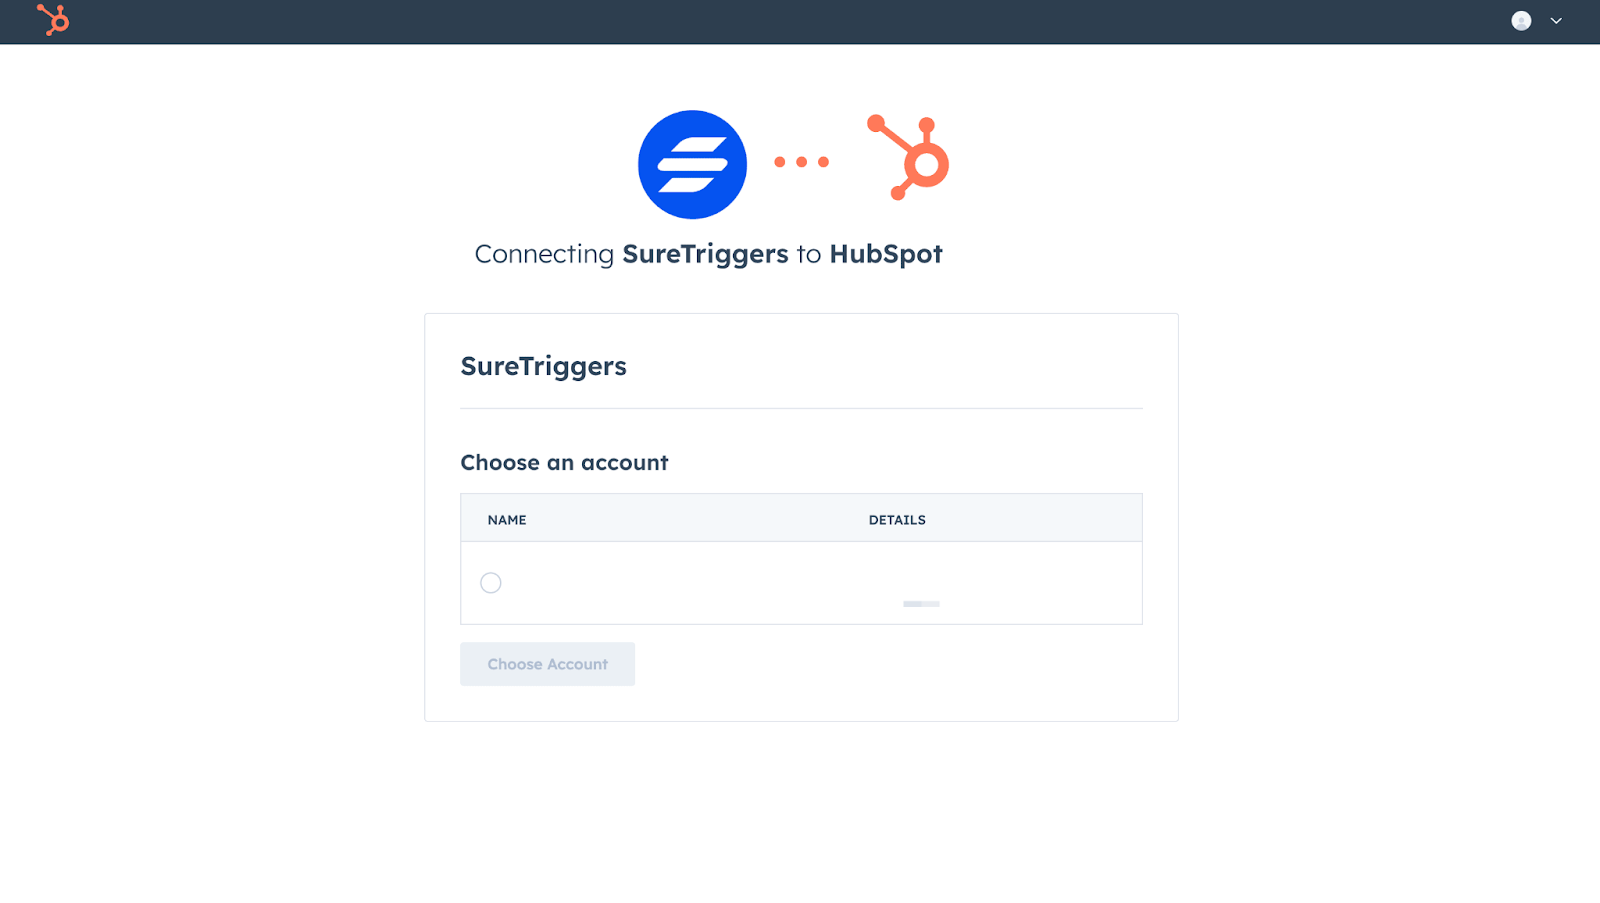
Based on the URL and information provided, you will be redirected to a different tab to verify your OAuth 2.0 connection.
The process of verifying your OAuth 2.0 connection may differ according to each app. Ensure you read the preferred application’s API documentation.
Upon successful verification, you will get a success message telling you that App Builder successfully connected with OttoKit.
You can now click on the “Save Test Authentication” button at the bottom of the flyout form.
That’s all! You can now start setting up actions and triggers for your app.
And if you have any questions, feel free to contact us. We’re always here to help!
We don't respond to the article feedback, we use it to improve our support content.