- Prerequisites
- Building an Integration
- Setting Up Authentication
- Setting Up Triggers & Actions
- Publishing Integration
- How To Authenticate Your Application Using The API Key Method
- How to Set-Up the Integration Based on Auth Type Bearer Token
- How To Authenticate Your Application Using OAuth 2.0
- How To Authenticate Your Application Using Basic Auth
- How To Authenticate Your Application Using The JWT Bearer Method
- How to Set-Up the Integration Based on Auth Type Session Auth
- How To Authenticate Your Application Using Custom Auth
How To Authenticate Your Application Using The API Key Method
This guide provides a comprehensive, step-by-step guide to understanding the API Key authentication process.
For example, we have chosen “Brevo” as our focus application.
Remember, when you’re setting up authentication in OttoKit App Builder, you are building a screen where users will enter their connection details (like an API key) to connect their app with OttoKit.
Let’s get started!
How Authentication With API Key Works
Authentication is a way to confirm your identity when connecting apps. It’s like logging into a website with a username and password to prove it’s you.
In the context of App Builder, authentication allows you to securely connect your account with external apps by providing the necessary information like an API key or password to confirm your identity.
An API Key is a unique code you get from your Brevo account. It’s what tells Brevo, “This is the right person trying to connect.” Here’s how it works step by step:
- When setting up the authentication in App Builder, you’ll see a place to enter that API key.
- You go to your Brevo account and find your API key. This is usually available in your account settings or API section.
- App Builder then sends this key to Brevo, and if the key matches what Brevo expects, it confirms that the connection is valid and allows OttoKit to interact with Brevo.
Once the connection is successful, OttoKit can pull data from Brevo or send information to it without asking you to log in again. The API key acts as the “proof” that it’s allowed.
You don’t always have to select the “API Key” method. The authentication method for your app is mentioned in the app’s API documentation.
Authenticating Your App With API Key
Here’s how you can authenticate with the App Builder using the API Key method:
Note: Ensure you’ve already built an integration before moving forward.
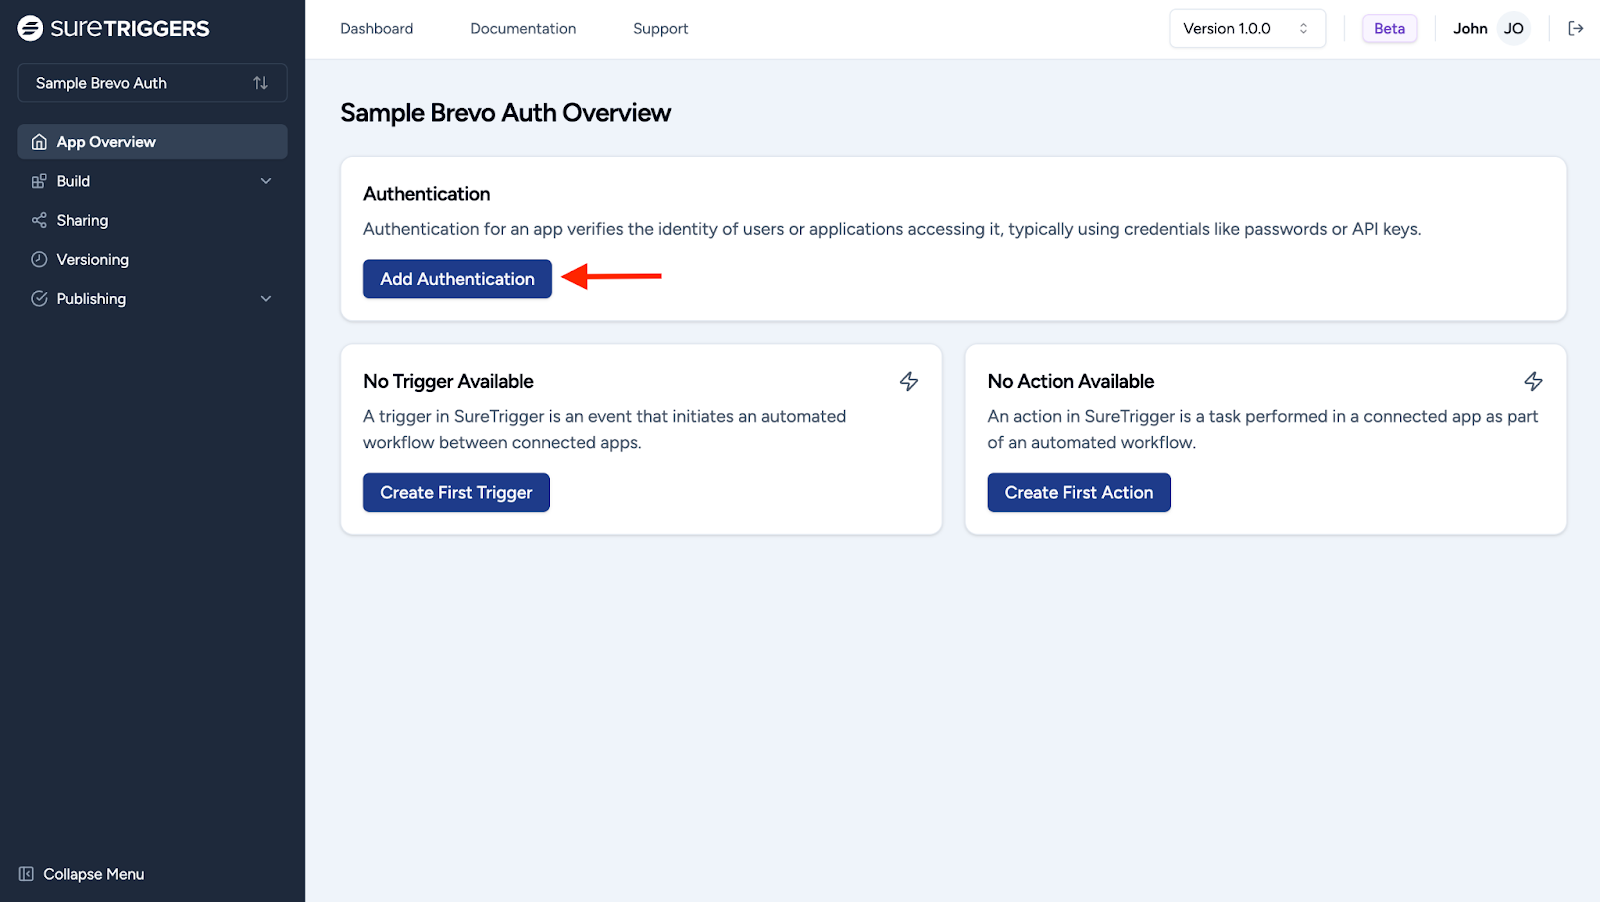
- After building an integration, you’ll be automatically redirected to the following “App Overview” page. Here, click the “Add Authentication” button to proceed.
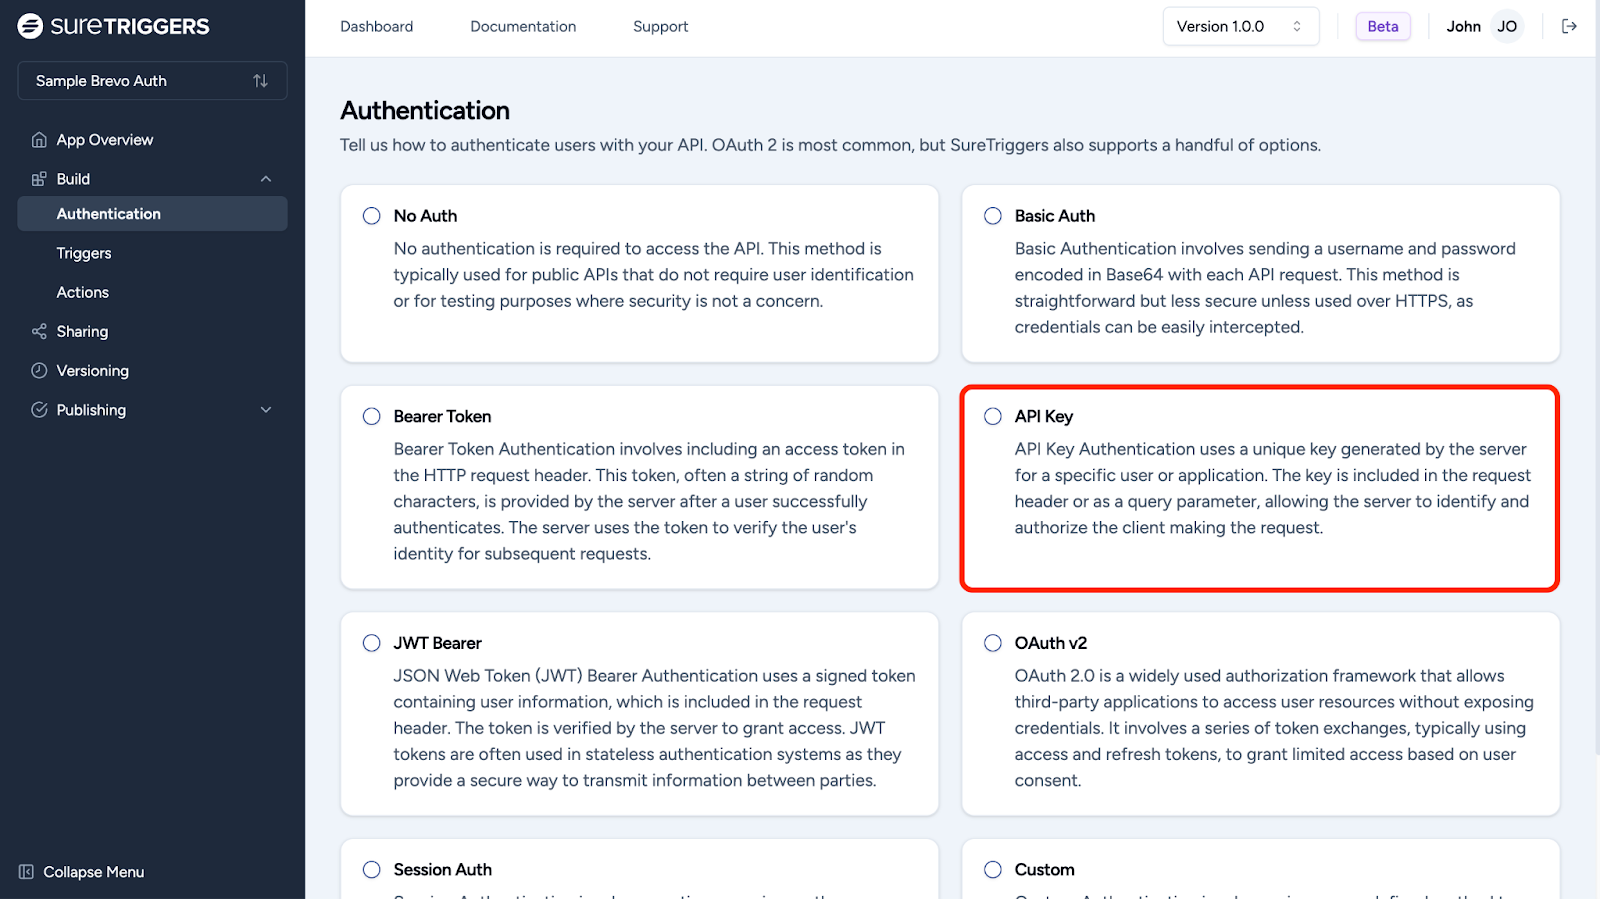
- On the Authentication page, select “API Key”. We followed the Brevo API documentation for selecting the authentication type as the API key.
Now, you need to add the input field for the connection. This is required for OttoKit users to pass the API Token while creating the connection between Brevo and the OttoKit platform. Only then they will be able to include Brevo (or your app) as a part of their automation workflows.
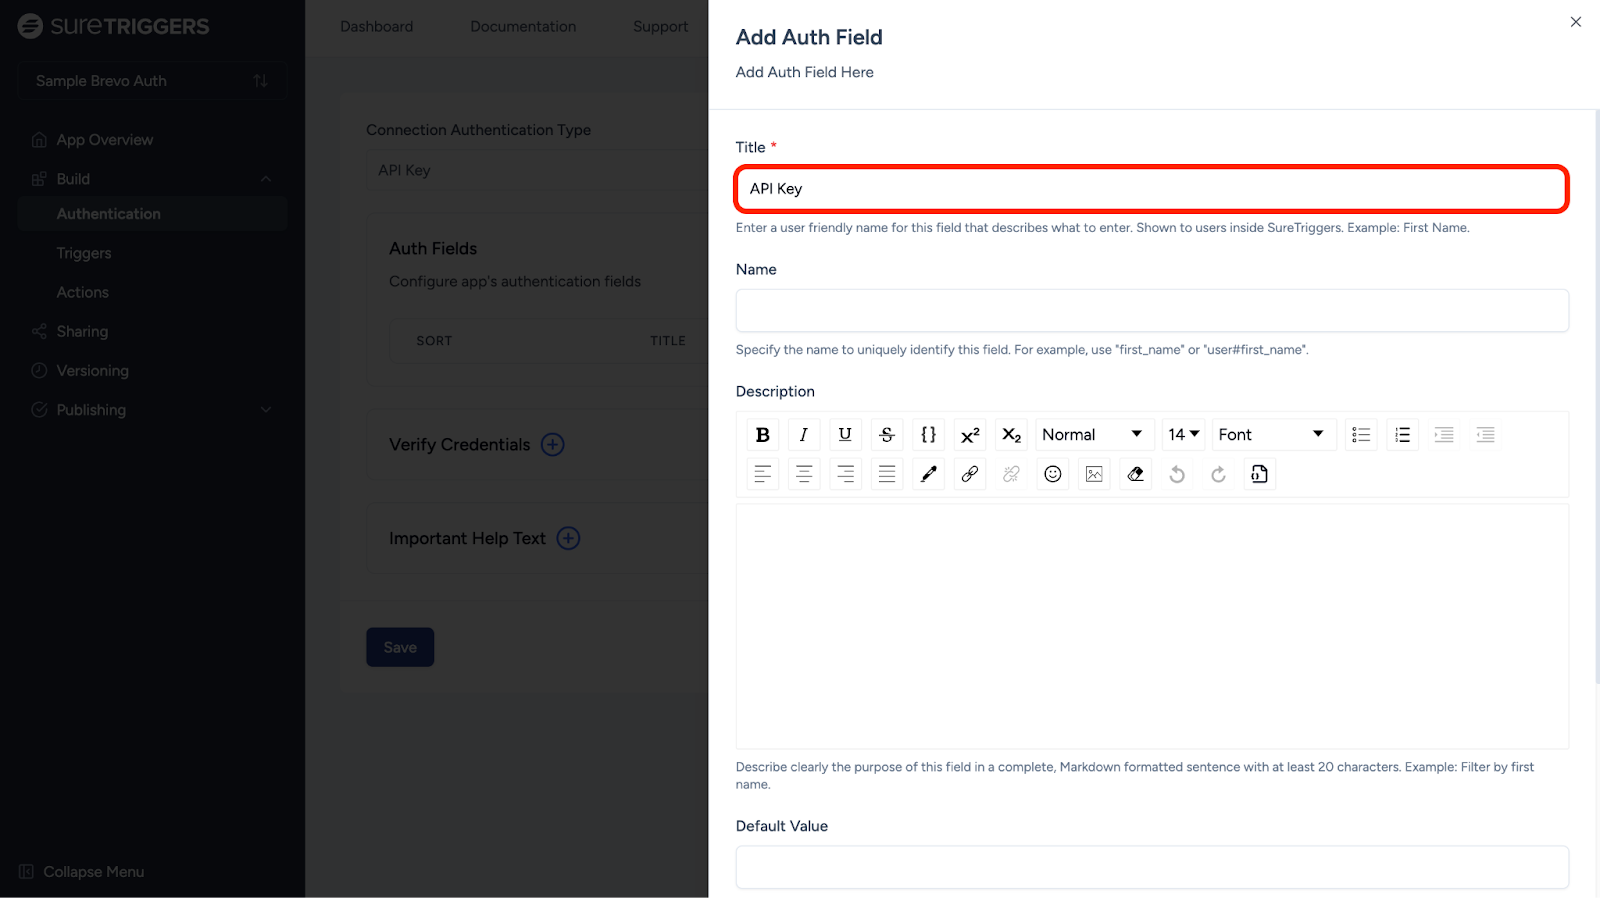
- To do this, click the “Add Auth Field” button.

On this flyout, fill in all required inputs as follows:
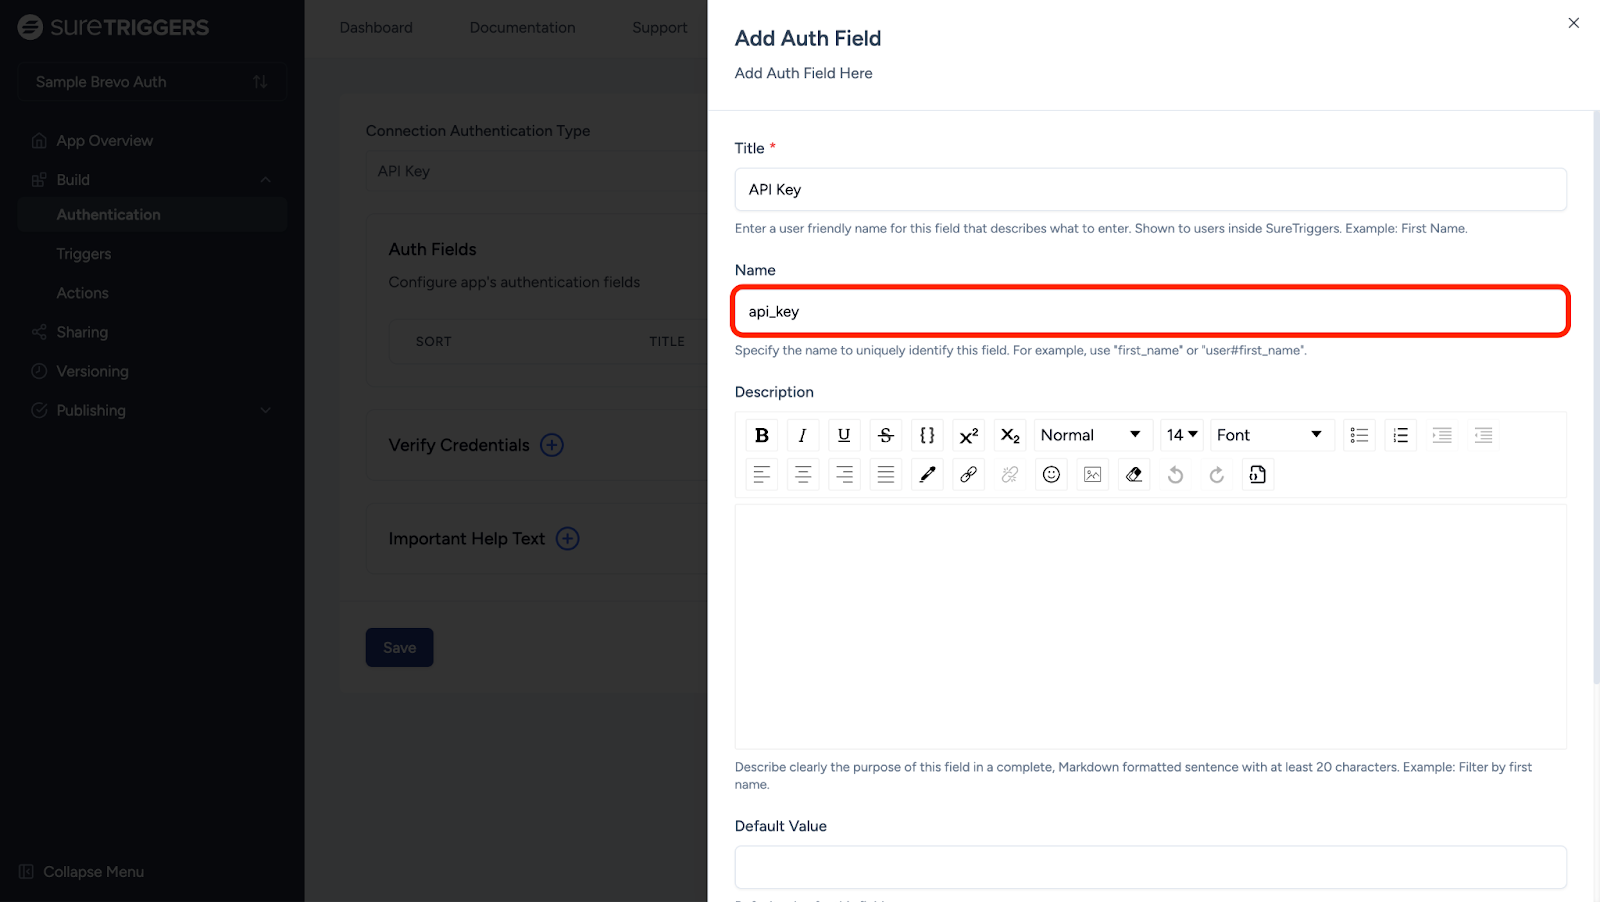
- Provide a user-friendly name for this field. This will be displayed to users inside their OttoKit account. For example, “API Key.”
- In the “Name” field, give the API key a unique label, like “api_key.” This internal label helps OttoKit know what data is being sent.
Later, when users set up automation, OttoKit can use this label to make sure the right information (like the API key) is sent at the right time, without needing to set it up again.
Note: You’ll need to map this label when creating actions and triggers to ensure the correct data is used in your workflows.
If you leave this field blank, a unique key will be automatically assigned.
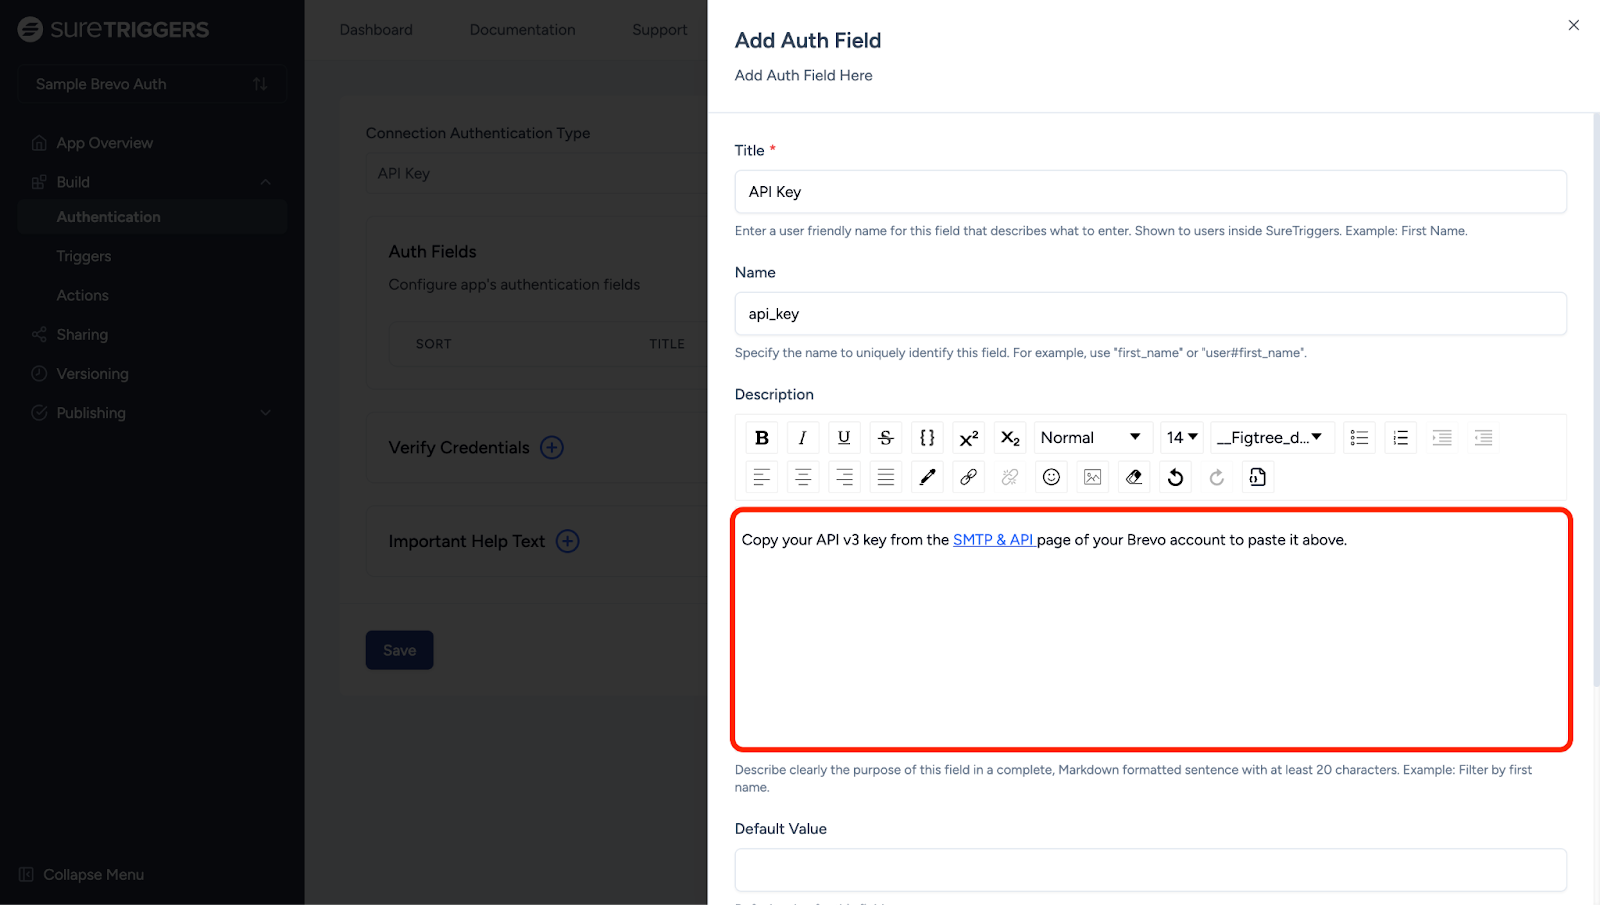
- The “Description” is beneficial for OttoKit users to understand where to copy the API Token from or help them with any other complex app-related activities. For example:
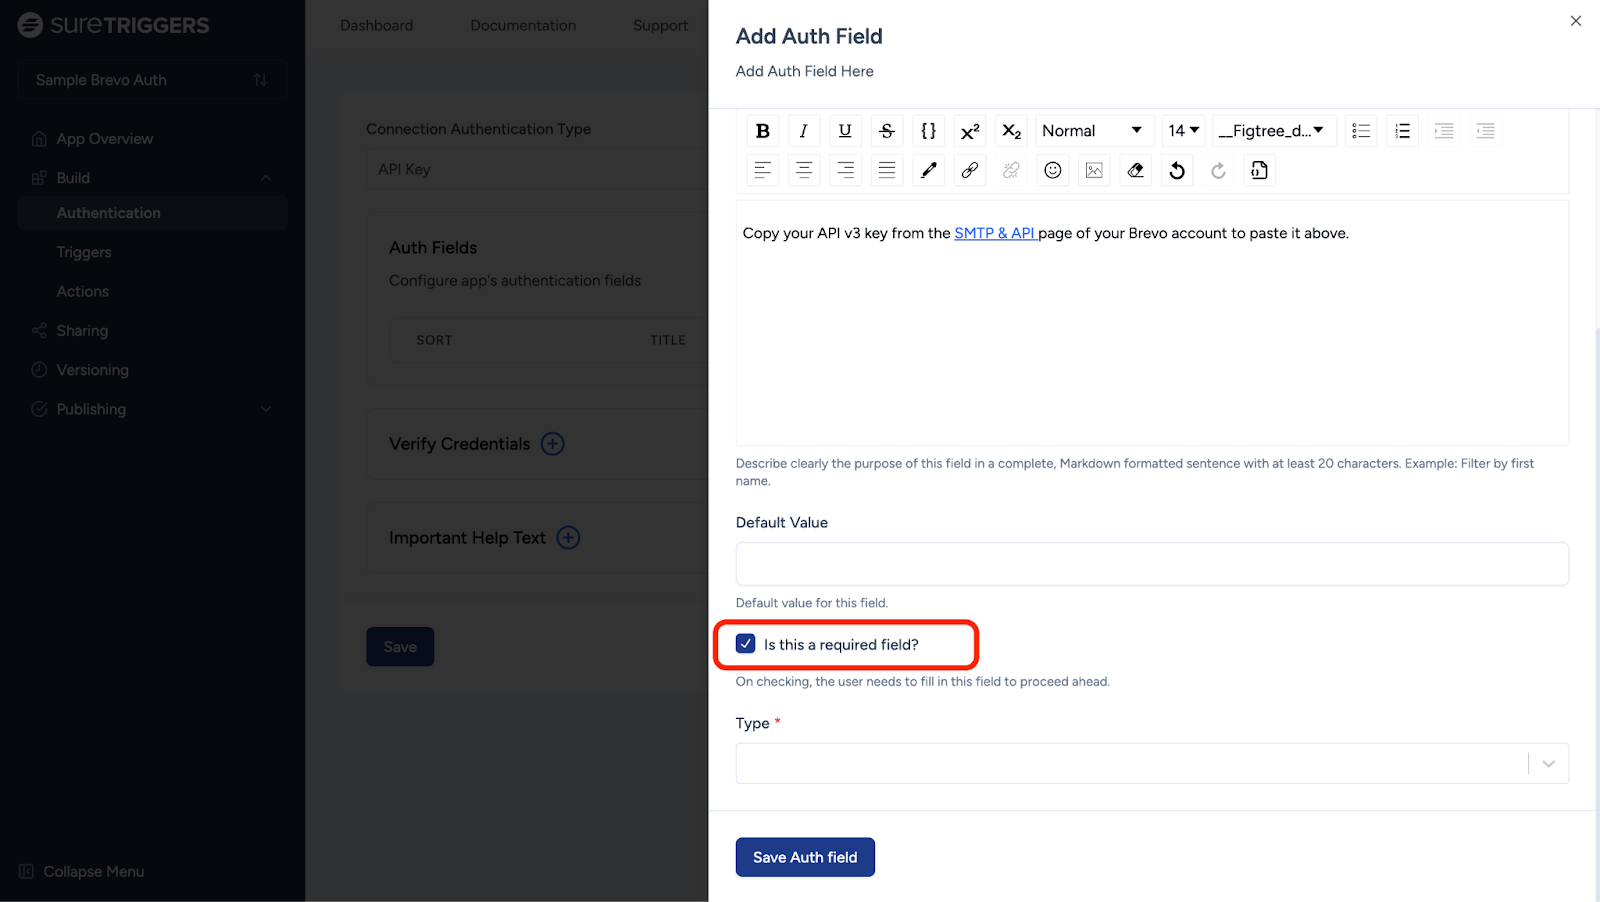
- Since there is only one field needed to create the connection, ensure this field is marked as required. To do this, check the box next to “Is this a required field?”
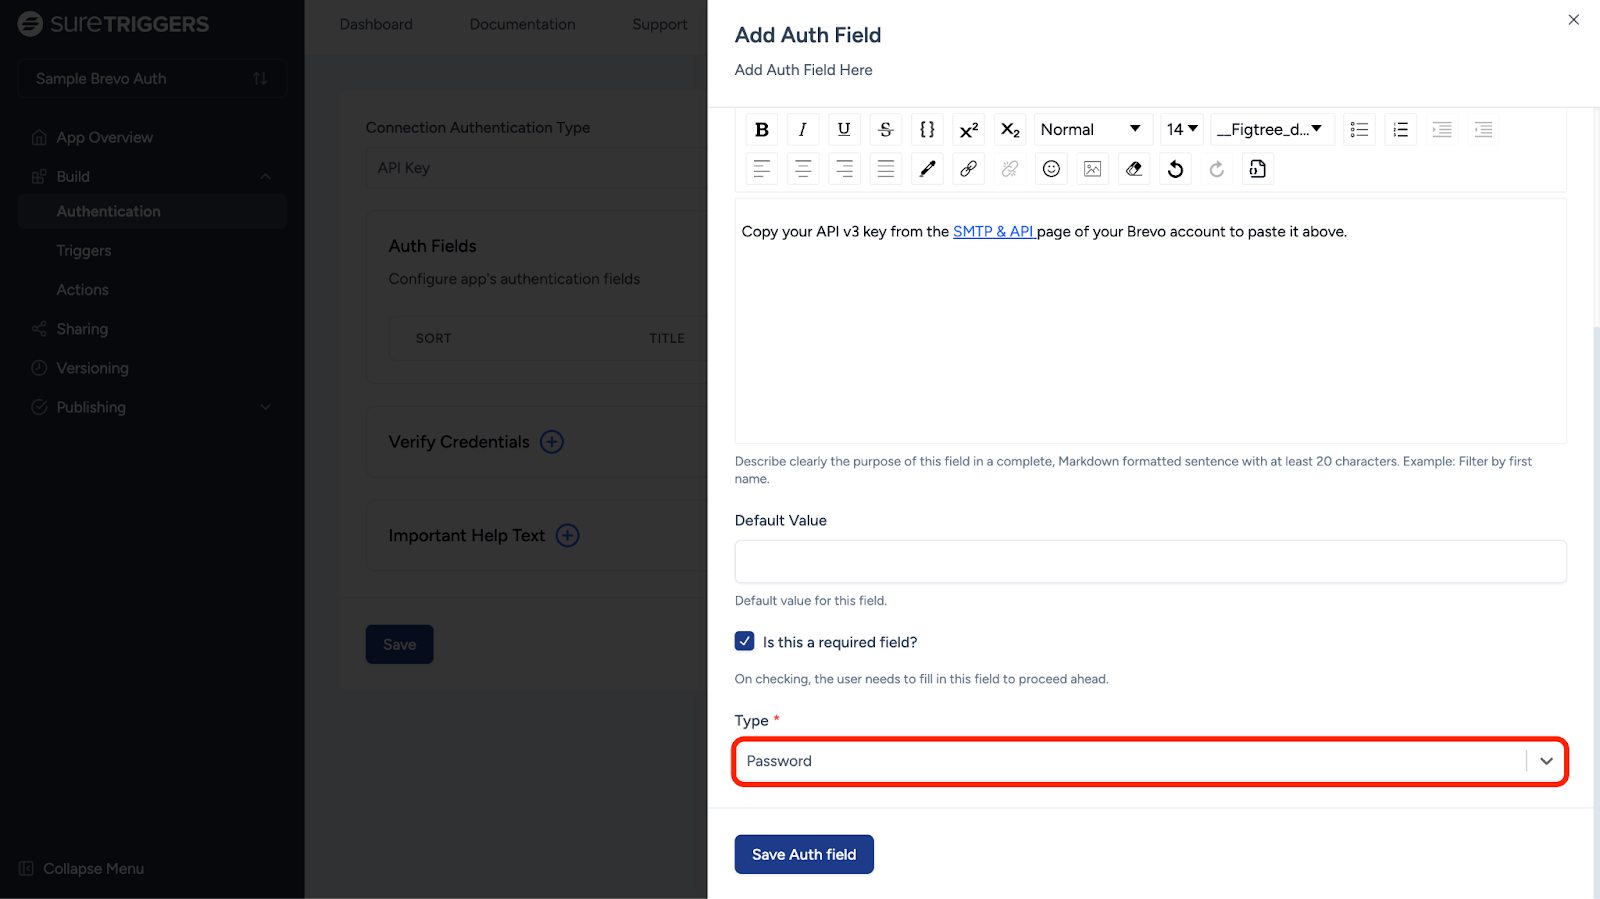
- It’s a standard practice to select this field type as “Password”. Since the API Token is sensitive, selecting it will ensure the input is entered in a hidden format.
Finally, click the “Save Auth field” button to save your authentication.
Testing Your API Key Authentication
Testing your authentication is important as it’s used to test the related triggers and action steps when built.
As an example, we’ll perform an API call for Brevo to ensure it functions correctly.
The App Builder will test an API endpoint by making a call to it and return a success message that will verify that our connection is successful.
Note: If you notice that the authentication fails, please review your API documentation and make the necessary adjustments.
Here’s how you can do it:
- Click on the plus icon next to the “Verify Credentials” tab.
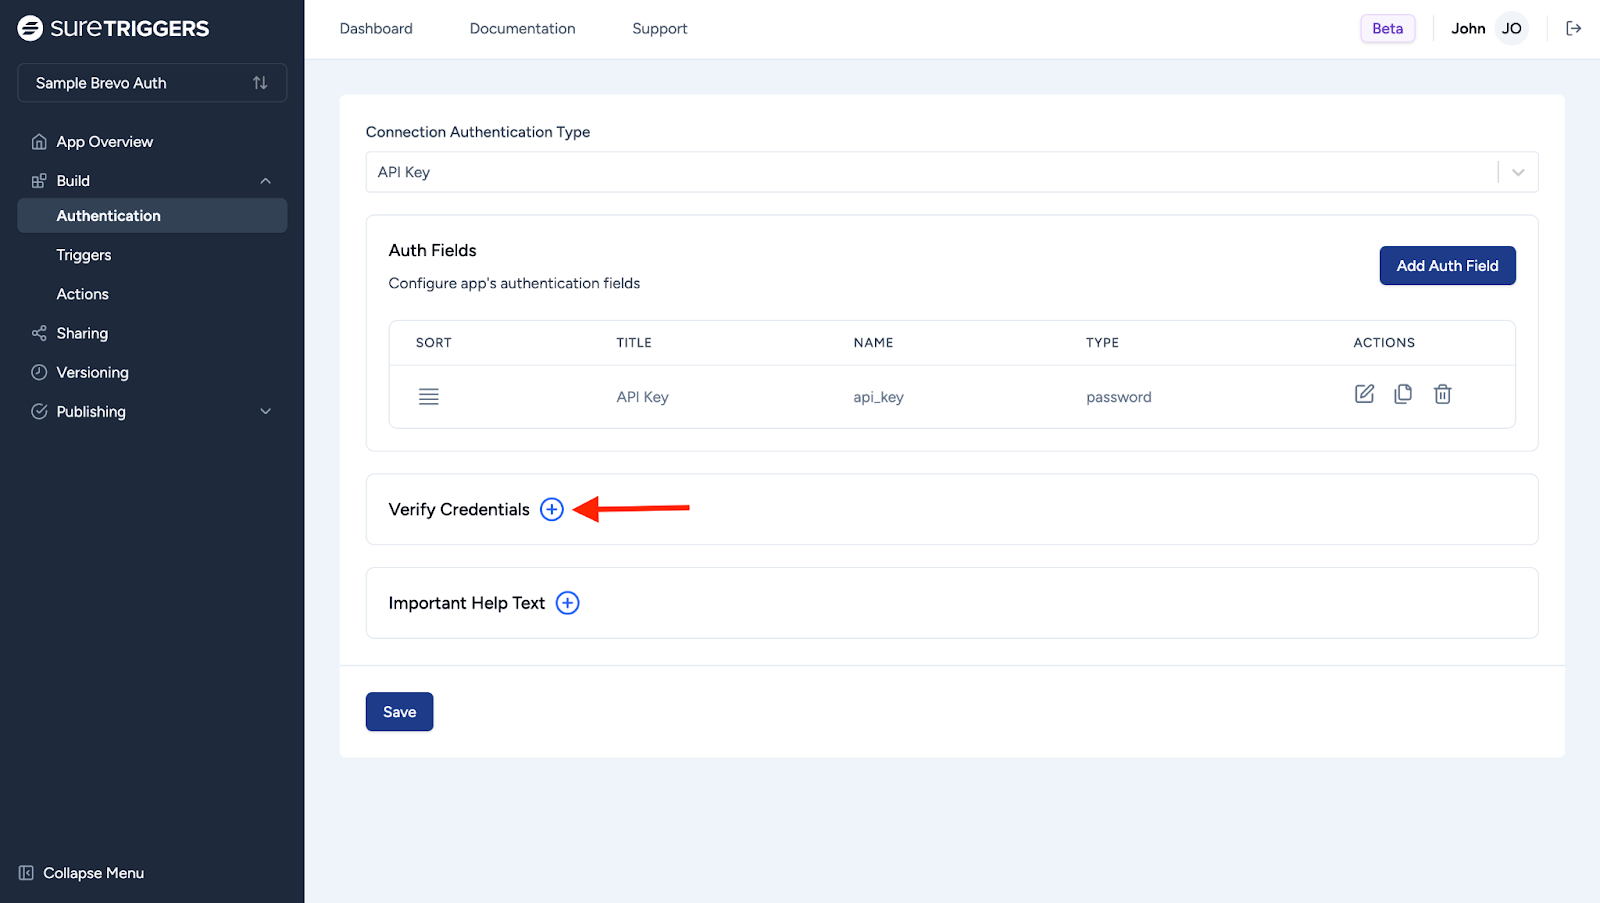
Here, we’ll perform a test API call to ensure your authentication is working properly. You just need to instruct OttoKit to make the test call using any available endpoint. It doesn’t need to be complicated.
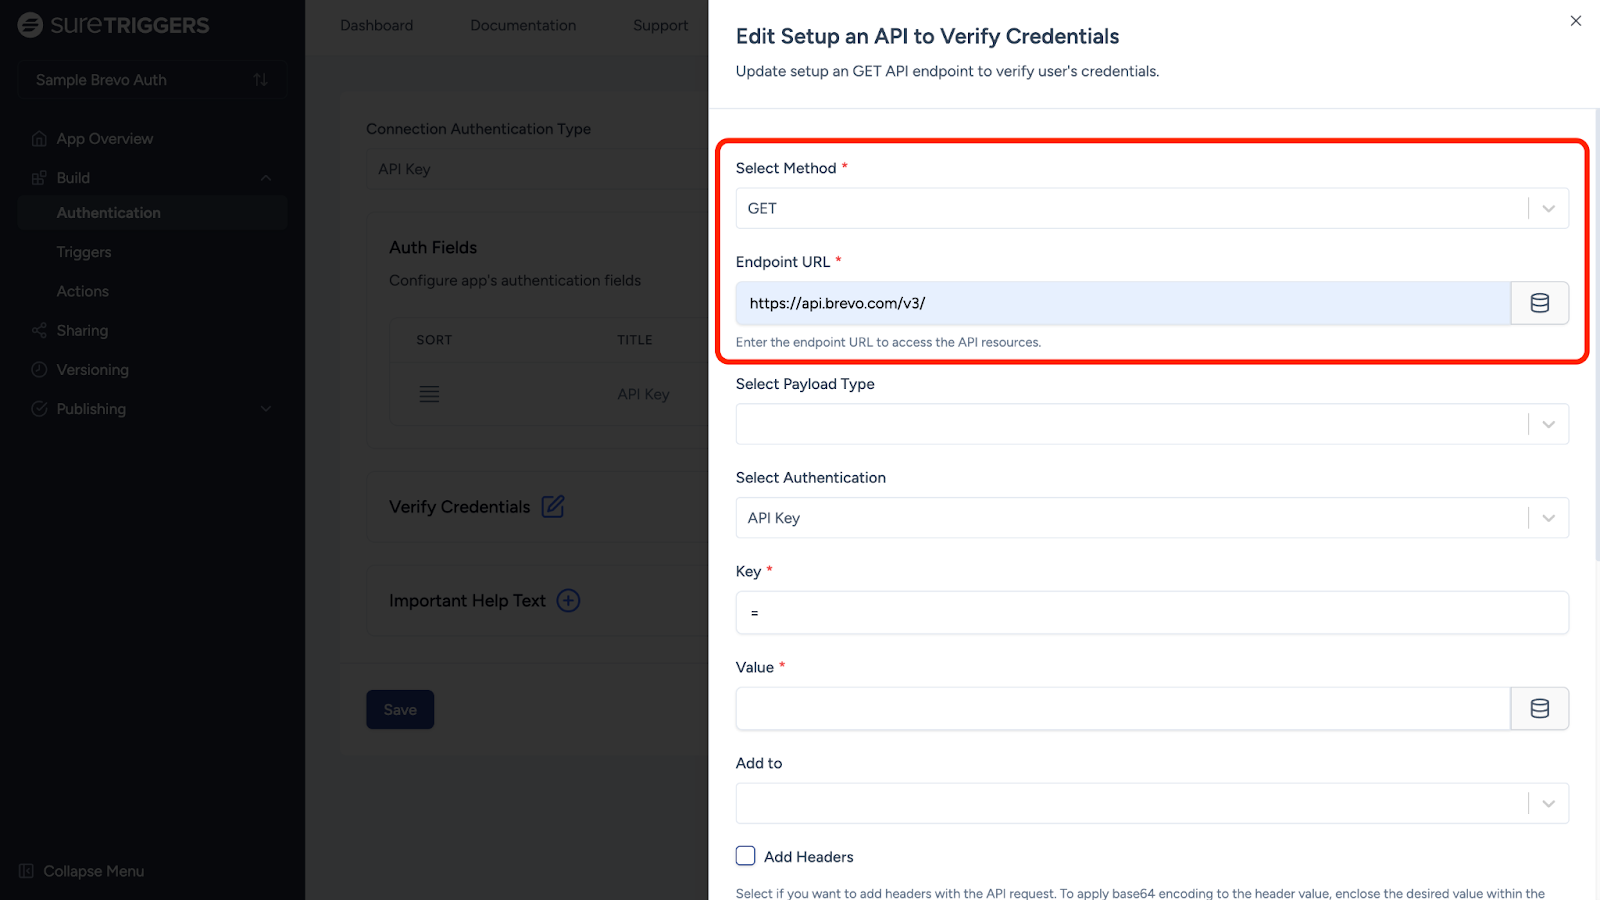
- Select the method as “GET”.
- Enter the endpoint URL obtained from Brevo’s API documentation. For example, we will use: https://api.brevo.com/v3/.
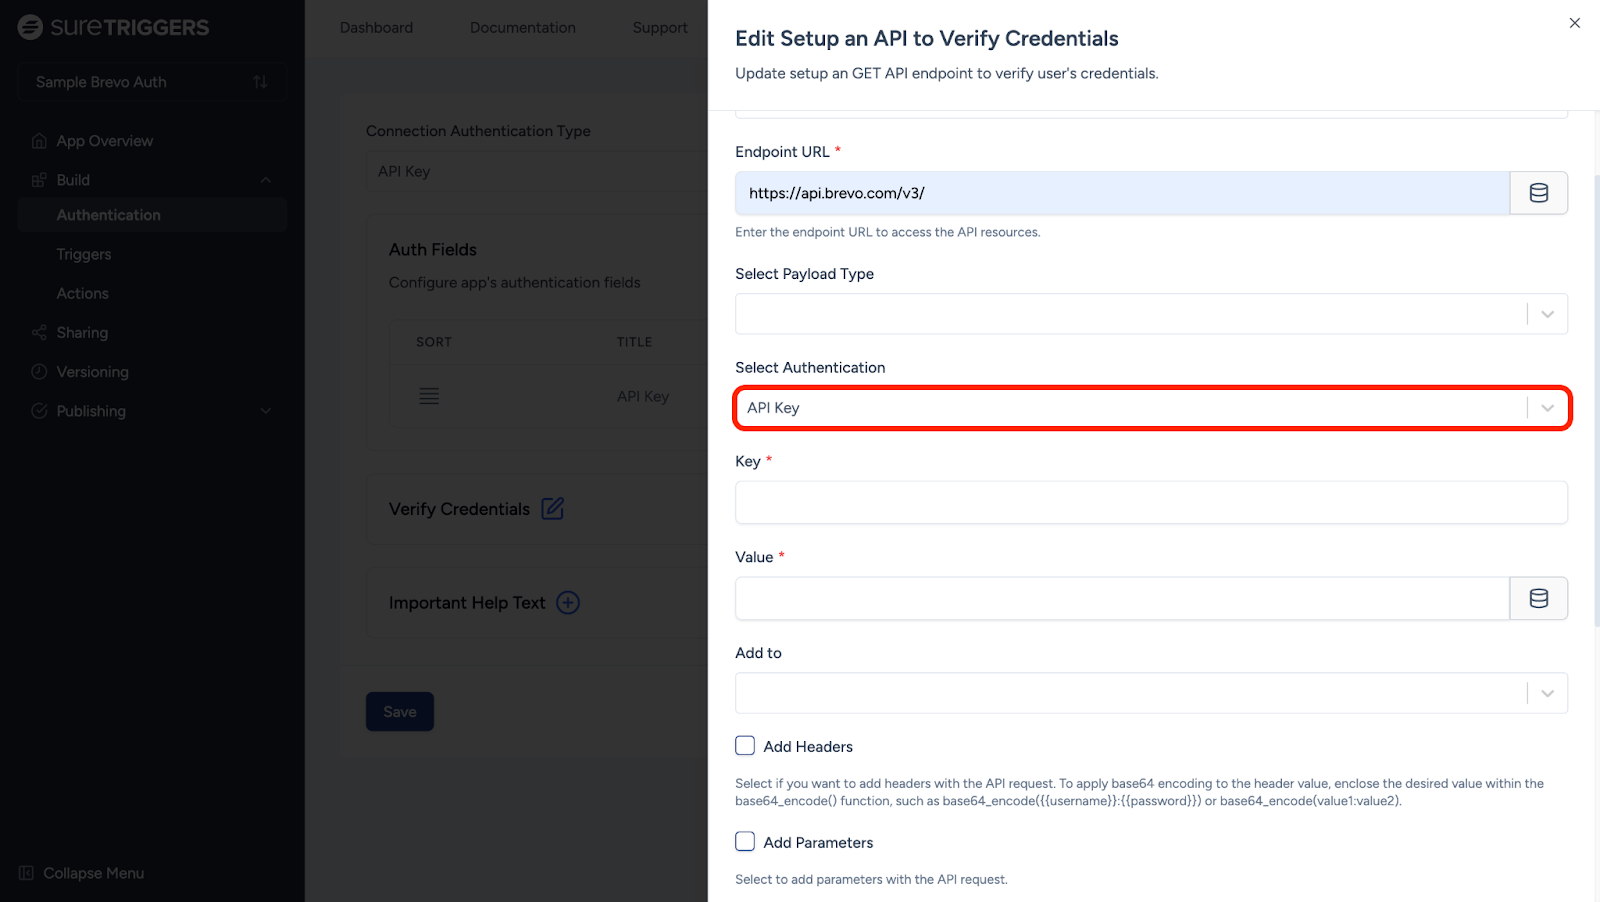
- Select the Authentication type as “API Key”.
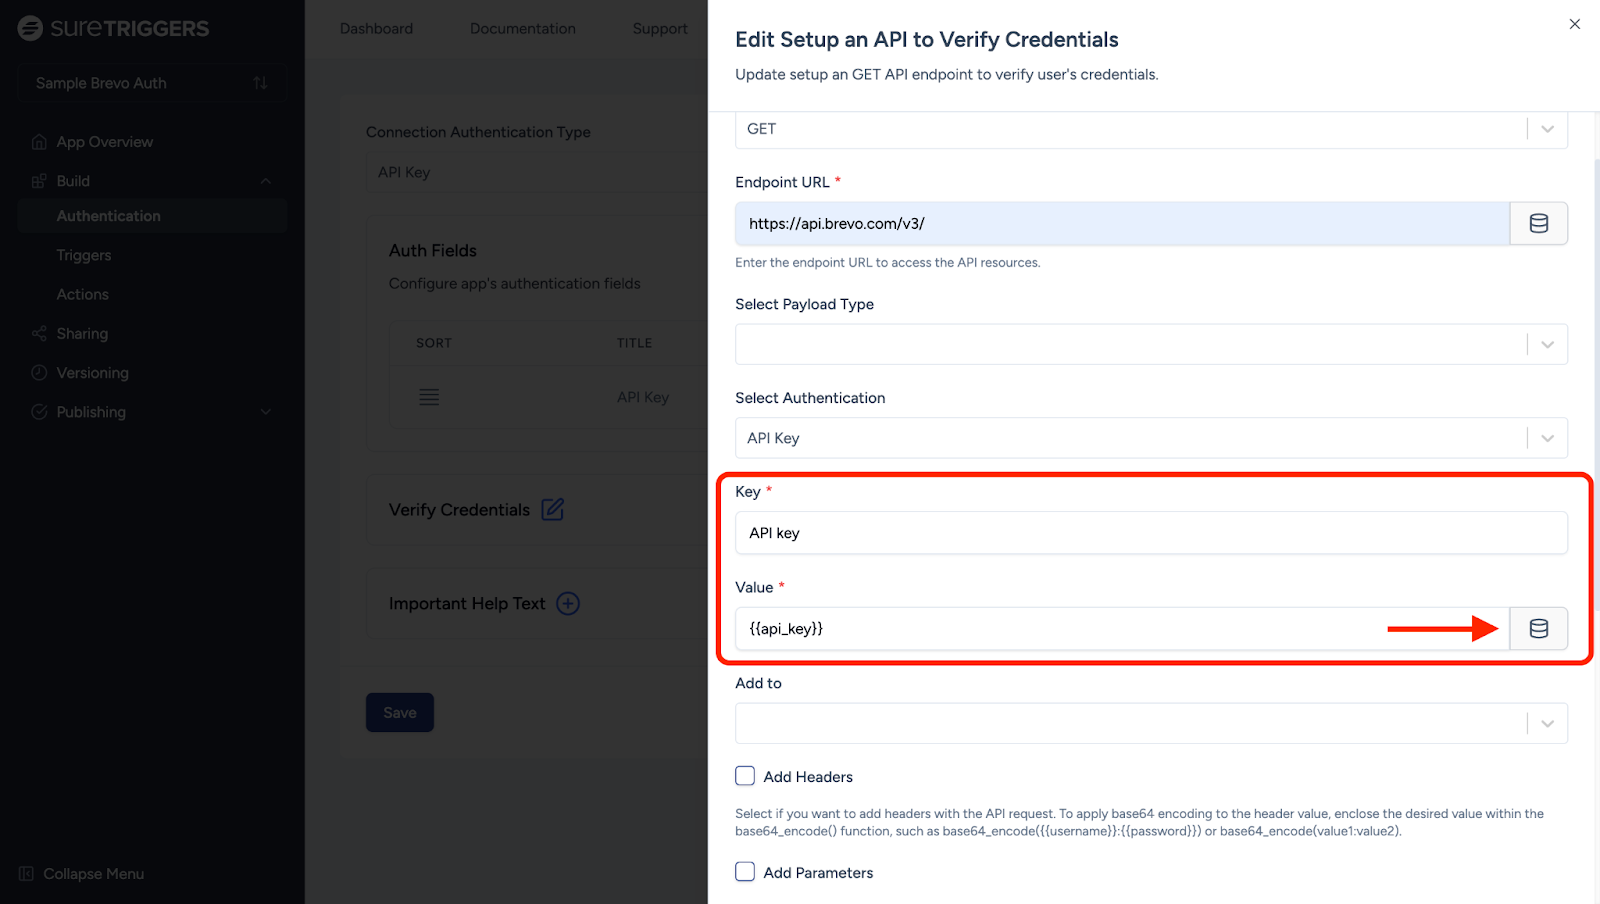
- Select Key & Value:
- Key: The name of the key used for API authentication. Identifies the type of authentication being used.
- Value: The value for this field will be fetched dynamically based on the data we provided before. To access the dynamic value, click the “Database” icon and see your value under Integration Fields.
Note: For the first time, you’ll need to manually enter this value to verify the connection before saving. If you enter the token dynamically, you will not be able to verify the connection.
- Configure the following fields according to what your API docs require:
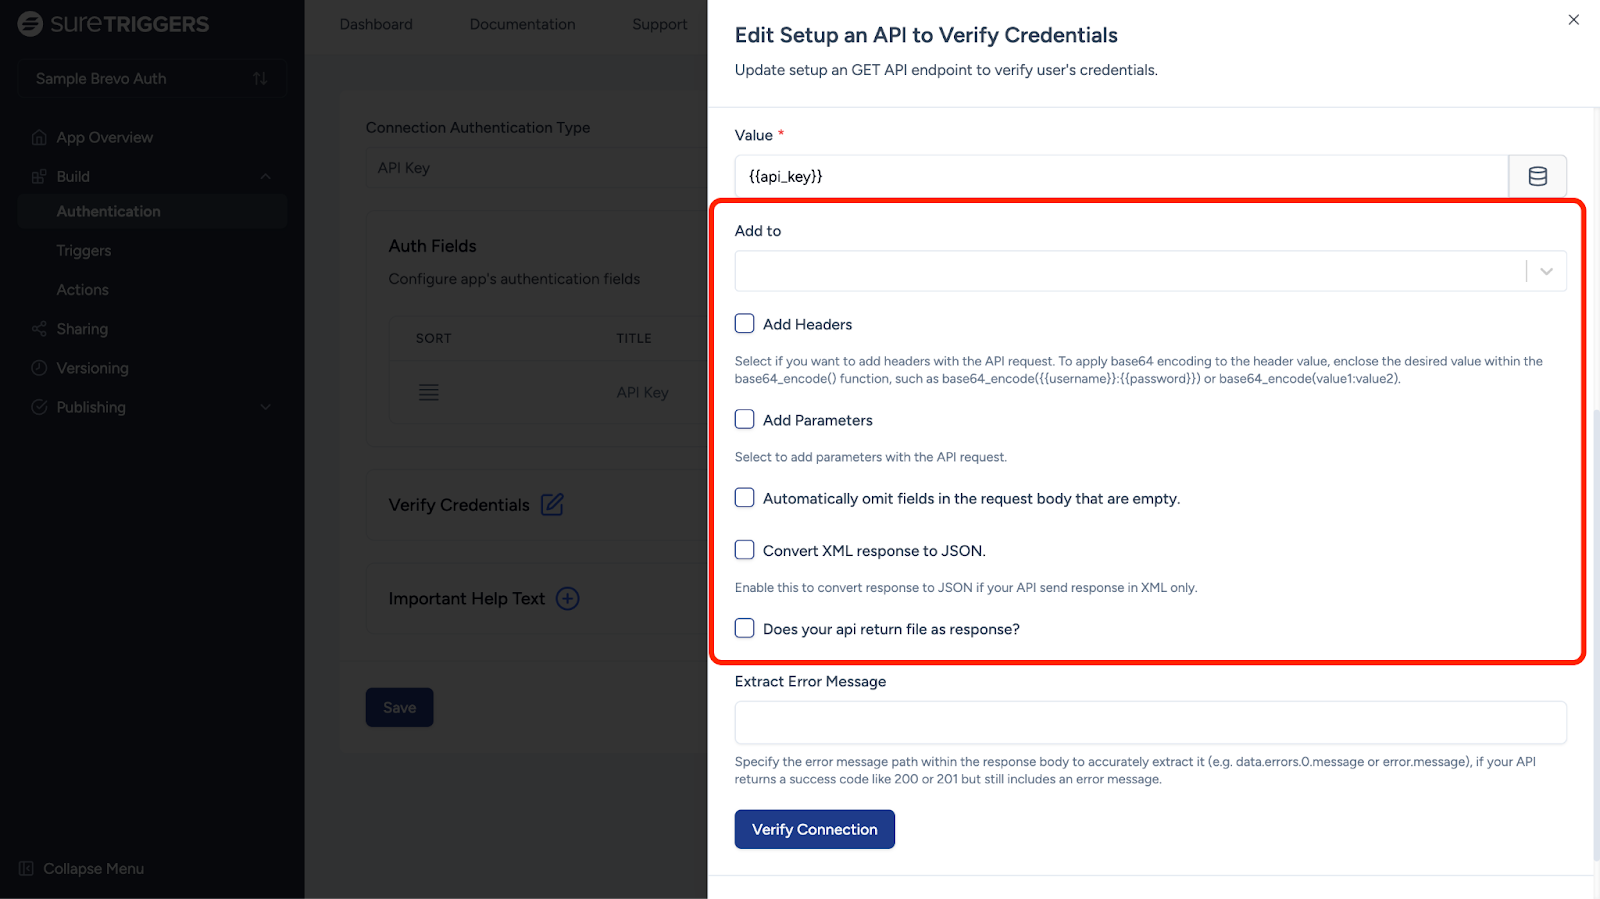
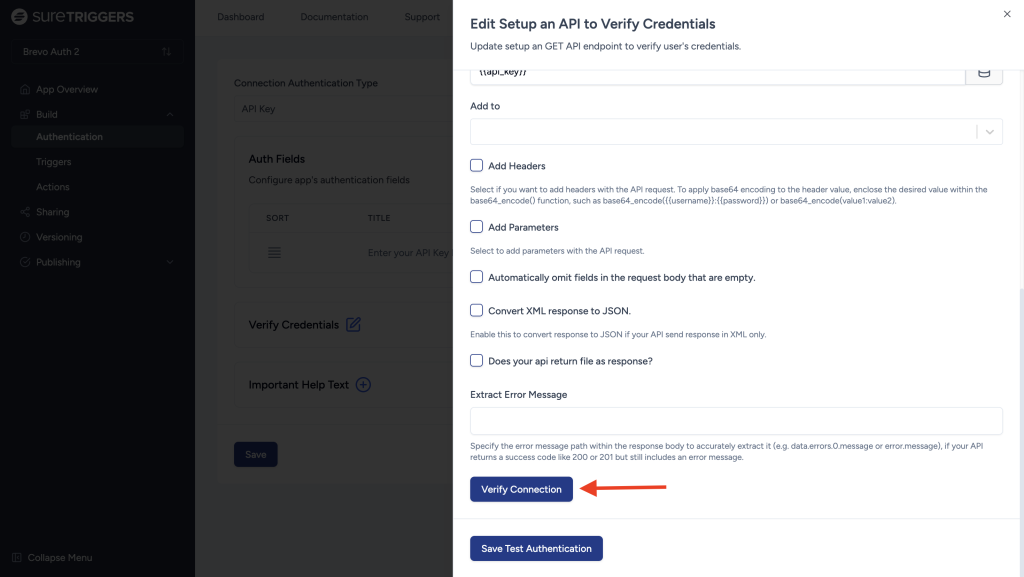
Click the “Verify Connection” button after filling in all the required fields.
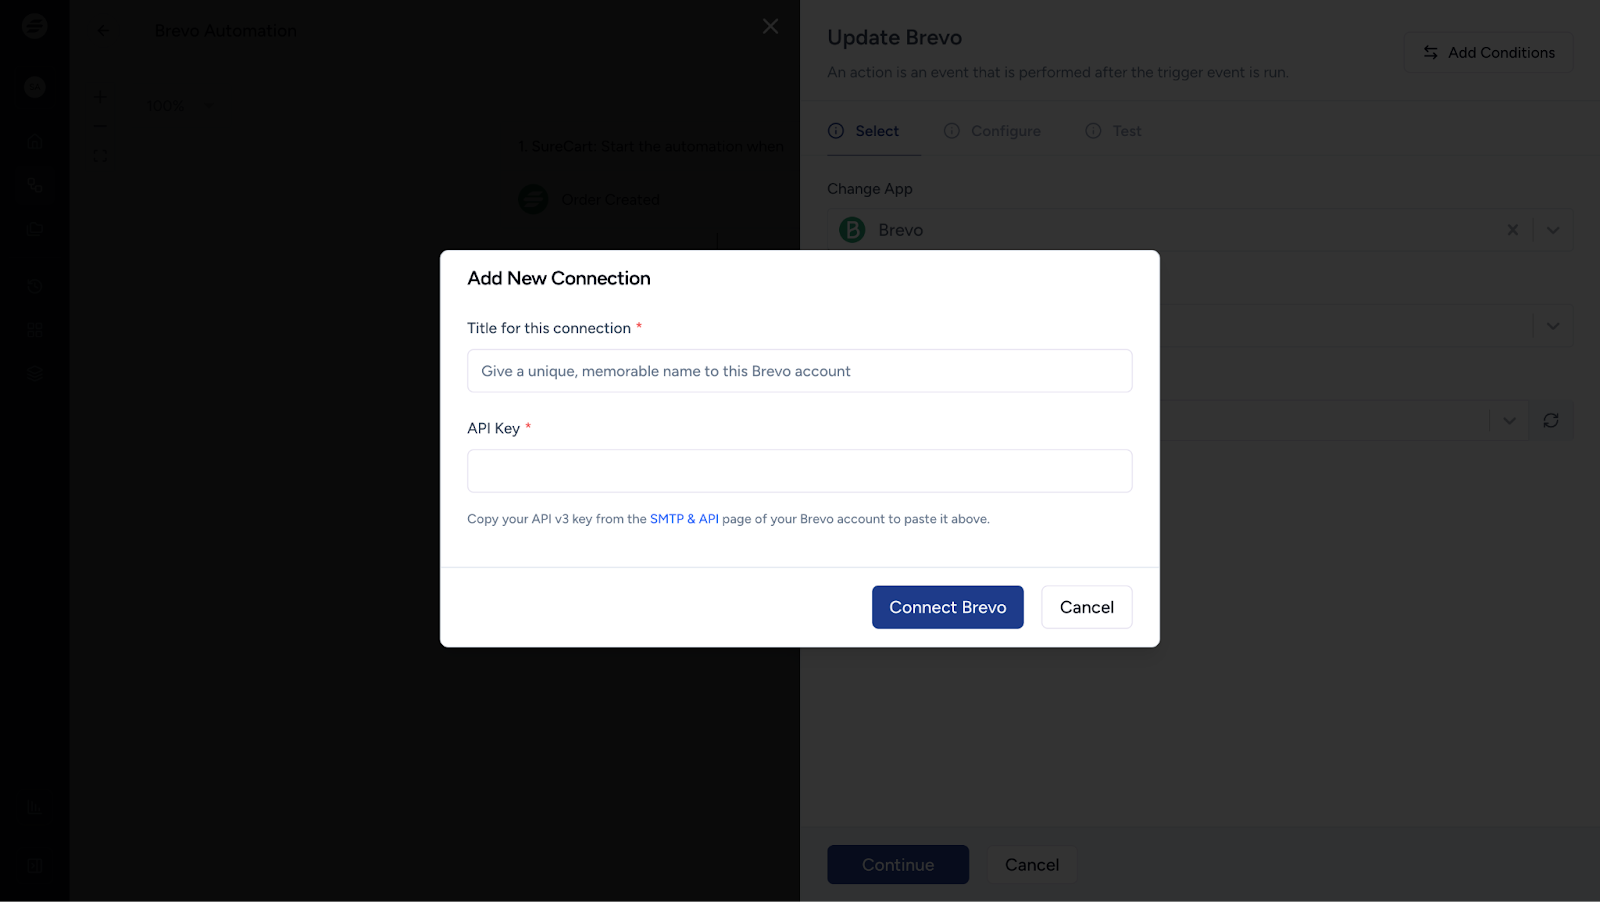
A new “Add New Connection” pop-up will appear. Enter your connection name, API Token, and click on the “Connect your_app_name” button. (specify which API token)
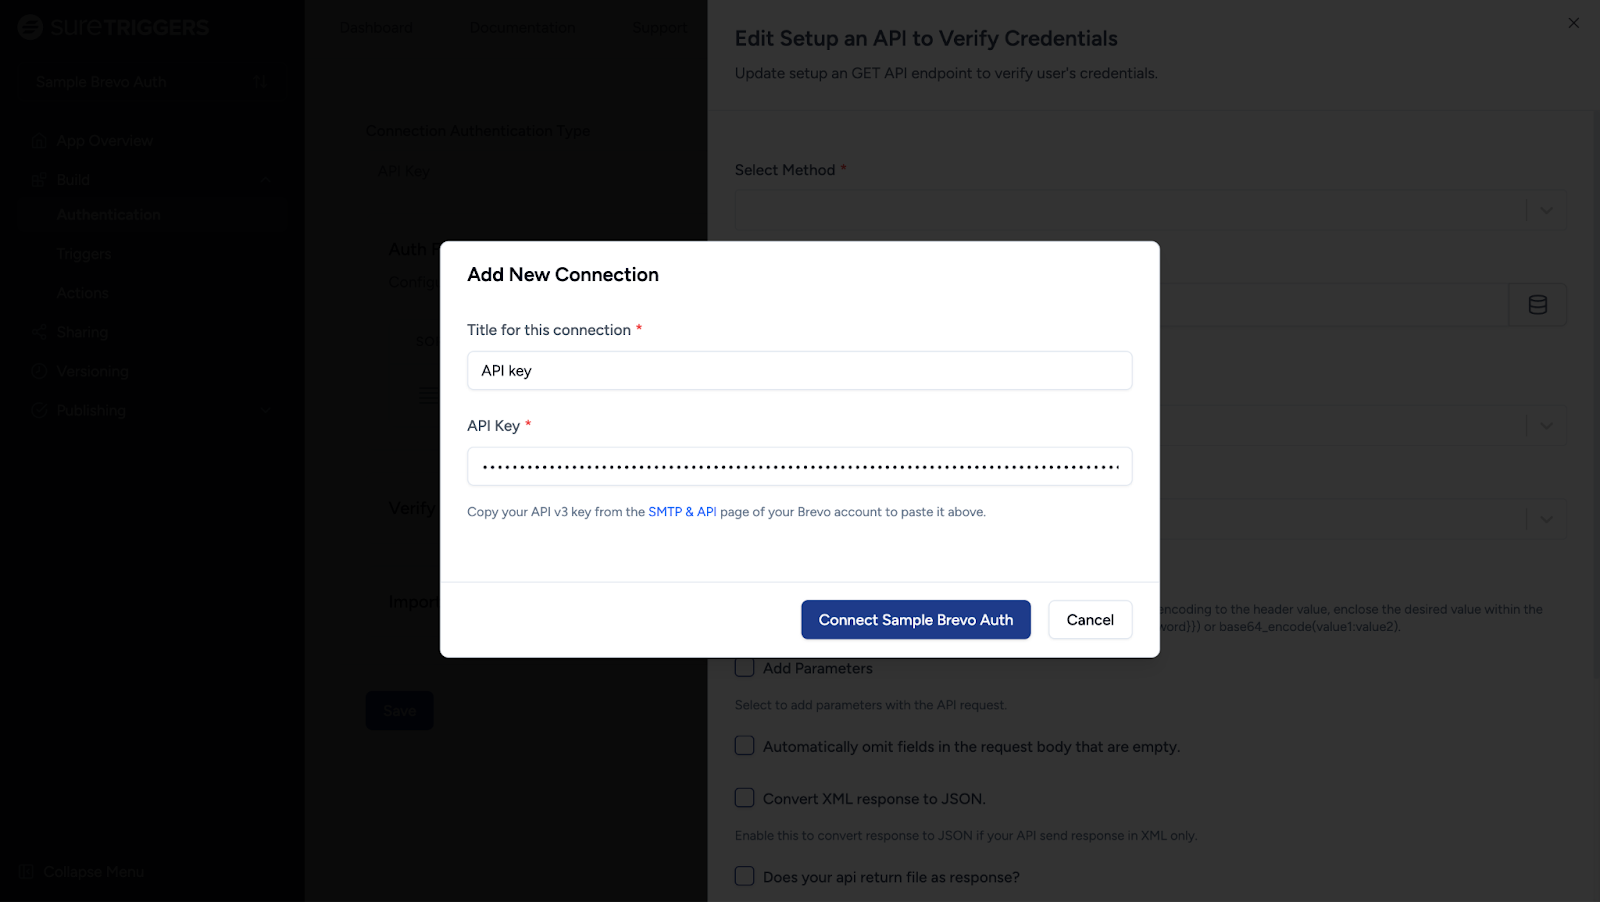
The process of getting your API key will vary depending on the application. Ensure you read the preferred application’s API documentation.
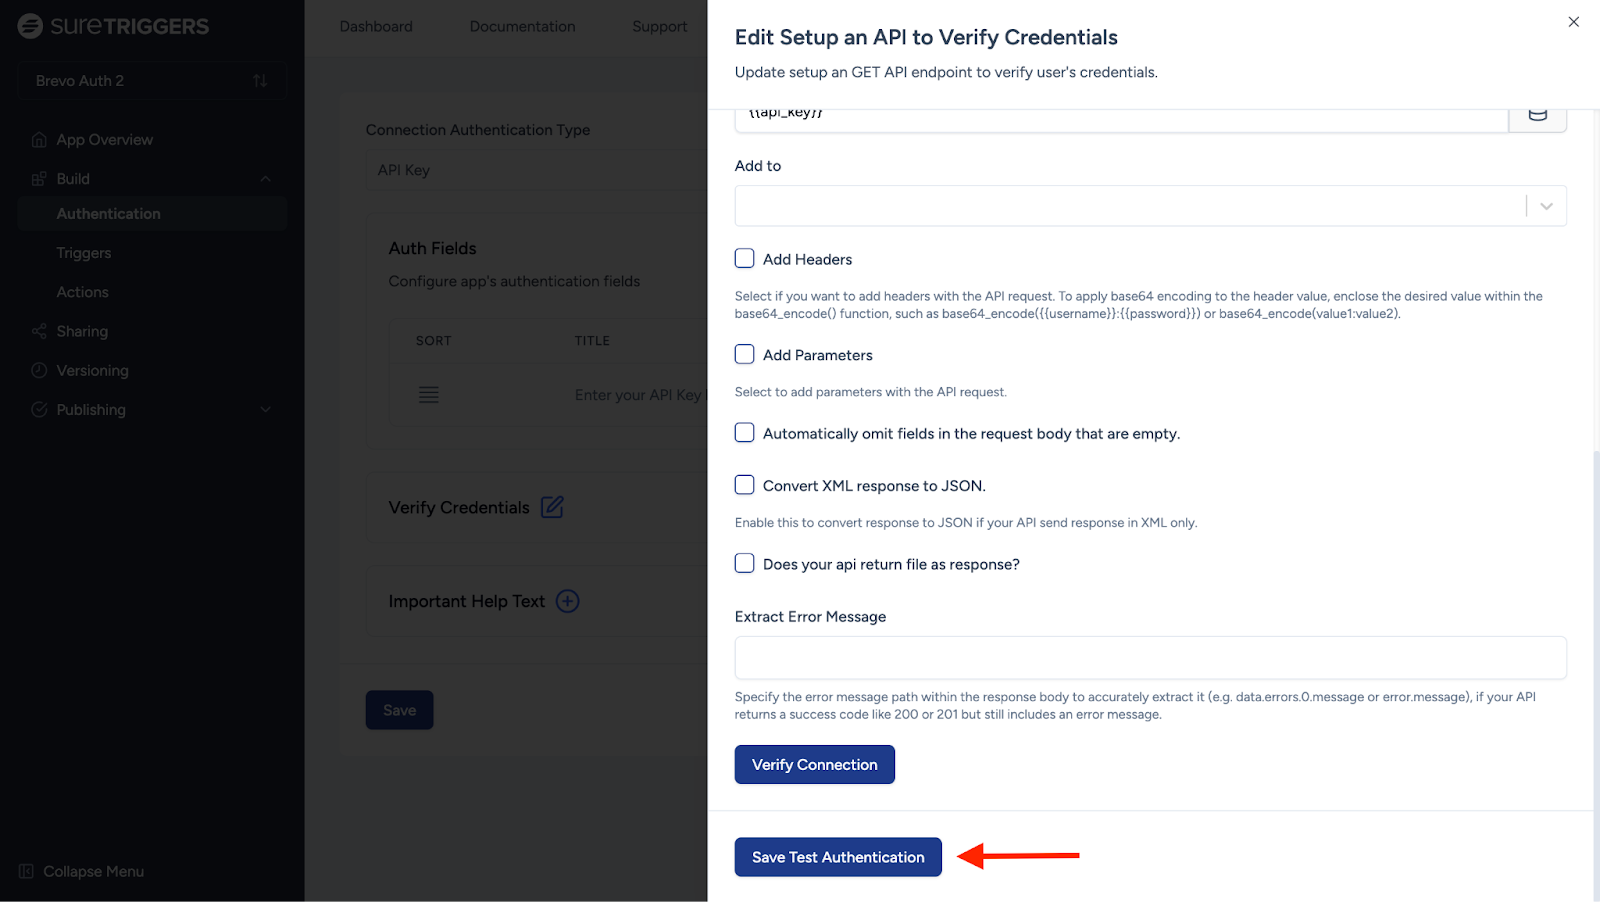
Upon successful verification, you will get a success message telling you that App Builder successfully connected with OttoKit.
You can now click on the “Save Test Authentication” button at the bottom of the flyout form.
That’s all! You can now start setting up actions and triggers for your app.
And if you have any questions, feel free to contact us. We’re always here to help!
We don't respond to the article feedback, we use it to improve our support content.