Cloudprinter.com is a global printing network that facilitates easy and efficient printing solutions for businesses worldwide. Offering a wide range of printing services, Cloudprinter connects businesses with a network of reliable print partners, streamlining the printing process and ensuring quality results.
In this article, we’ll understand how to set up webhooks in Cloudprinter.com to receive notifications on a webhook URL.
Setting Up Webhook in Cloudprinter.com
1. Login to your Cloudprinter.com dashboard.
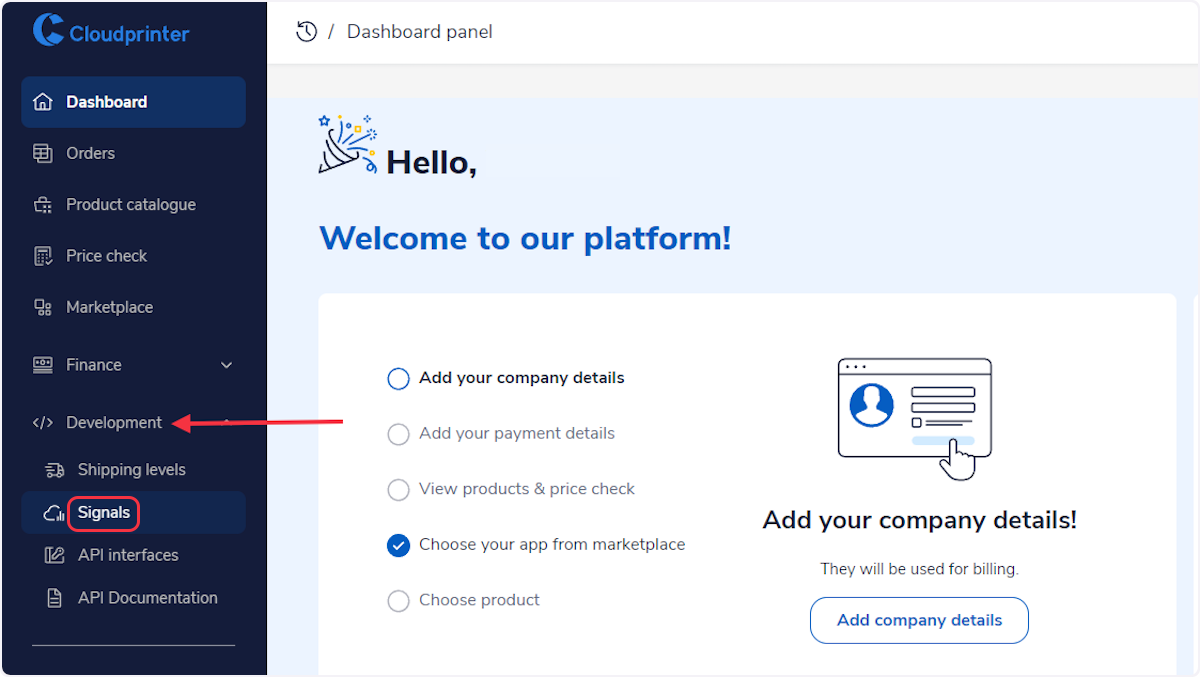
2. Go to ‘Development’ from the left sidebar and select ‘Signals’.
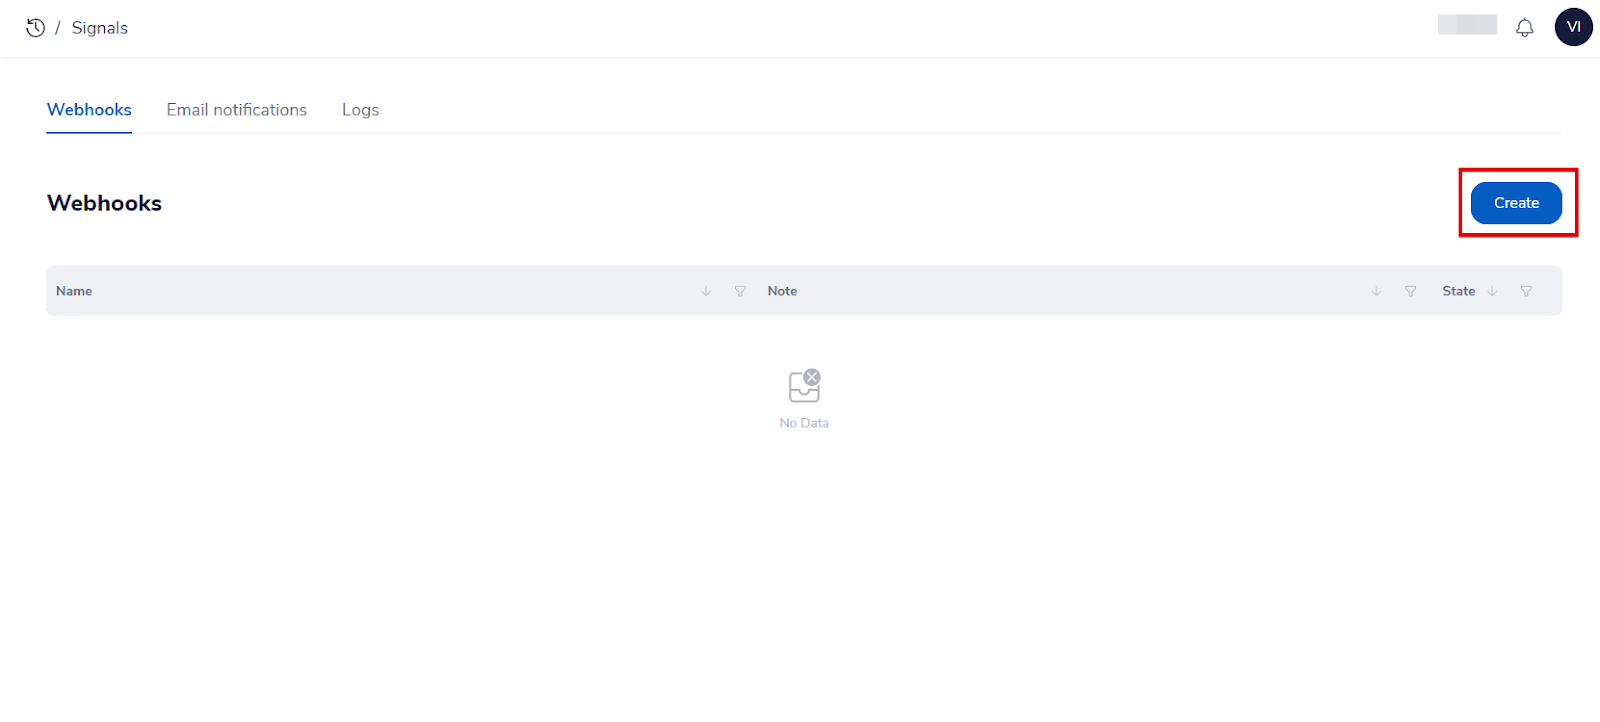
3. Now, inside the Webhooks section, click on ‘Create’.
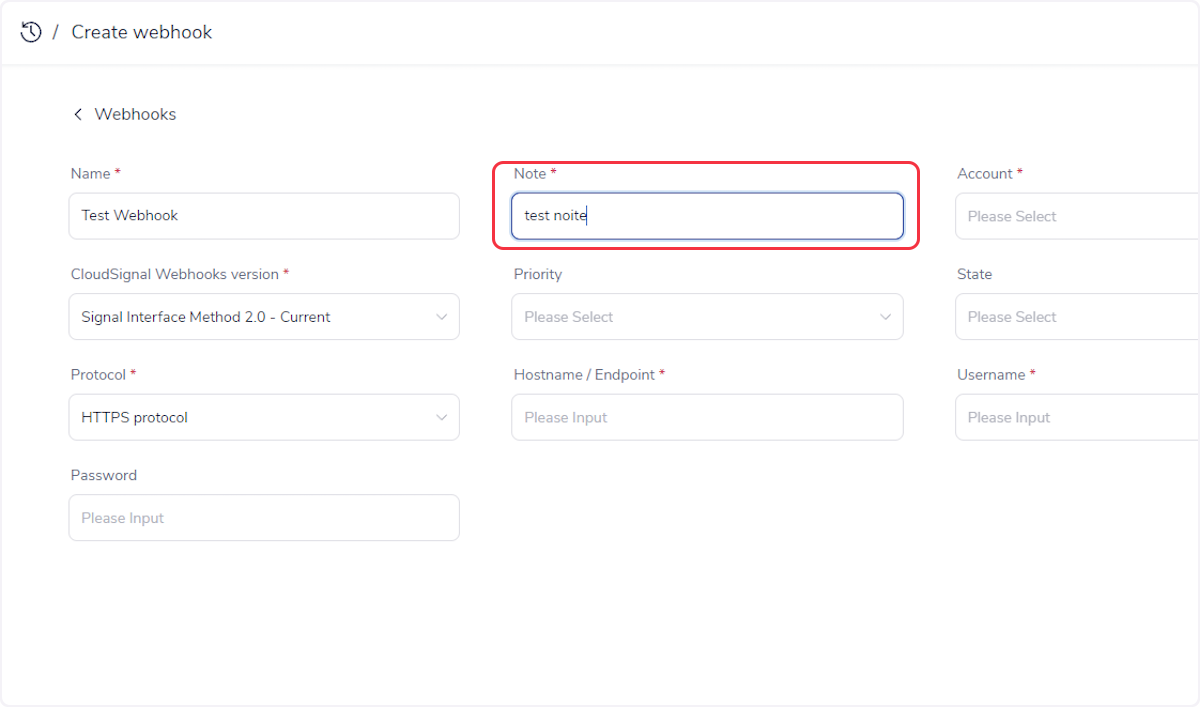
4. Provide any name for your webhook.
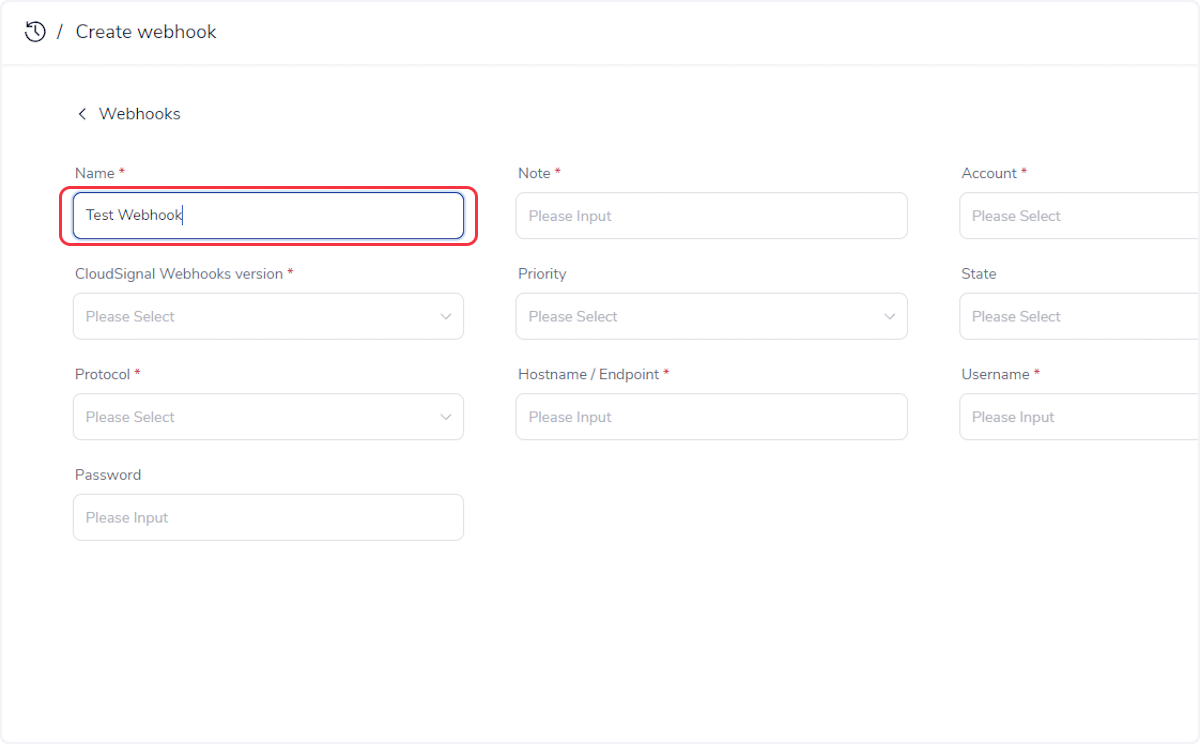
5. Select the “CloudSignal Webhooks version” version.

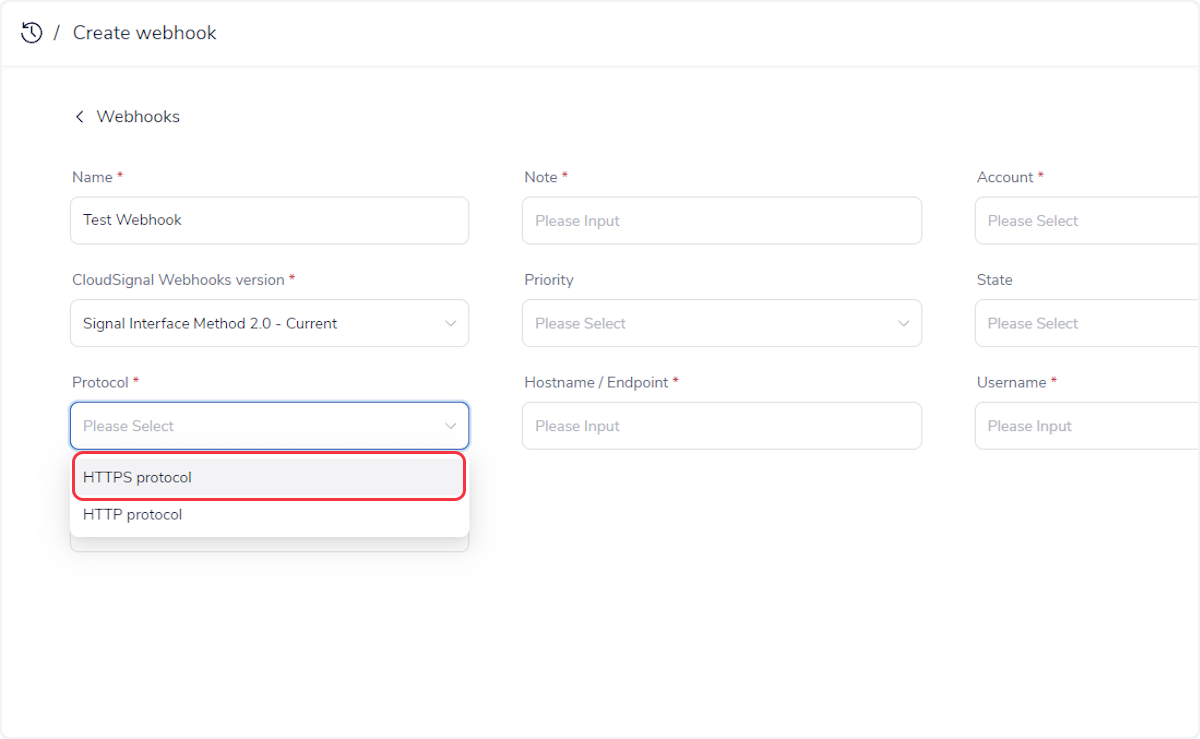
6. Select Protocol.
7. Add a note for your webhook.
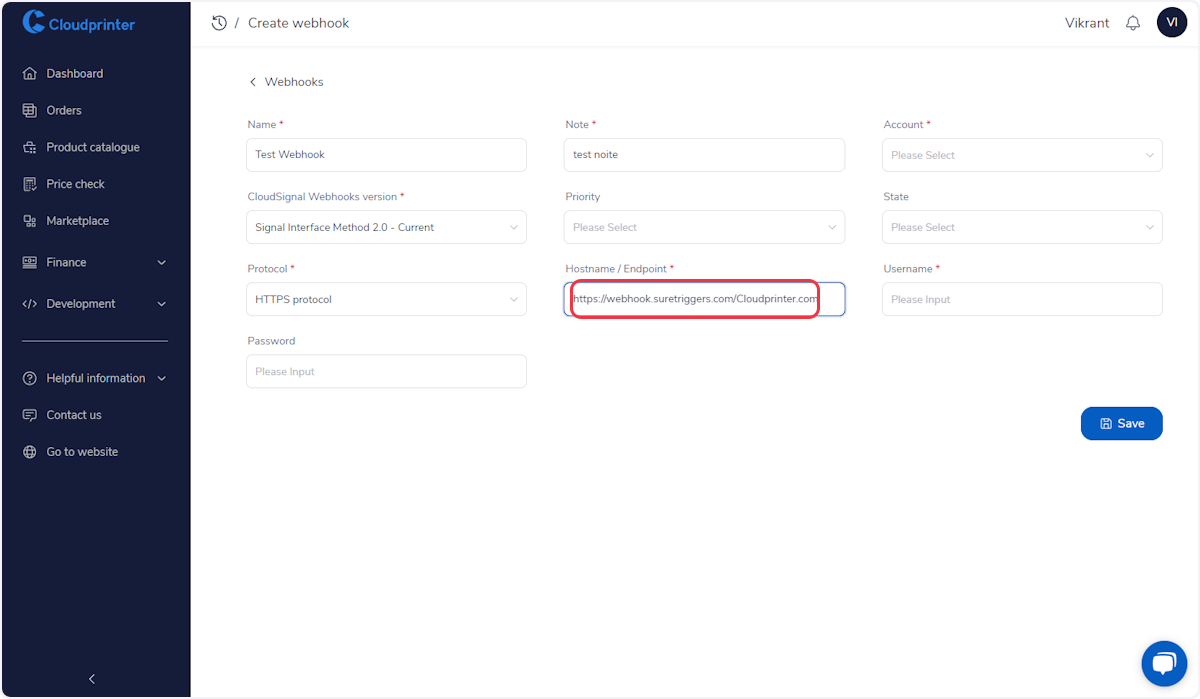
8. Copy the webhook URL from the trigger flyout, and paste it into the “Hostname/Endpoint” field.
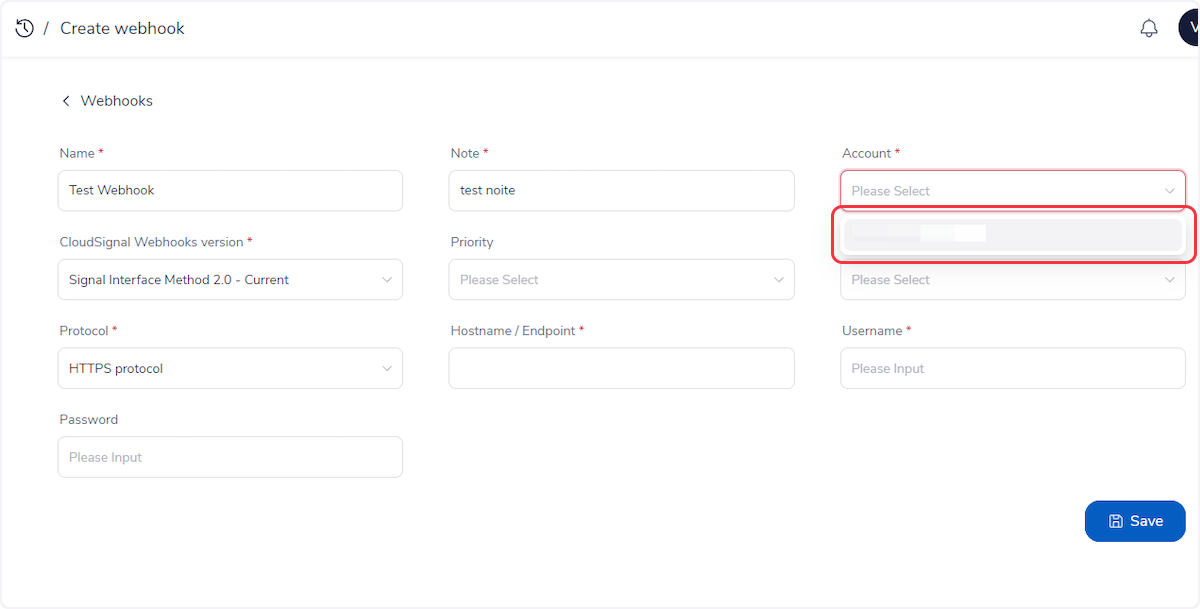
9. Select Account.
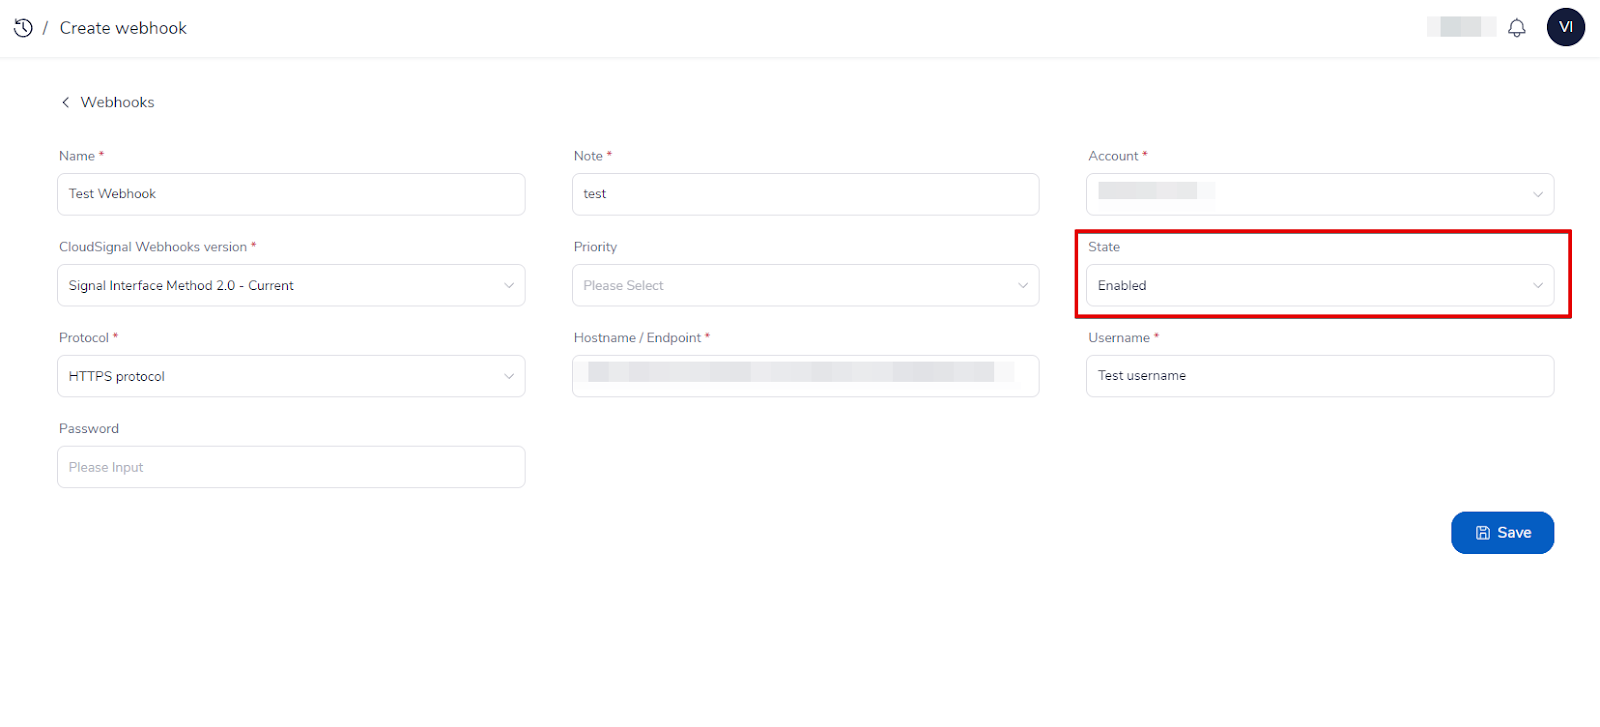
10. Enable the webhook state.
11. Enter Username.
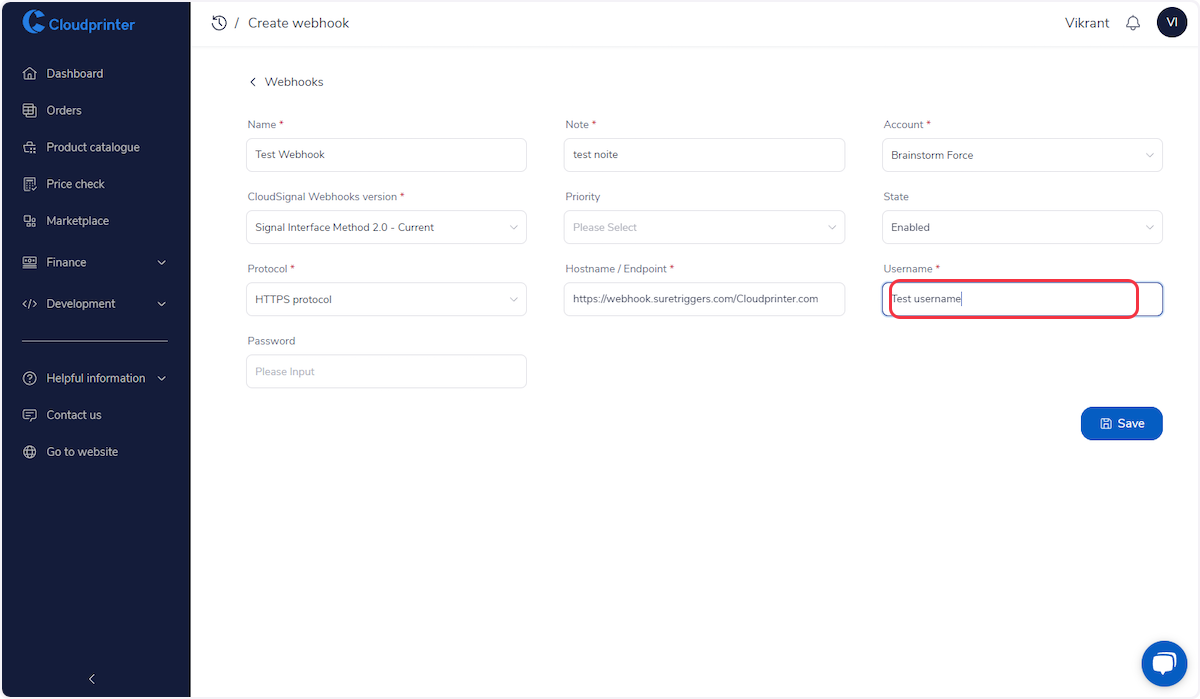
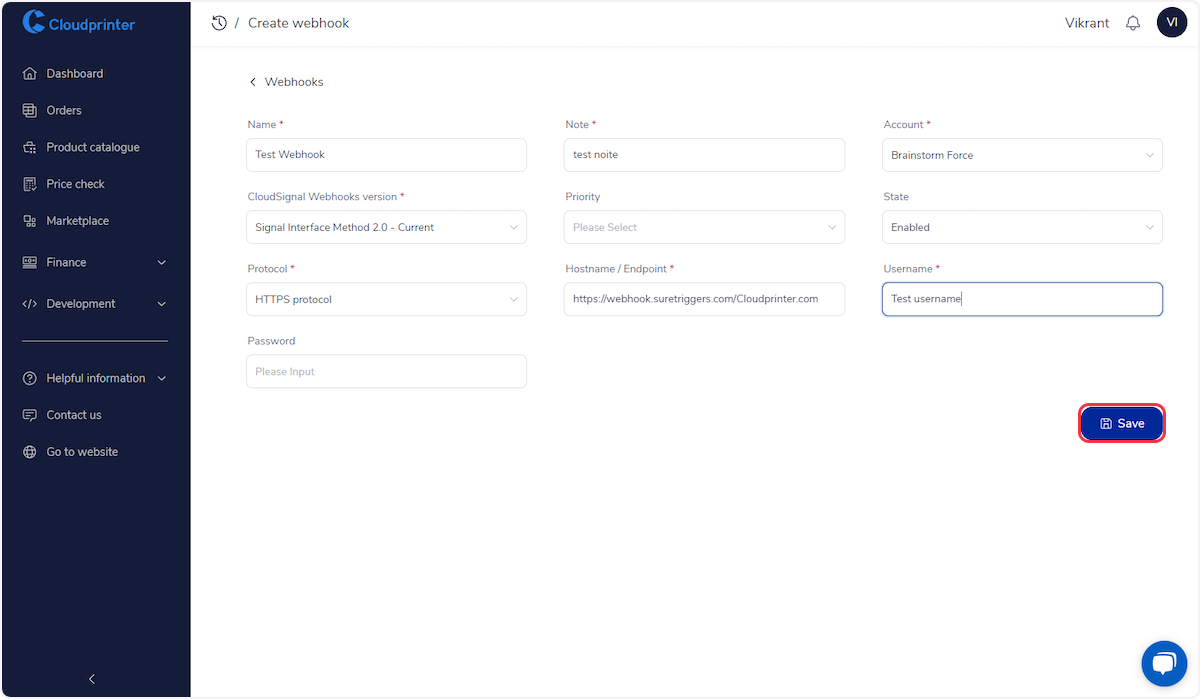
12. Click on ‘Save’.
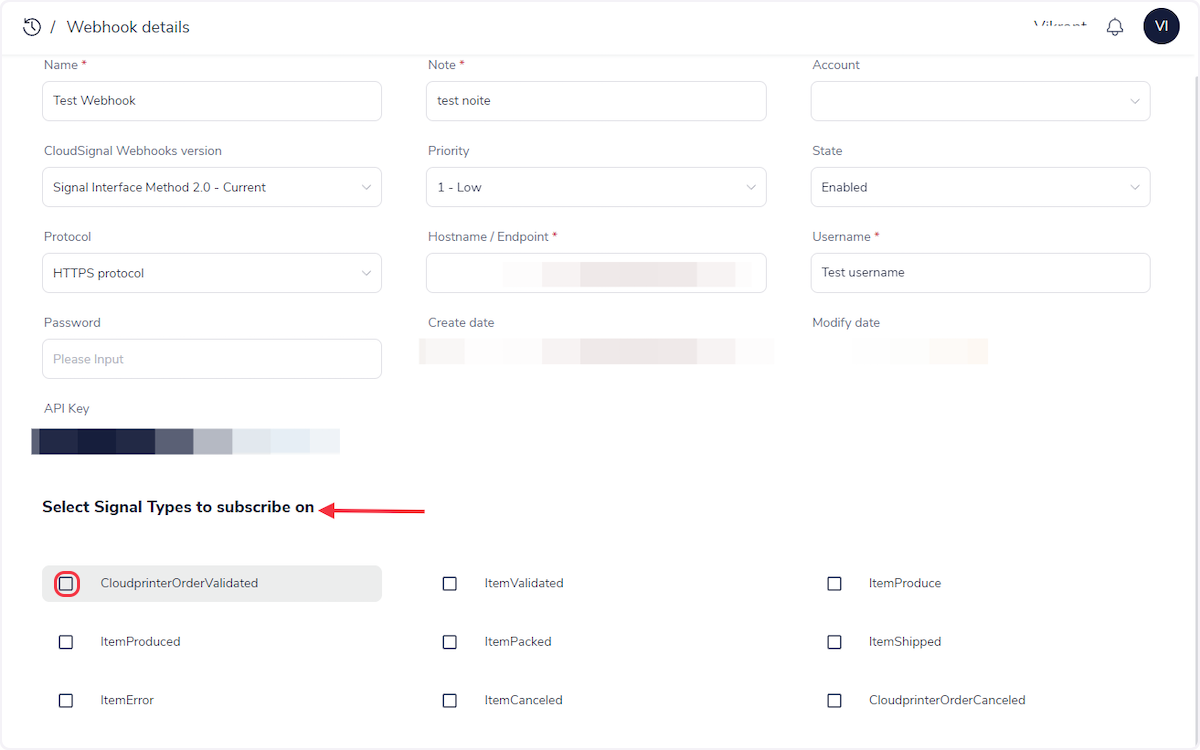
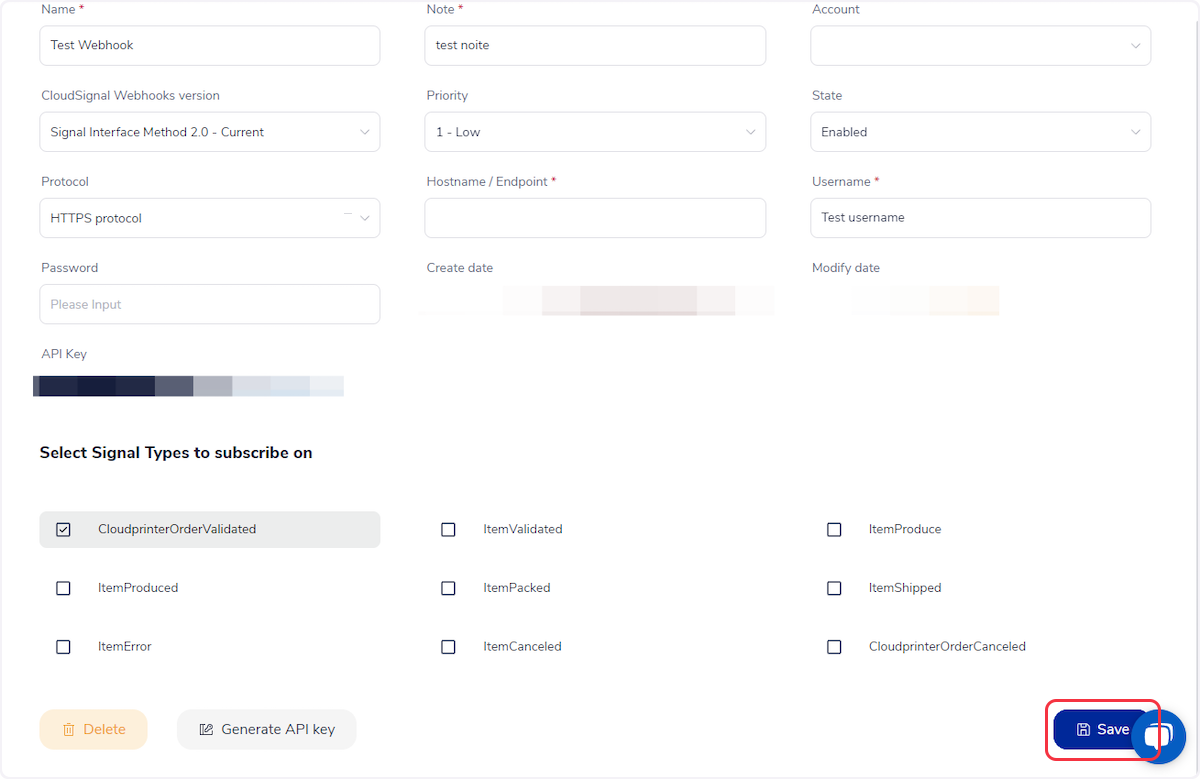
13. Now, select the type of signal that your workflow should trigger.
14. Click on ‘Save.
That’s it! You have successfully added a webhook to your Cloudprinter.com account.
Connect Cloudprinter.com with Other Apps
If you want to connect Cloudprinter.com with other apps that you use to automate processes, you must check out SureTriggers!
SureTriggers provides a number of Cloudprinter.com integrations to help you automate processes like:
- Create Trello cards for new canceled orders in Cloudprinter.com
- Create monday.com items with new signals in Cloudprinter.com
These are just some random examples of automation. SureTriggers can do a lot more!
To learn more, join our Facebook community.
Recommended Articles
How to sign up for SureTriggers?
Common terms that you’ll come across in SureTriggers