Retable is a platform that lets you create and manage online spreadsheets and databases without coding. You can easily build custom solutions, integrate with other apps, and collaborate with your team in real-time.
In this article, we’ll understand how to set up webhooks in Retable to receive notifications on a webhook URL.
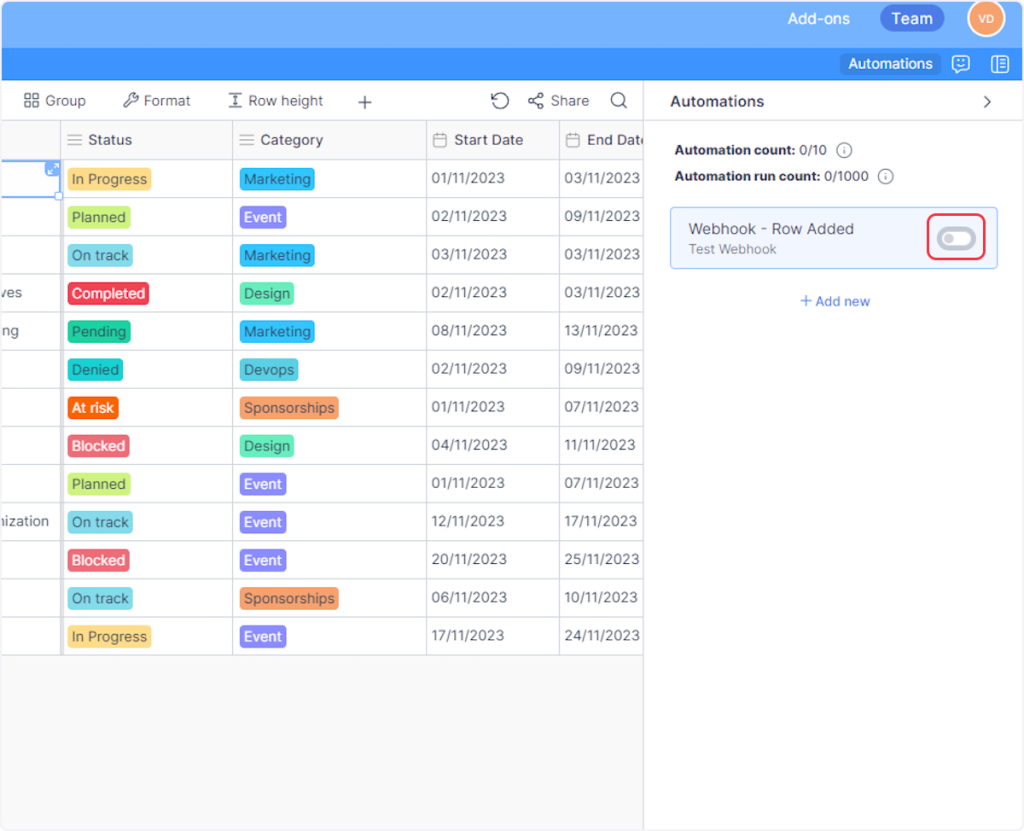
Setting Up Webhook in Retable
- Login to the Retable account.
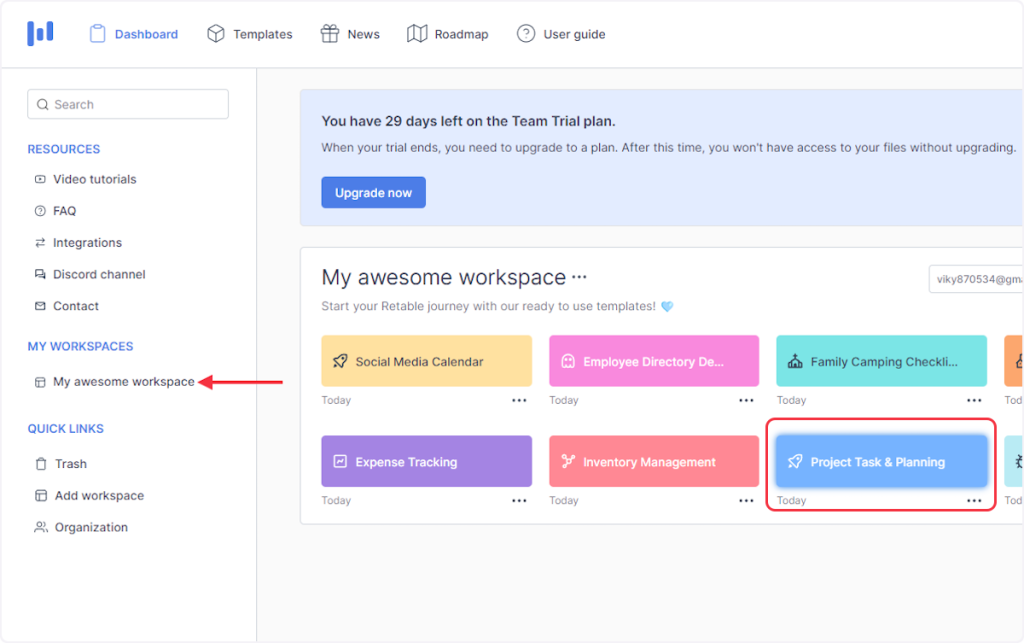
- On the “My Workspaces” page, click and select the project for which you want to set up the webhook automation.
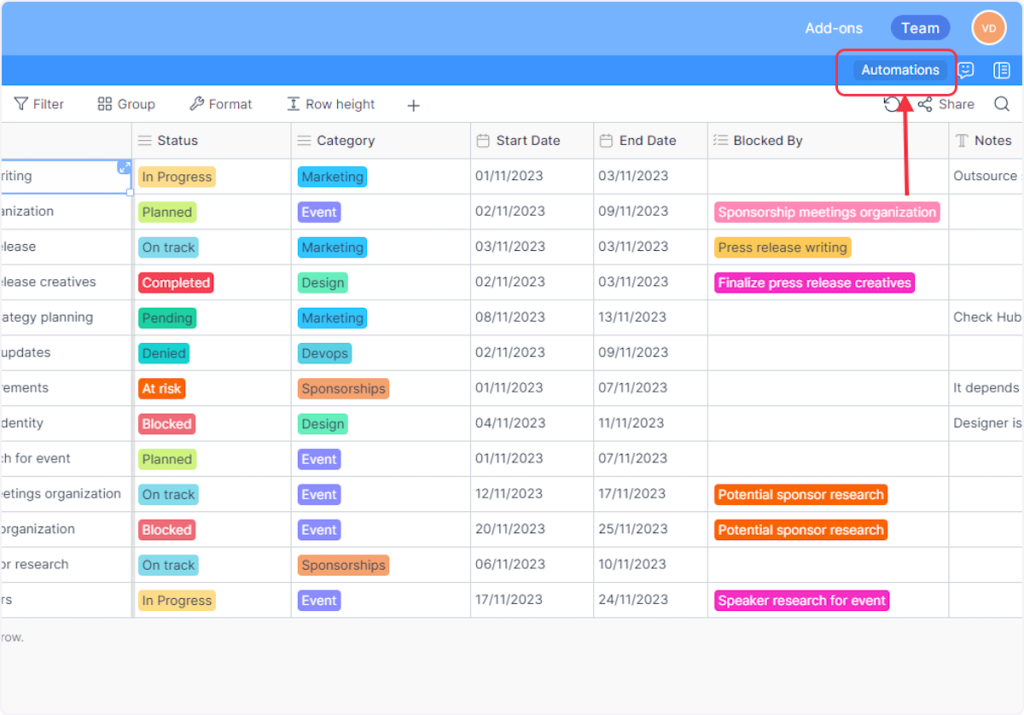
- Next, click on ‘Automations’.
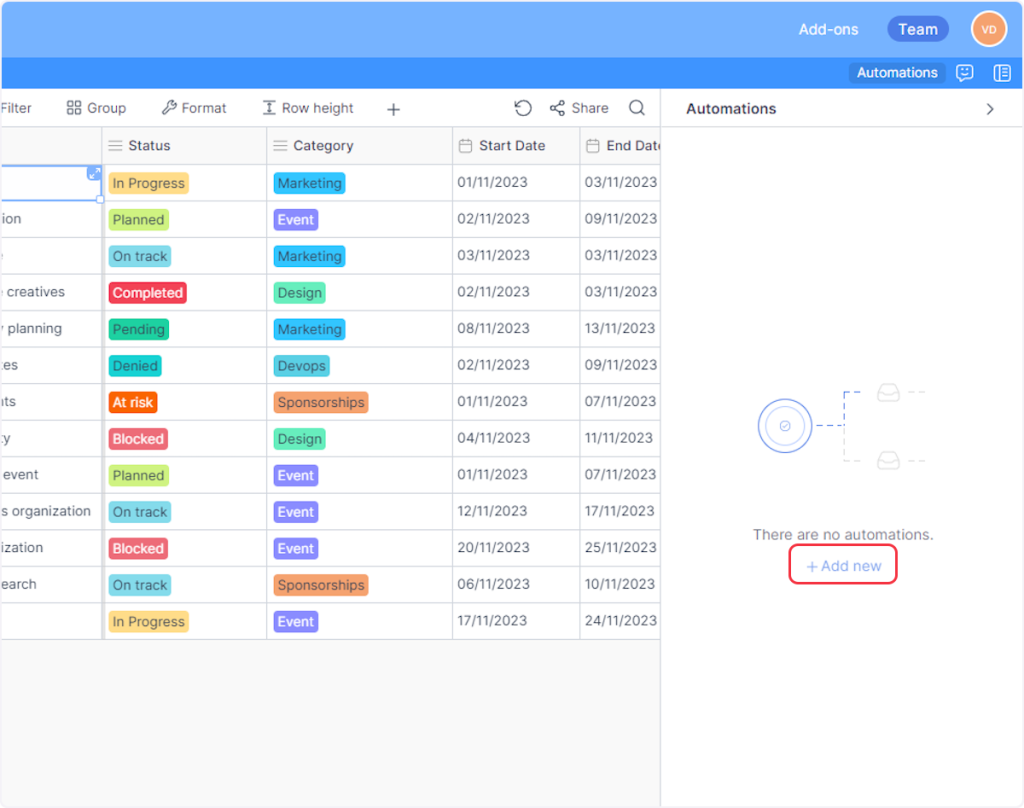
- Now, inside the ‘Automations’ slider flyout, click on the “+ Add new” button.
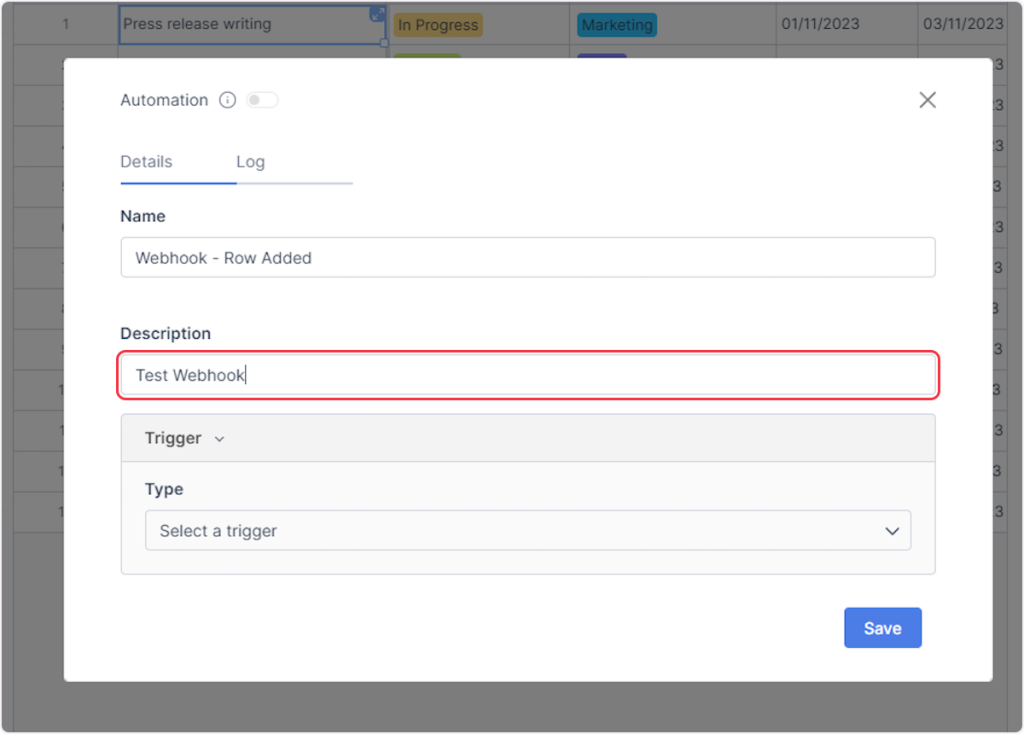
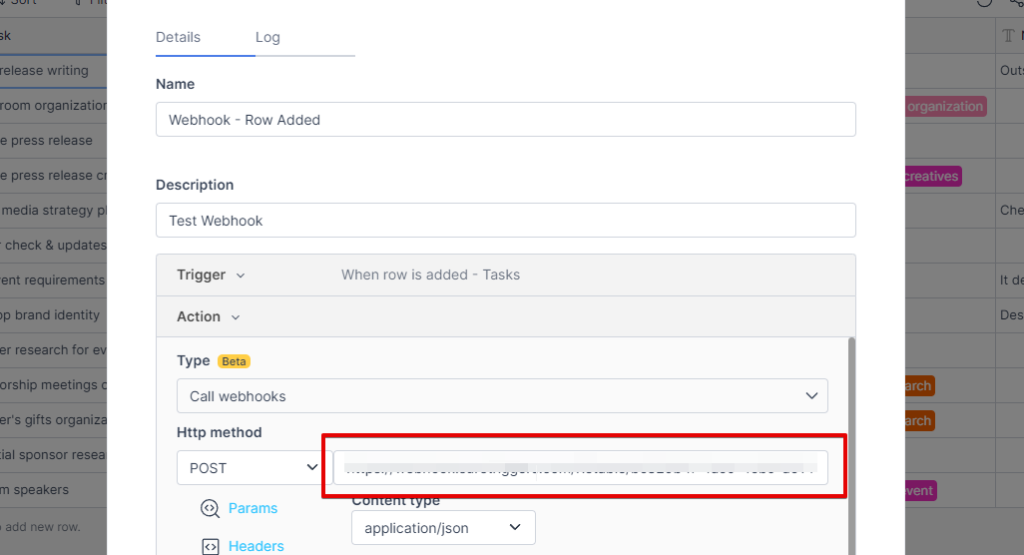
- Now, inside the ‘Automation’ pop-up, enter the name for your webhook.
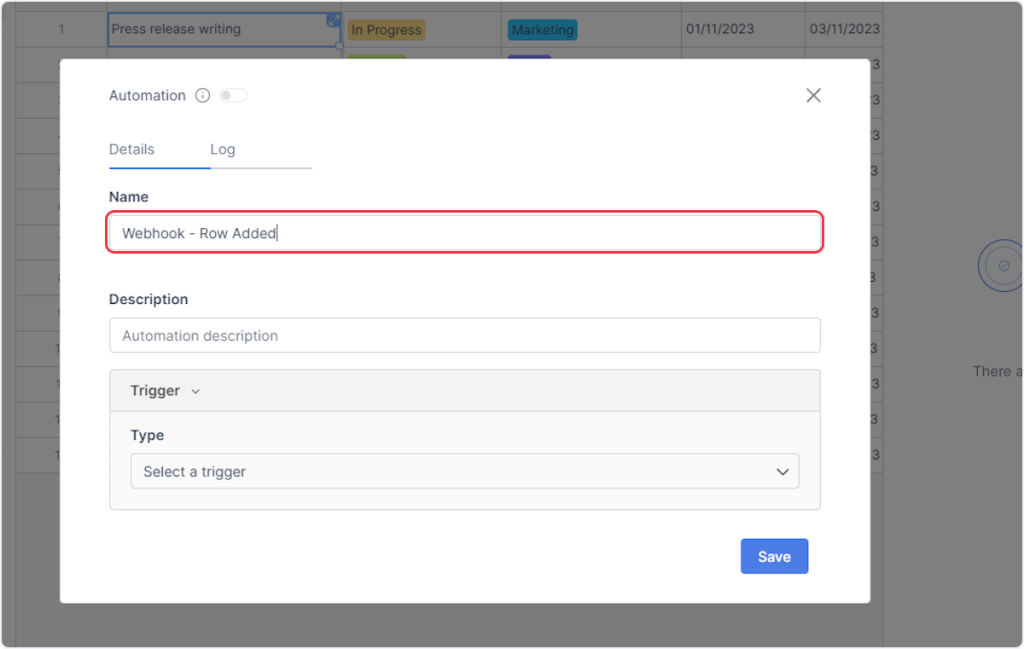
- Add a description for your webhook if you want.
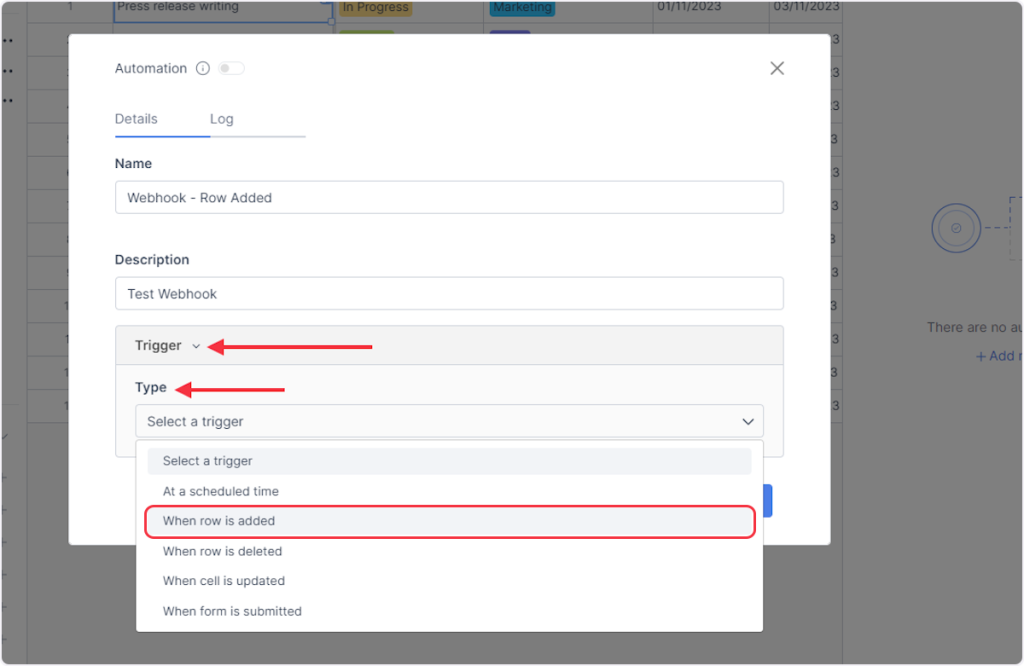
- Now, click on ‘Trigger’ and then select the trigger type from the ‘Type’ dropdown as per your trigger. For example, if you want to set up a webhook for the “Row Added” trigger, then you need to select the “When row is added” trigger from the ‘Type’ dropdown.
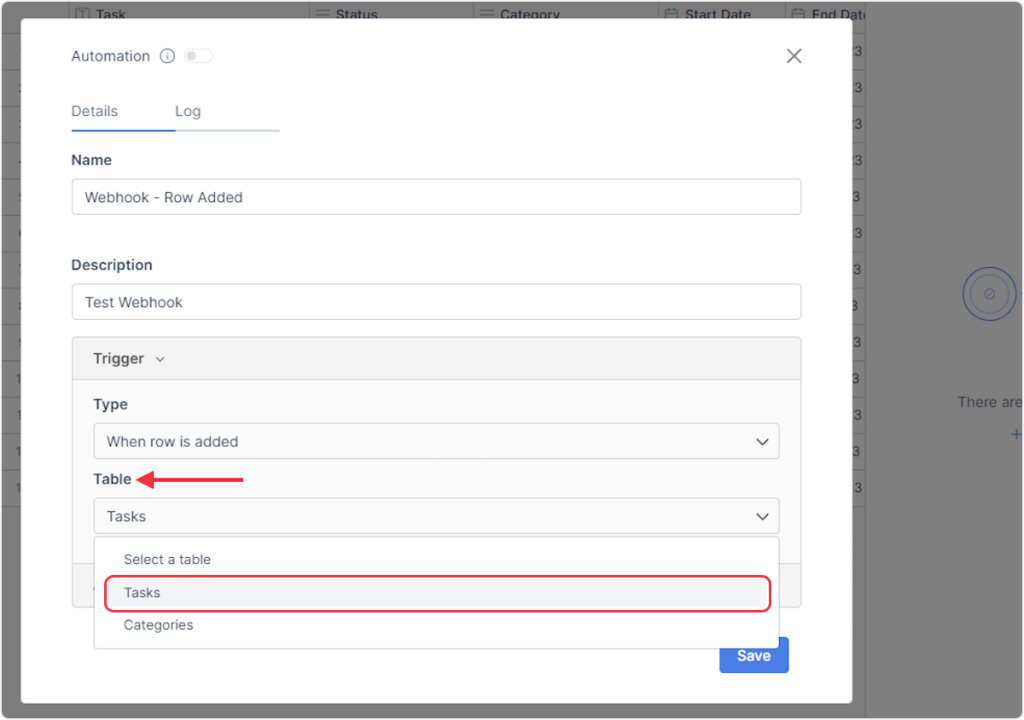
- Select a particular table from the ‘Table’ dropdown if you have more than one table inside your project and you are creating automation for a specific table.
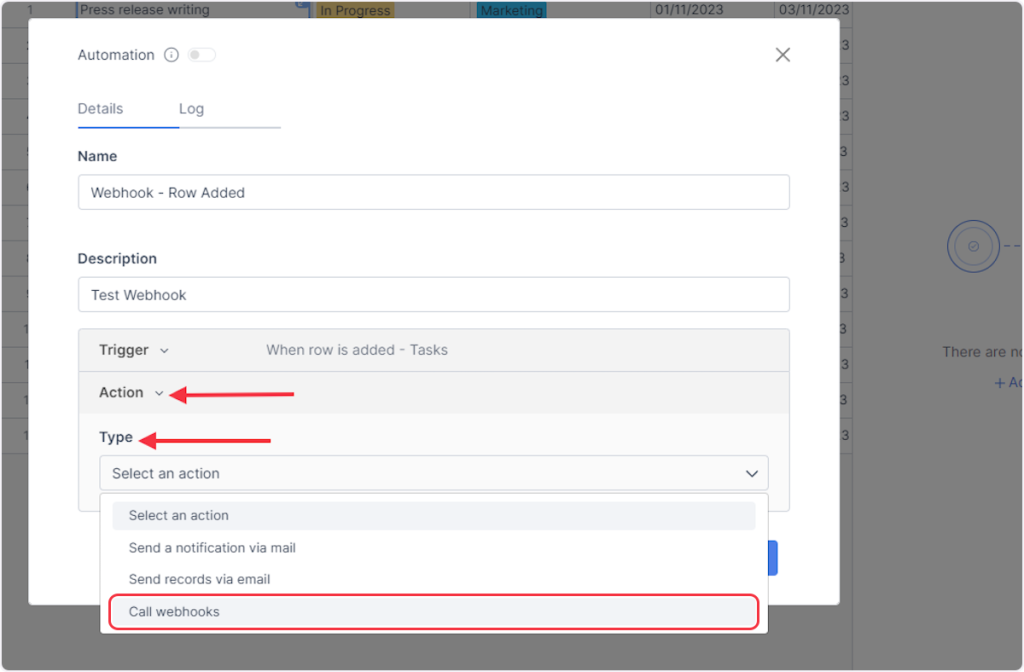
- Now, in the “Actions” step, choose the “Call Webhooks” option from the ‘Type’ dropdown.
- Now, select ‘POST’ as the HTTP method.

- Copy the above webhook URL from the trigger flyout and paste it into the designated URL field.
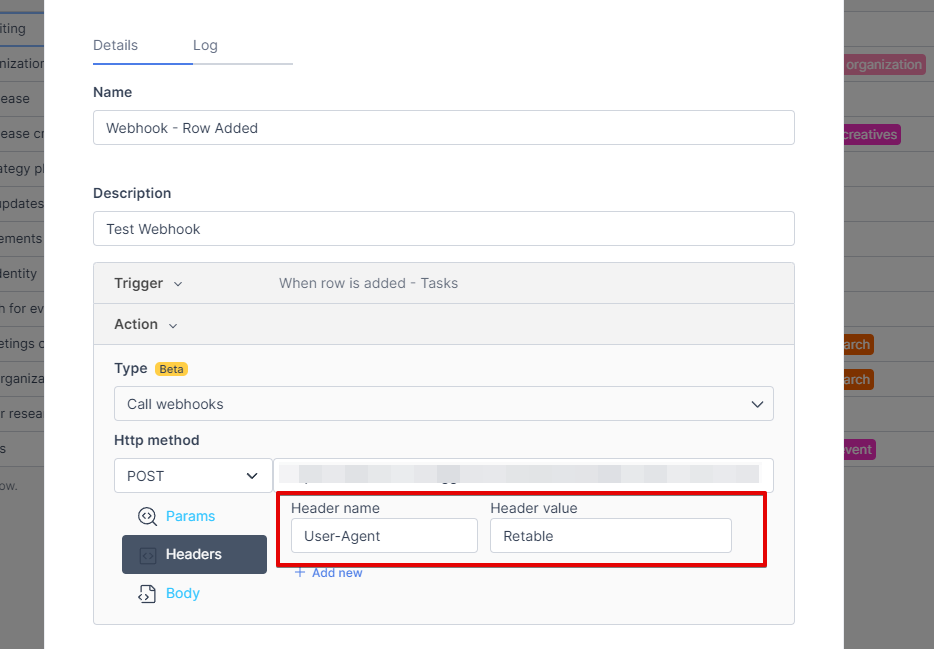
- Leave ‘Headers’ as they are, as they are the default settings.
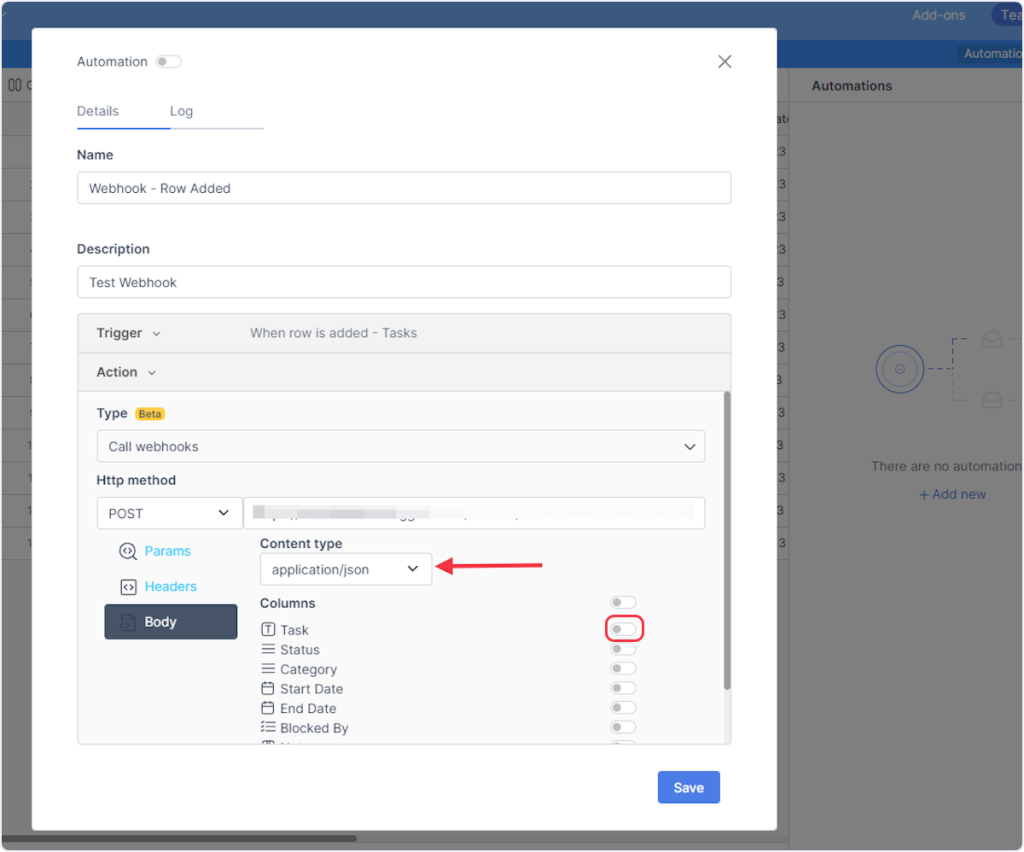
- Now, inside the ‘Body’ section, you can choose the option “application/json” from the “Content Type” dropdown. Then, enable any particular column or enable all columns as per your requirement to retrieve the data after the workflow execution.
- Click on ‘Save’.
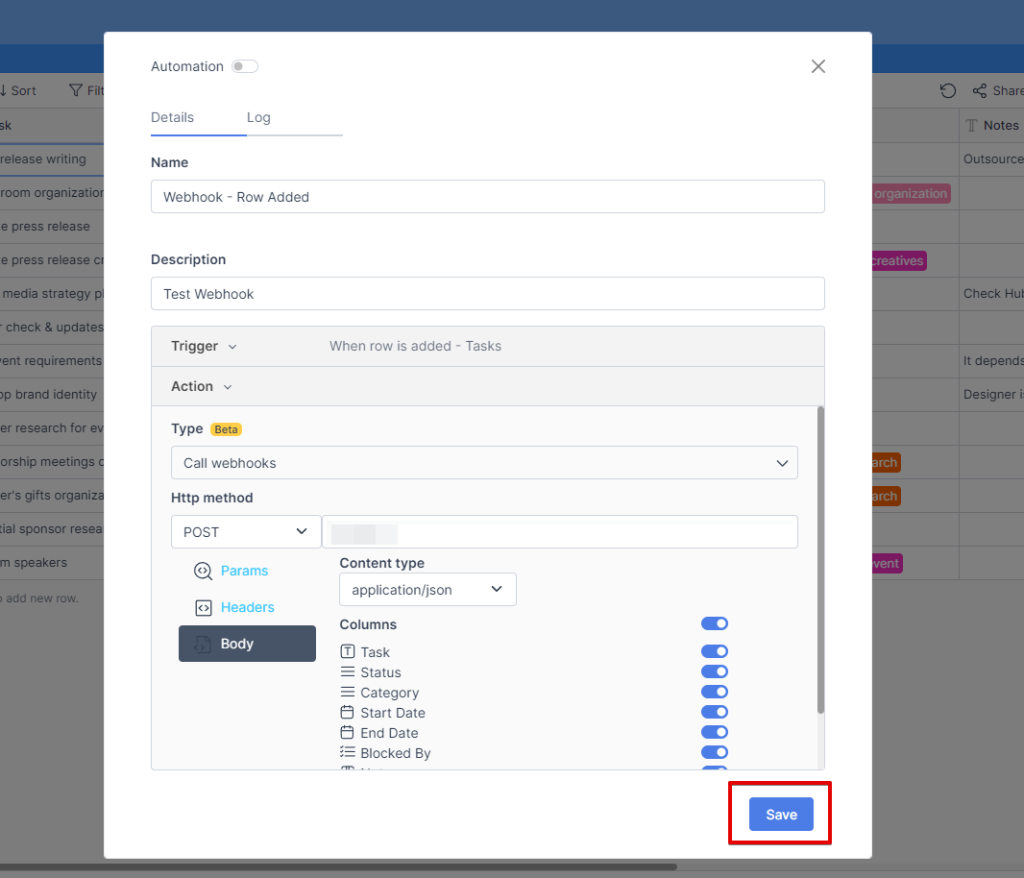
- Don’t forget to enable the switch of the created automation in the ‘Automations’ flyout.
That’s it! You have successfully added a webhook to your Retable account.
Connect Retable with Other Apps
If you want to connect Retable with other apps that you use to automate processes, you must check out SureTriggers!
Retable integration can help you automate processes like:
- When a row is deleted from Retable, remove the tag from the contact in Fluent CRM.
- Create a new task in ClickUp based on a new row added in Retable.
These are just some random examples of automation. SureTriggers can do a lot more!
To learn more, join our Facebook community.
Recommended Articles
How to sign up for SureTriggers?
Common terms that you’ll come across in SureTriggers