RepairShopr is an all-in-one operations management software solution designed for repair businesses. It offers features such as a ticketing system, job tracker, POS module, invoicing system, and an integrated marketing platform.
In this article, we’ll understand how to set up webhooks in RepairShopr to receive notifications on a webhook URL.
Setting Up Webhook in RepairShopr
- Login to your RepairShopr account.
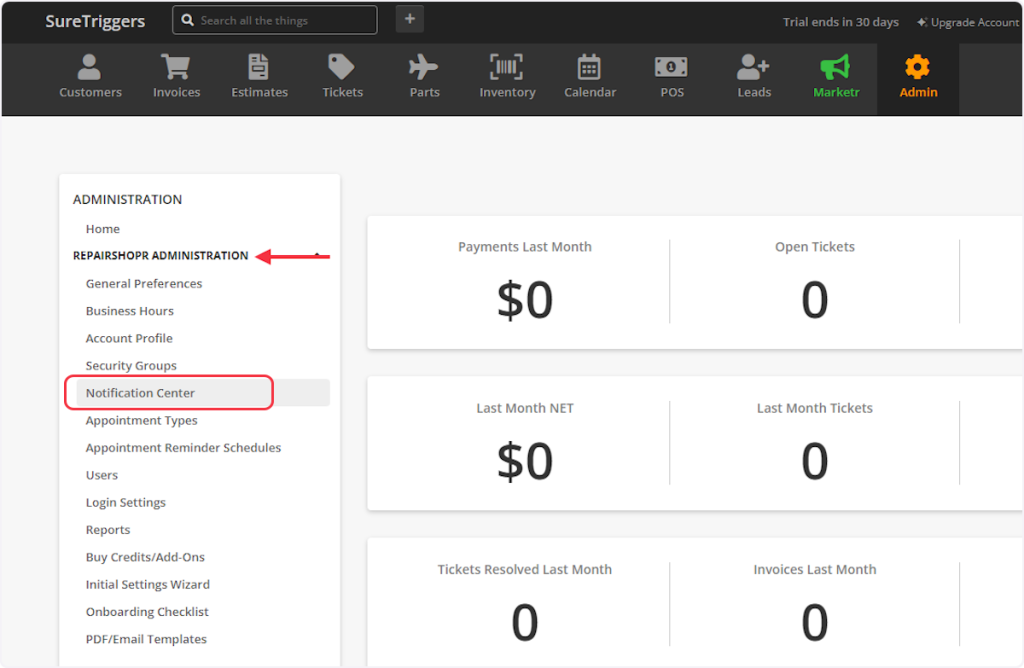
- Click on the ‘Admin’ tab.

- Now, within the “Repairshopr Administration” section, click on “Notification Center”.
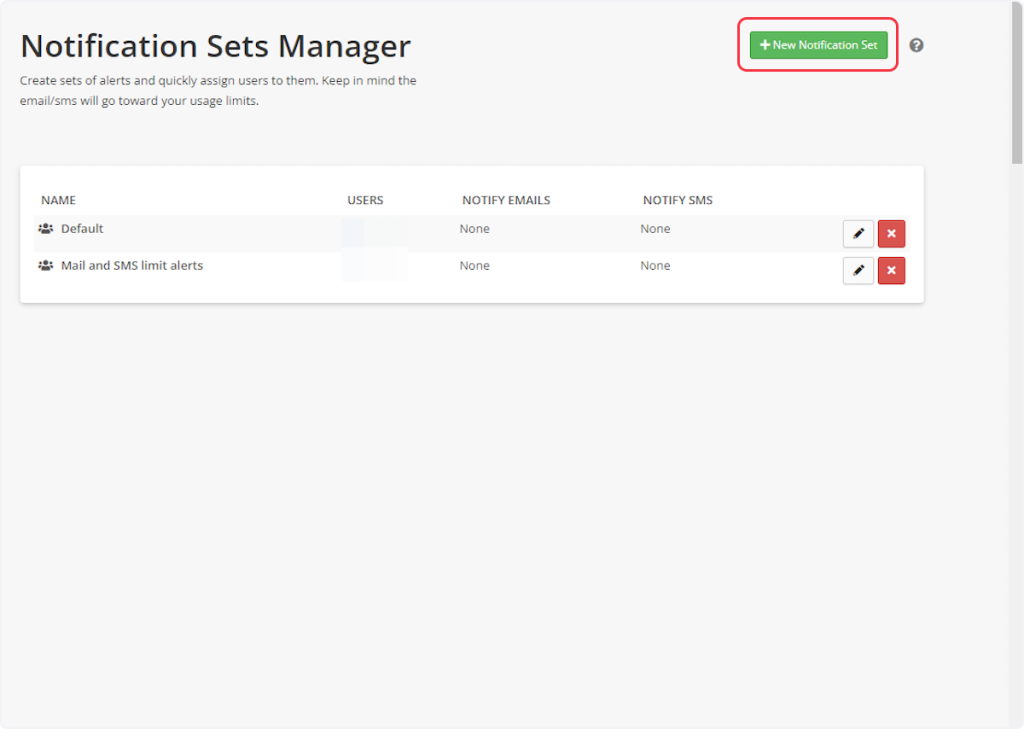
- Click on “+ New Notification Set”.
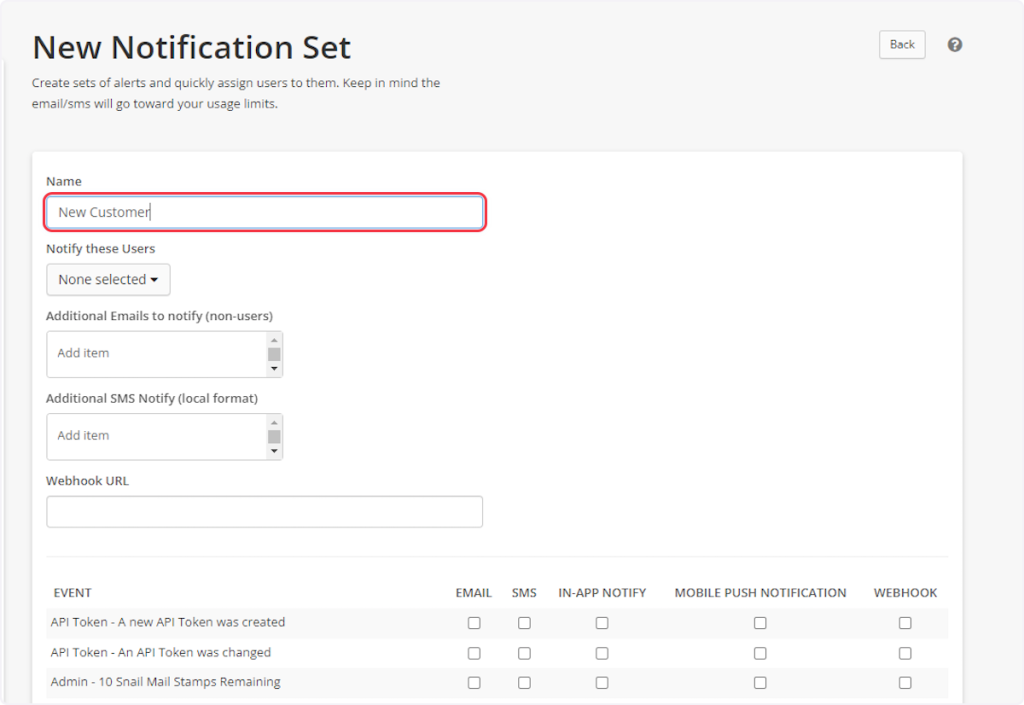
- Enter a name for the webhook under the ‘Name’ field.
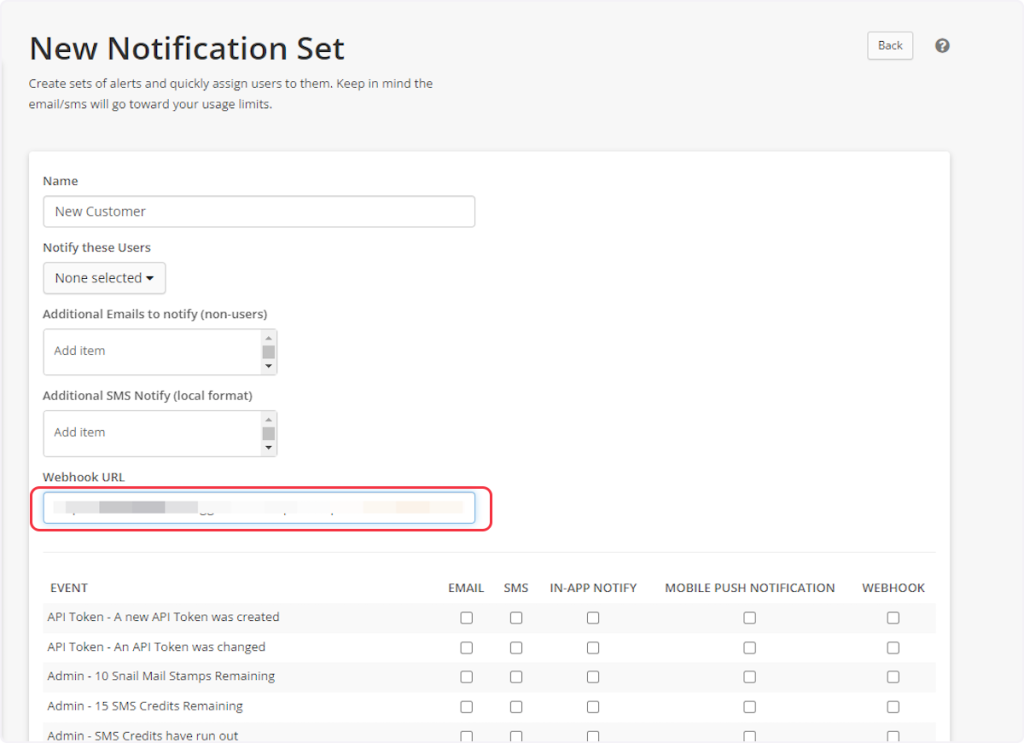
- Copy the webhook url from trigger flyout & paste it under the “Webhook URL” field.
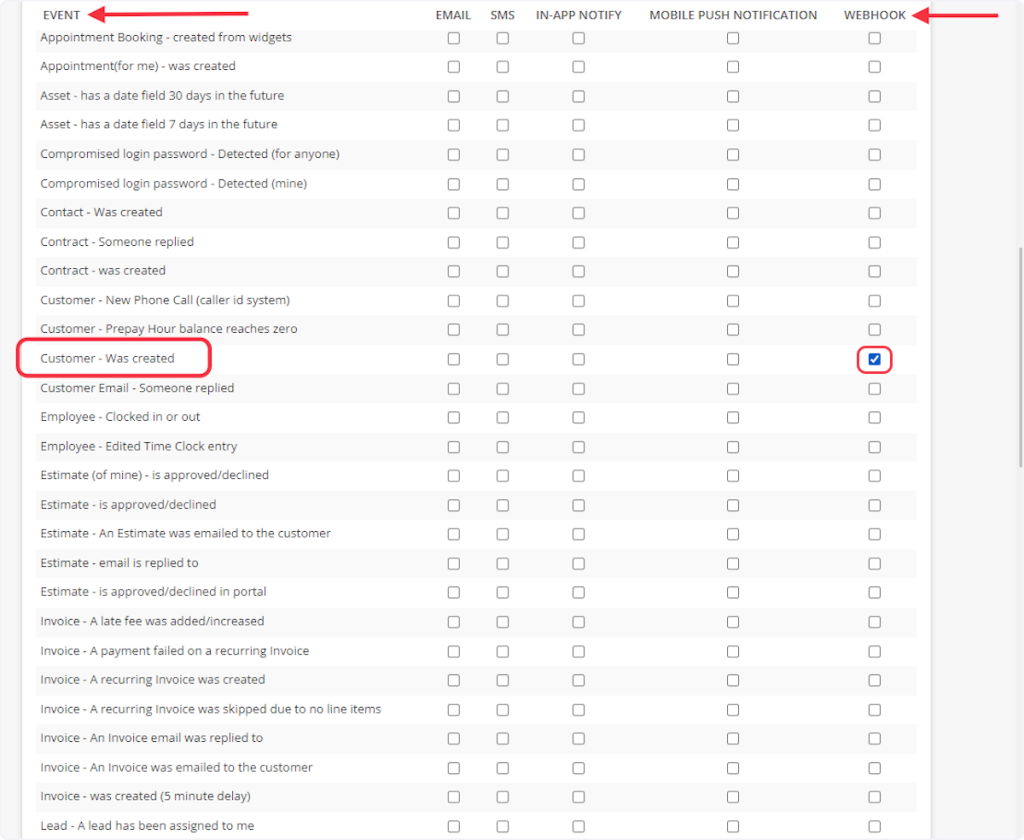
- In the event section, only check the Webhook checkbox for the specific event you’re setting up the trigger for. For example, for the “New Customer” trigger, check the Webhook checkbox next to the “Customer – Was created” event.
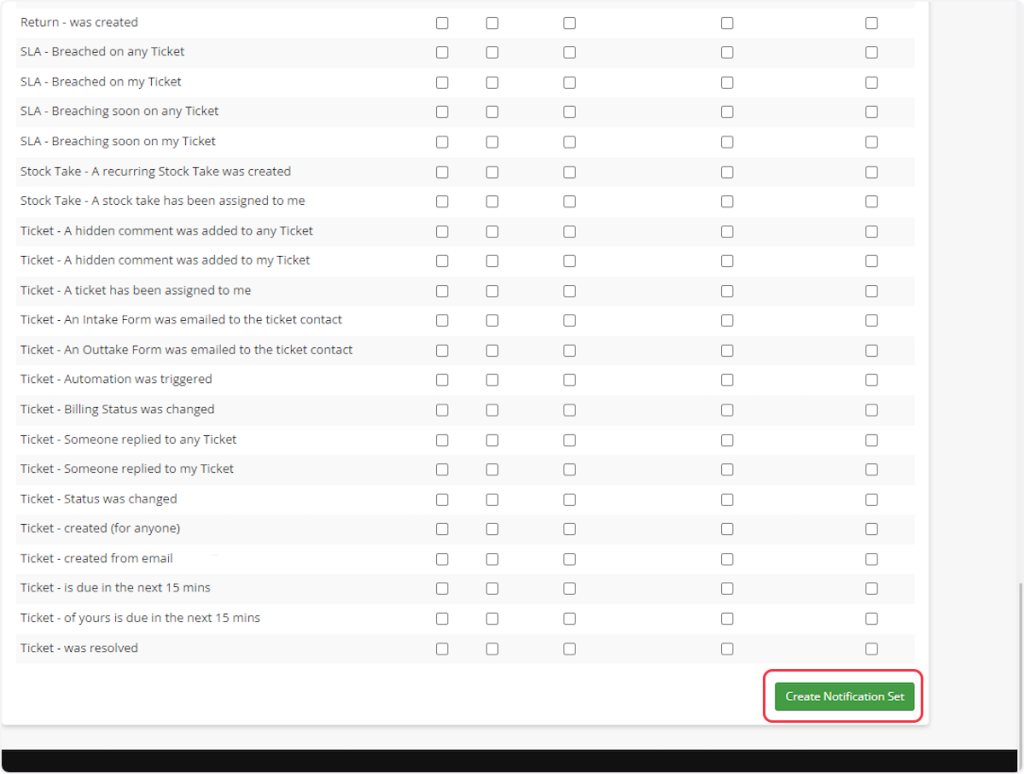
- Click on the “Create Notification Set” button.
That’s it! You have successfully added a webhook to your RepairShopr account.
Connect RepairShopr with Other Apps
If you want to connect RepairShopr with other apps that you use to automate processes, you must check out SureTriggers!
RepairShopr Integration can help you automate processes like:
- Post new RepairShopr invoice activity to a Slack channel.
- Add new RepairShopr tickets to Trello lists.
These are just some random examples of automation. SureTriggers can do a lot more!
To learn more, join our Facebook community.
Recommended Articles
How to sign up for SureTriggers?
Common terms that you’ll come across in SureTriggers