Passcreator is a comprehensive platform for creating and managing digital passes, tickets, and coupons. With its intuitive interface and robust features, Passcreator enables businesses to effortlessly design and distribute personalized mobile passes for various purposes.
In this article, we’ll understand how to set up webhooks in Passcreator to receive notifications on a webhook URL.
Setting Up Webhook in Passcreator
- Login to your Passcreator dashboard.
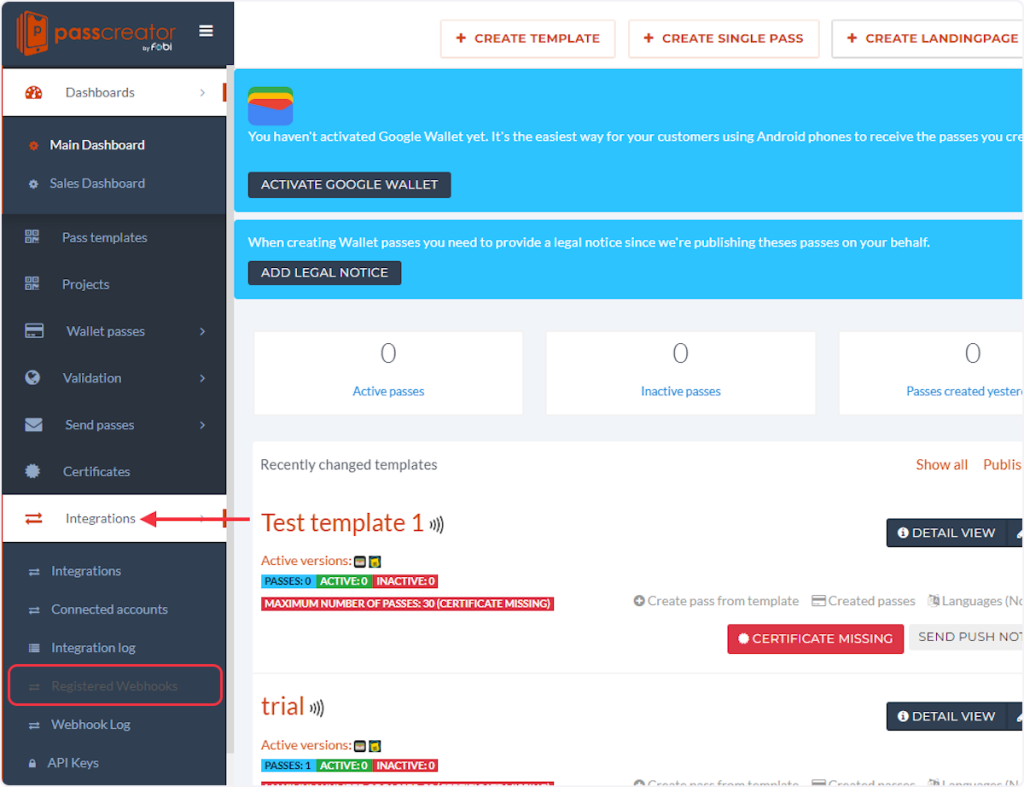
- On the dashboard under the ‘Integrations’ tab select ‘Registered Webhooks’.
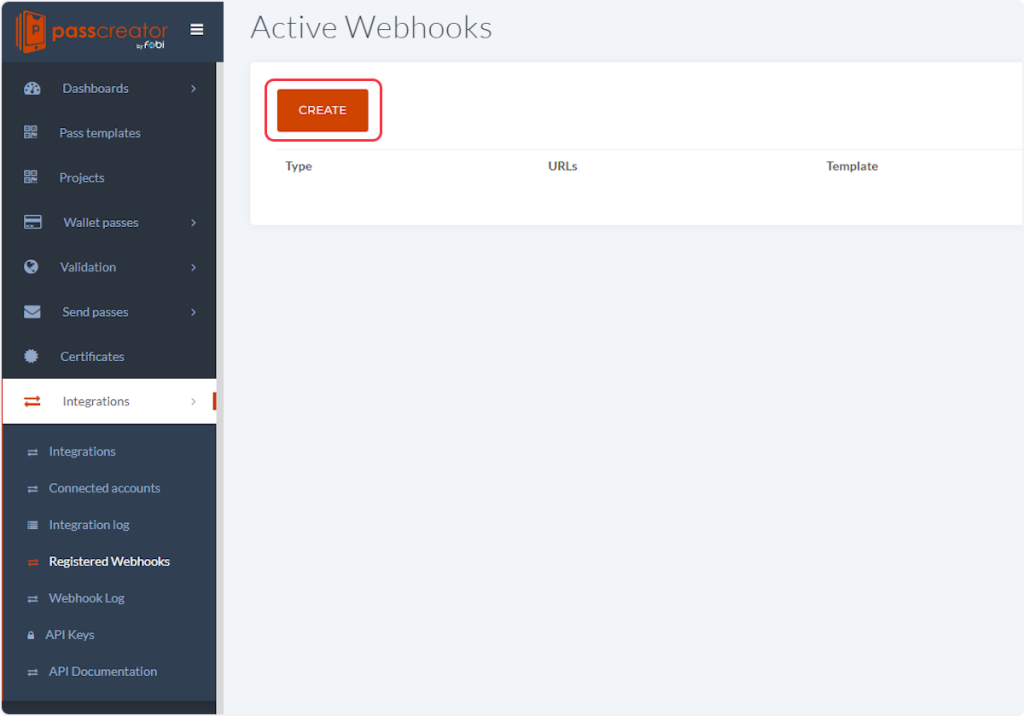
- Click on the ‘CREATE’ button.
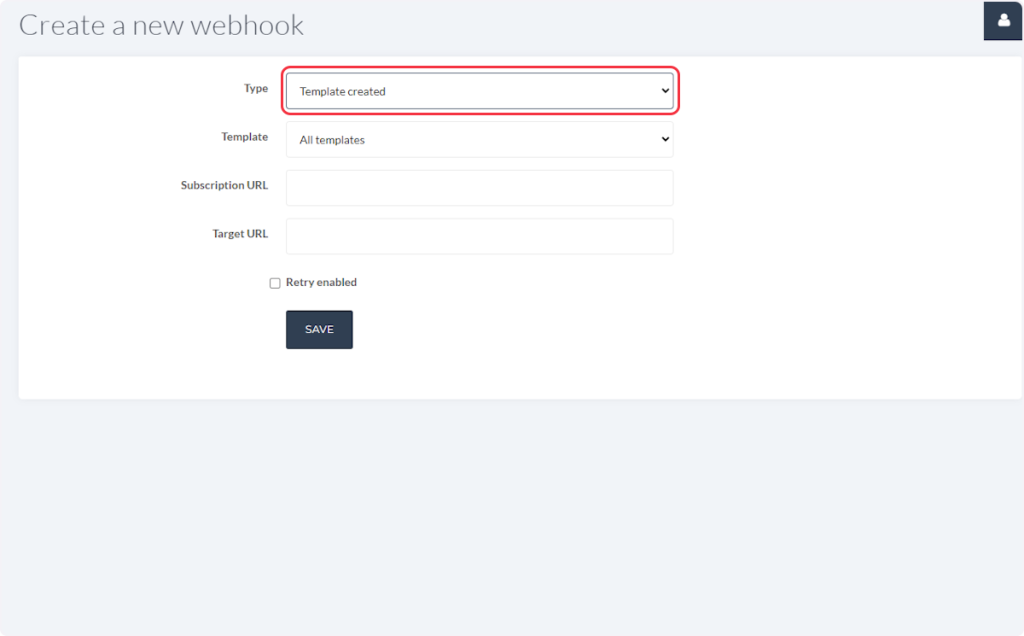
- Now, inside the Type dropdown, select the type according to your trigger. For example, if you’re setting up a webhook for the “Template Created” trigger, then you need to select “Template created” from this dropdown.
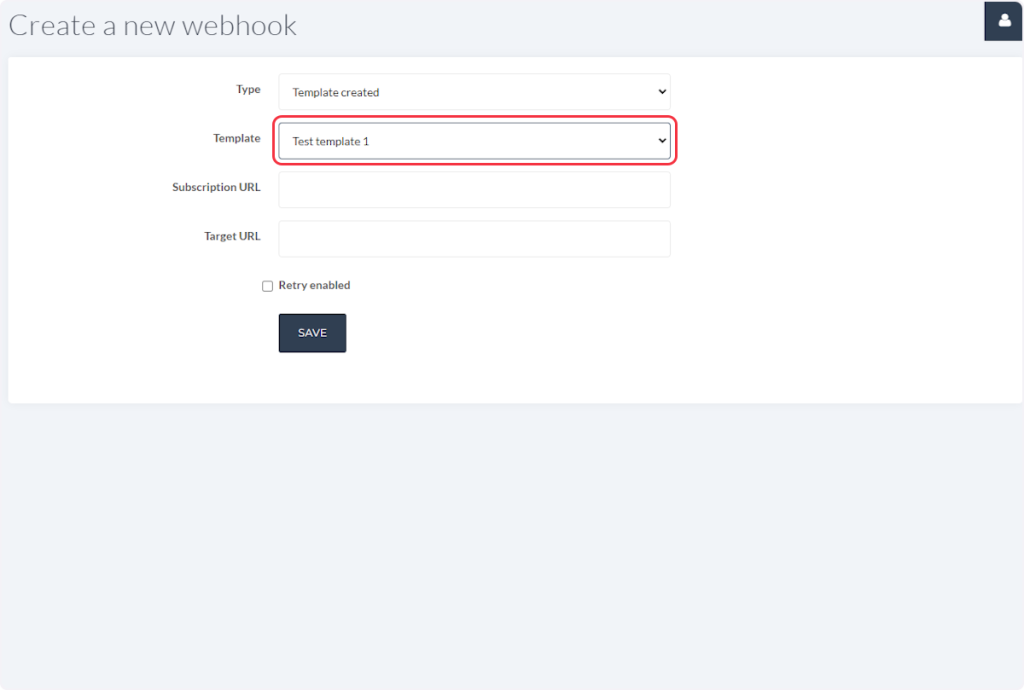
- Select any template that you want from the Template dropdown menu.
- Now, copy the webhook URL from the trigger flyout and paste it into the ‘Target URL’ field.
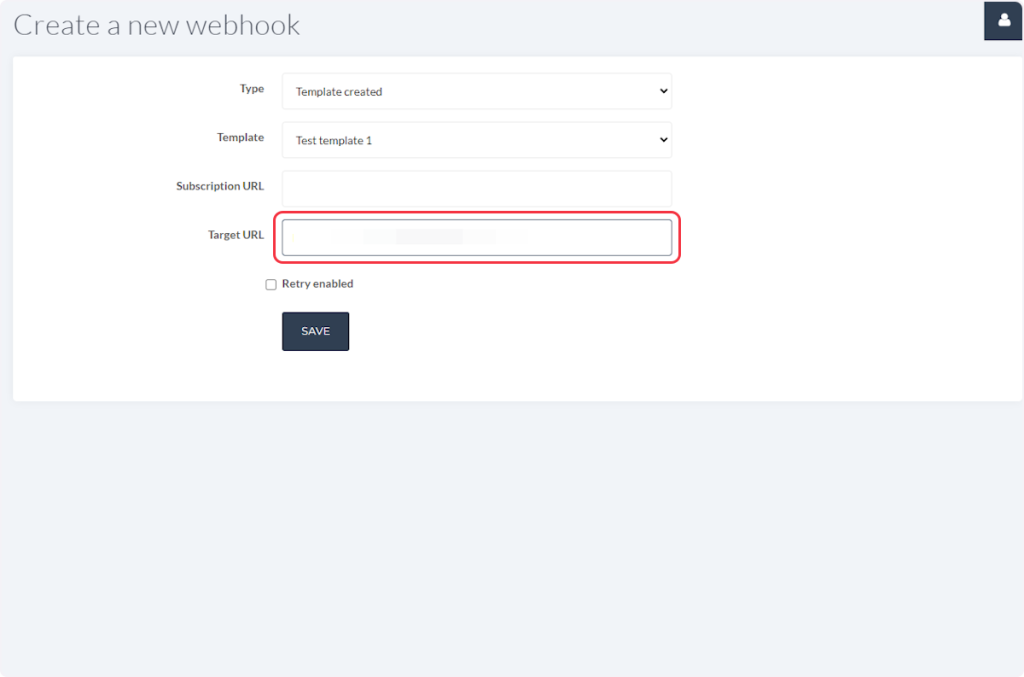
- You can also check the “Retry enabled” checkbox if desired.

- Click on ‘Save’.

That’s it! You have successfully added a webhook to your Passcreator account.
Connect Passcreator with Other Apps
If you want to connect Passcreator with other apps that you use to automate processes, you must check out SureTriggers!
Passcreator Integration can help you automate processes like:
- Add customers to HubSpot when Passcreator passes are scanned.
- Create and update Mailchimp subscribers from new Passcreator passes.
These are just some random examples of automation. SureTriggers can do a lot more!
To learn more, join our Facebook community.
Recommended Articles
How to sign up for SureTriggers?
Common terms that you’ll come across in SureTriggers